8 condensate drain assembly, Maintenance – AERCO KC1000 Low NOx Boiler equipped with C-More version 3.04 User Manual
Page 59
MAINTENANCE
7-5
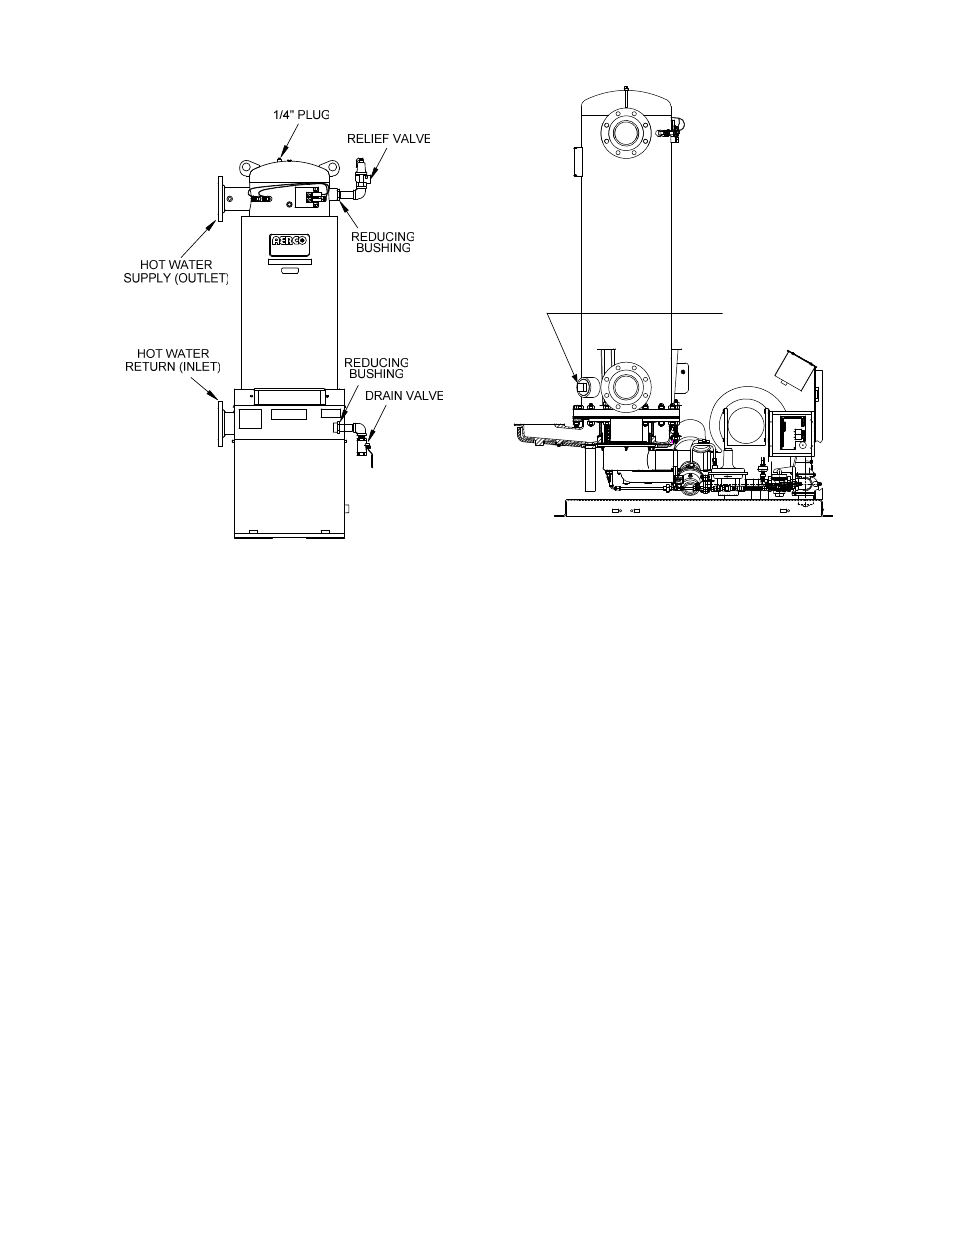
2-1 /2 INCH
PLUG
Figure 7.10
Heat Exchanger 2 ½ Inch Inspection Plug
Location
Figure 7.9
Heat Exchanger Supply and Return
Locations
7.8 Condensate Drain Assembly
KC Boilers contain a condensate drain cup
(Figure 2.6) which should be inspected and
cleaned annually to ensure proper operation.
4. Remove the 2 ½ inch plug located in the
shell at the rear of the unit (Figure 7.10).
To inspect and clean the assembly, proceed as
follows:
5. Remove the relief valve, drain valve (Figure
7.9) and any reducing bushings.
1. Remove the left side panel and left rear
cover to provide access to the condensate
drain components (see Figure 2.6).
6. Perform the inspection. Reassemble the unit
once the inspection is completed.
2. Disconnect the plastic tubing from the
condensate cup drain tube to the drain.
7. Open the supply and return valves and
reconnect AC power to the unit.
3. Remove the condensate cup from the unit.
Thoroughly clean the cup and inspect the
cup drain tube for blockage.
4. After the above items have been cleaned
and inspected, reassemble the drain
components by reversing the previous steps.