Control arm assembly, Disassembly, Inspection – Cub Cadet G730 User Manual
Page 18: Assembly
16 G730
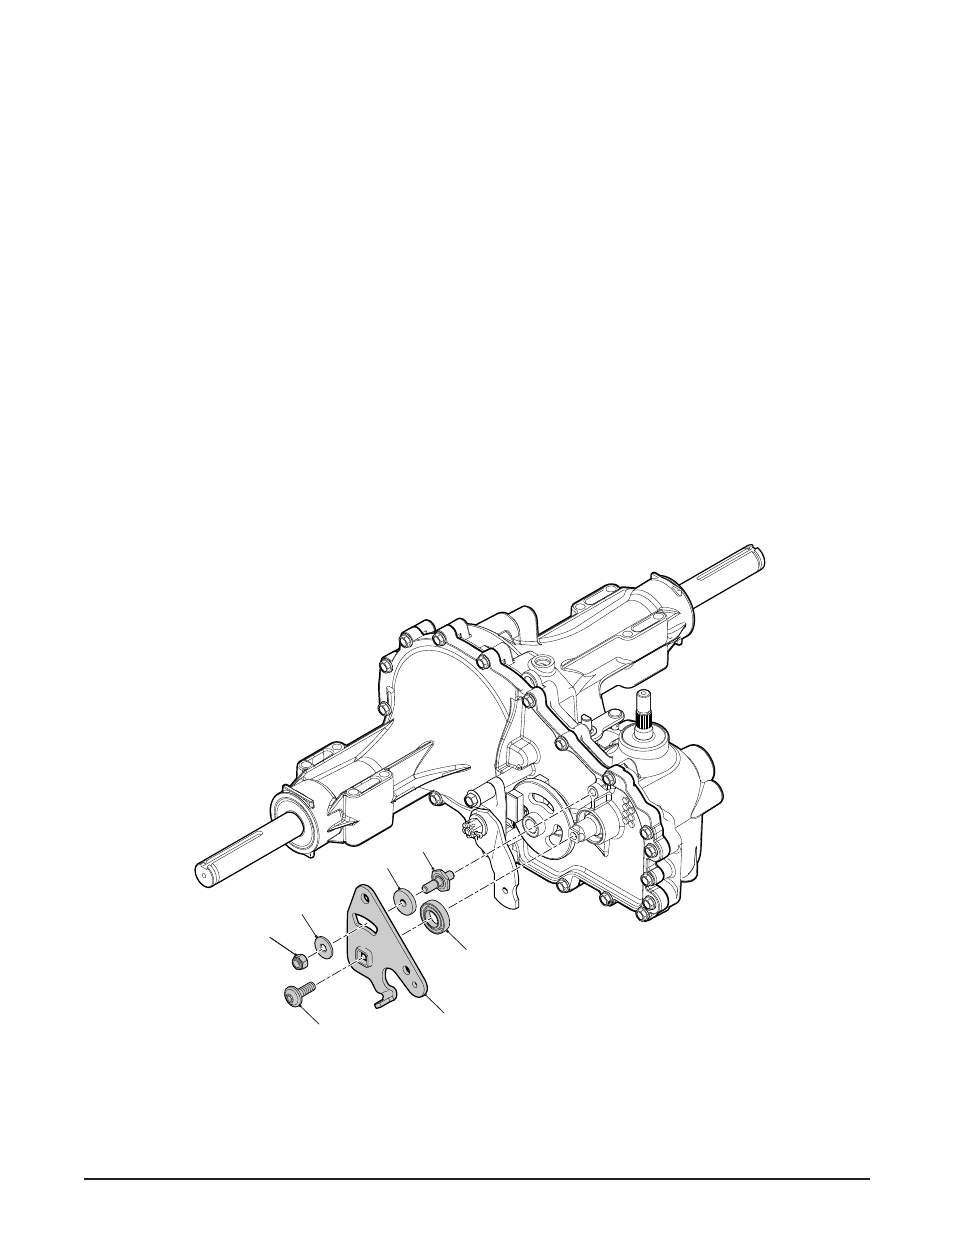
CONTROL ARM ASSEMBLY
Refer to Figure 8
Disassembly
1. Remove the lock nut (47), the washer (45)
and the Torx head screw (46).
2. Remove the control arm (44), the washers
(48) and the stud (42).
NOTE: Only remove the seal (41) if damaged
or worn. The seal cannot be serviced
separately. Refer to “Seal Kit” in the
Items List on page 37.
Inspection
1. Inspect all parts for excessive wear or dam-
age. Replace if necessary.
Assembly
1. Reassemble all parts in the reverse order
of disassembly.
2. When tightening the fasteners, refer to the
table on page 20 for the required torque
values.
NOTE: As a general rule, use the low end of
the torque spec on fasteners when
reassembling the unit.
Figure 8, Control Arm Assembly
41
42
48
45
47
44
46
See also other documents in the category Cub Cadet Special machinery:
- G1332 (20 pages)
- i1046 (32 pages)
- i1046 (36 pages)
- 54M (28 pages)
- 980 (20 pages)
- 949 (20 pages)
- Time Save (28 pages)
- 990 (24 pages)
- 997 (36 pages)
- V469 (20 pages)
- 6 Fabricated Deck (36 pages)
- M48-M60-KW (28 pages)
- 4 Fabricated Deck (36 pages)
- 4 Fabricated Deck (32 pages)
- 6 Fabricated Deck (28 pages)
- 4 Fabricated Deck (32 pages)
- 4 Fabricated Deck (32 pages)
- 6 Fabricated Deck (32 pages)
- 4 Fabricated Deck (32 pages)
- CC 500 BAT (30 pages)
- CC 22 (20 pages)
- CC 949 (13 pages)
- 33" Wide Area (29 pages)
- Z-Wing (88 pages)
- TANK S Series: Electrical System (9 pages)
- TANK S Series: Hydraulic Drive & Steering System (12 pages)
- TANK S Series: Steering System Adjustments (11 pages)
- 640 (24 pages)
- 640 (20 pages)
- 641 (24 pages)
- 641 (20 pages)
- J466 (32 pages)
- Series C460 (28 pages)
- 435A (24 pages)
- 642 (24 pages)
- 414 (24 pages)
- M465 (28 pages)
- Fun Runner (117 pages)
- 4 x 2 Big Country - Steel Bed (38 pages)
- 4 x 2 Big Country - Poly Bed & Steel Bed (82 pages)
- 4 x 4 Volunteer (328 pages)
- 6 x 4 Big Country (121 pages)
- CC 4BP 32cc (29 pages)
- 2518-48 (60 pages)
- 1525 (39 pages)