Cub Cadet RT 75 User Manual
Page 23
Engine
19
15.
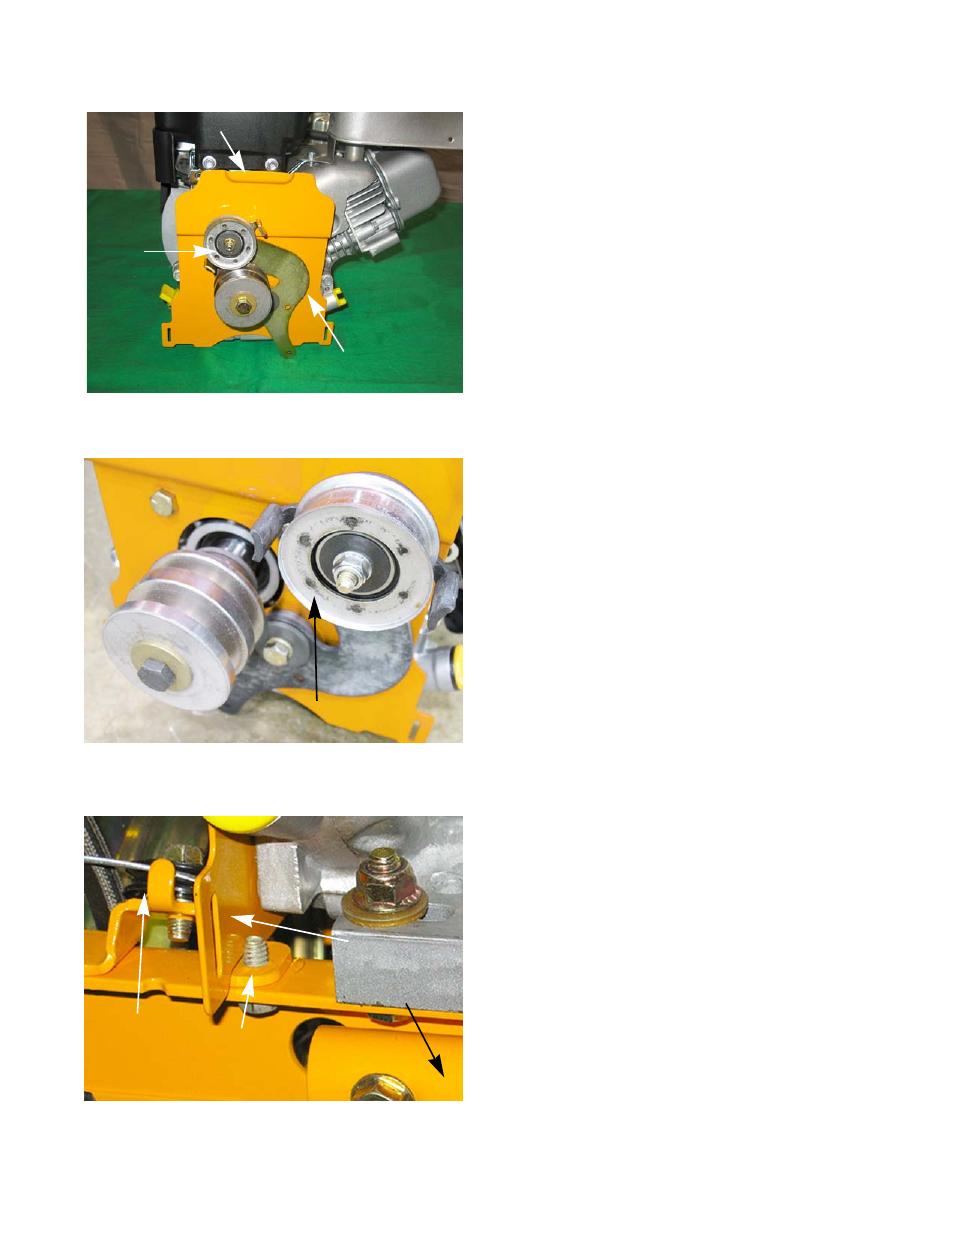
Transfer the engine pulley, reverse idler bracket and
the motor cover plate to the new engine. See Figure
4.6.
NOTE: If the idler pulley was removed from the idler
bracket, it must be reassembled so that the spot
welds face away from the idler bracket to ensure
proper belt alignment. See Figure 4.7.
Engine Installation
16.
Set the engine, with the motor cover plate installed,
on the tiller.
NOTE: The motor cover plate must sit between the cable
pulley bracket and the screw securing the cable
pulley bracket. See Figure 4.8.
17.
Tip the engine to the rear of the tiller and slide the
bumper between the engine and the frame.
18.
Install the four engine mounting screws, using a 1/2”
wrench.
19.
Follow steps 1 through 13 in the previous section in
reverse order.
20.
Test run the tiller in a safe area before the tiller is
returned to service.
NOTE: The engine RPM should be set to 3500 RPMs for
proper operation.
Figure 4.6
motor cover plate
reverse idler bracket
engine
pulley
Figure 4.7
Spot welds must face away from
the idler bracket
Figure 4.8
cable pulley
screw
bumper
cover
plate