Traction drive belt removal/ replacement, Traction drive belt removal/replacement – Cub Cadet 600 series User Manual
Page 7
500 and 600 SERIES 2-STAGE SNOW THROWER
3
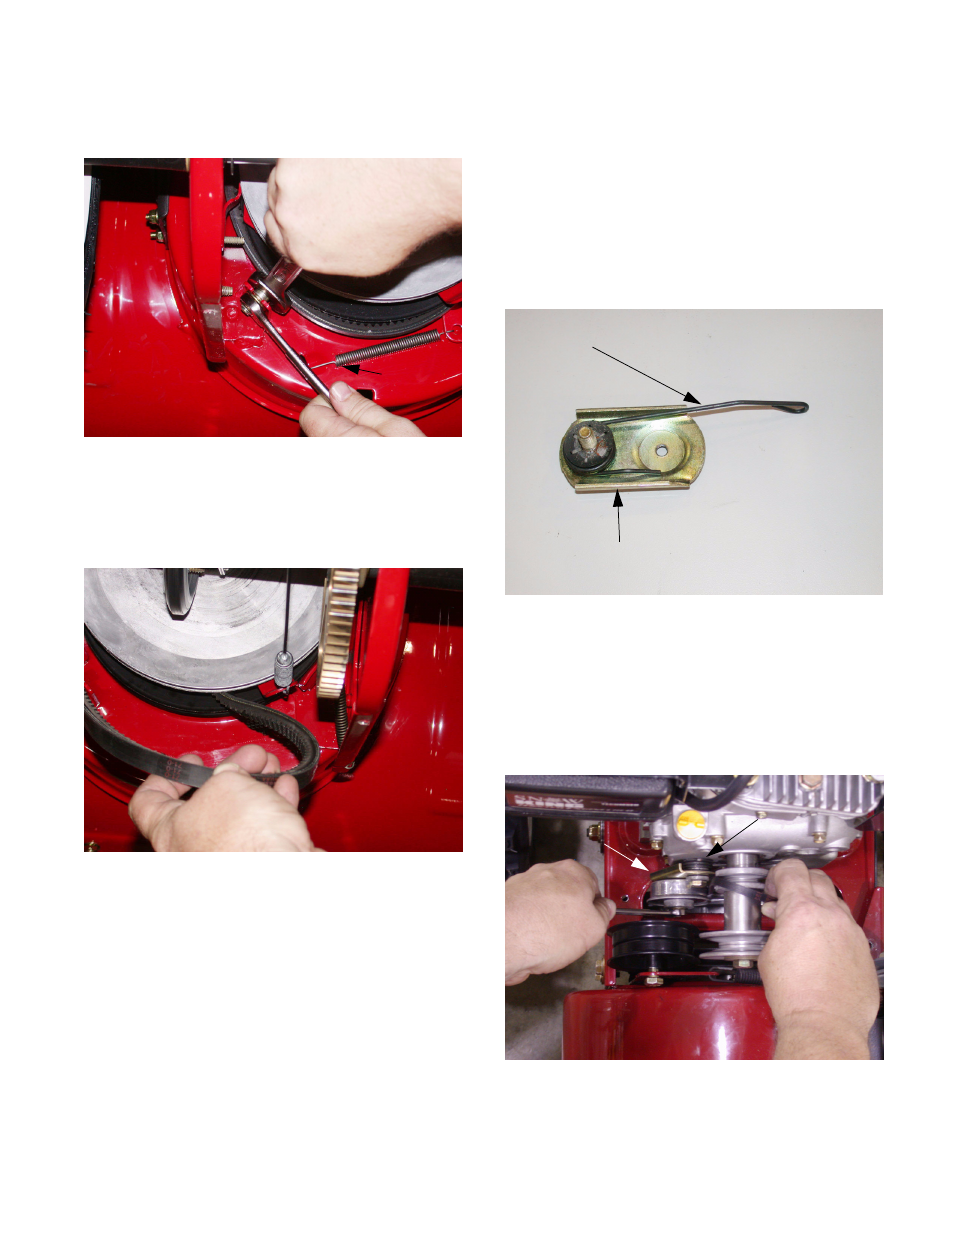
3.9.
Loosen the belt guide (shoulder bolt) with a 3/4”
wrench and a 9/16” wrench. See Figure 3.9.
3.10. Unhook the return spring on the idler bracket
3.11. Pull the belt down past the Auger pulley.
3.12. EXamine the removed belt: If it failed because of
something other than normal wear, identify and
correct the cause before returning the snow
thrower to service
3.13. Install the new belt by reversing the removal pro-
ceedure.
3.14. Run/test/adjust the auger drive system before
returning the snow thrower to service.
Figure 3.9
RETURN
SPRING
Figure 3.11
4.
TRACTION DRIVE BELT REMOVAL/
REPLACEMENT
4.1.
Remove auger belt as described on the auger
drive belt removal section of the manual.
NOTE: A coil spring on previous models used to
provide tension to the traction drive belt. For the
2005/2 manufacturing season the coil spring
was replaced with a torsion spring. See Figure
4.1.
4.2.
The torsion spring is mounted below the crank
shaft and can be removed with a 1/2” socket.
4.3.
Relieve the tension from the drive belt by using a
3/8” wrench to apply slight upward pressure on
the torsion spring to free the belt from the engine
pulley.
Figure 4.1
Drive Clutch Idler Bracket
Torsion Spring
Figure 4.3
Drive clutch
Idler Bracket
Torsion
Spring