Cub Cadet 600 series User Manual
Page 12
500 and 600 SERIES 2-STAGE SNOW THROWER
8
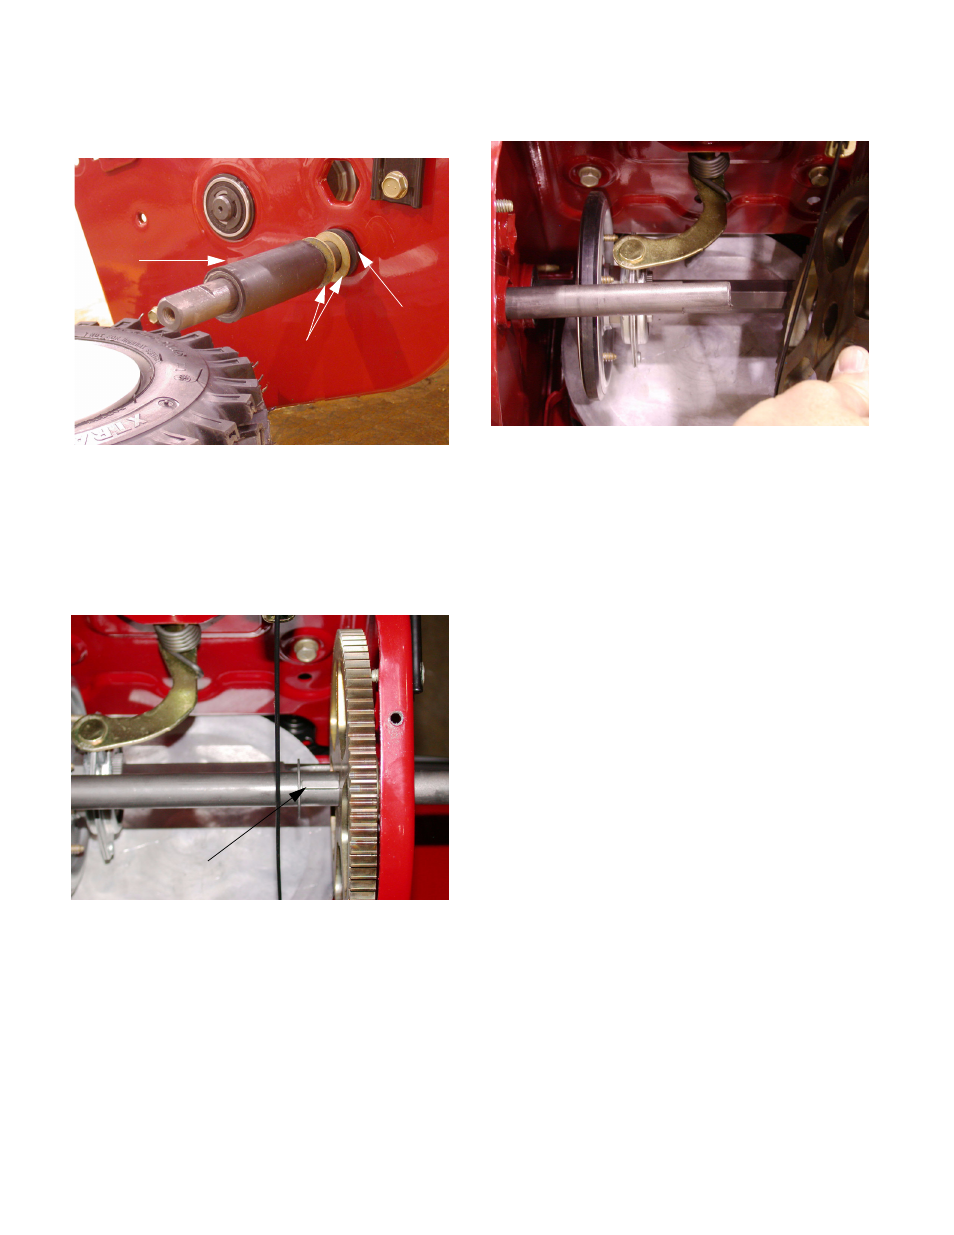
8.6.
Slide the spacers and washers off of the axle.
See Figure 8.6.
NOTE: There are 2 shim spacers on the left side
and only 1 on the right side.
8.7.
Slide both hex bushings off the axle.
8.8.
Slide the shaft to the left while holding the gear
from moving.
NOTE: There is a woodruff key on the shaft and
can easily be lost if not careful.
8.9.
The axle is supported by a pair of hex flange
bushings: one on each side of the frame. Care-
fully pry each one out of the frame and slide it off
the end of the axle the shaft out of the housing.
NOTE: Anytime it is necessary to remove bush-
ings carefully inspect for normal wear and
replace if wear is excessive.
8.10. Slide the axle out completely.
8.11. Examine the removed parts: If any of the parts
failed because of something other than normal
wear, identify and correct the cause before
returning the snow thrower back to service.
8.12. In stall new/old parts by reversing the removal
procedure.
8.13. Run/ test the snow thrower before returning the
snow thrower back to service.
Figure 8.6
Spacer
Washers
Bushing
Hex
Figure 8.8
Woodruff Key
Figure 8.10