Introduction, Cable adjustments, Introduction cable adjustments – Cub Cadet 600 series User Manual
Page 5
500 and 600 SERIES 2-STAGE SNOW THROWER
1
1.
INTRODUCTION
1.1.
The 2005-2 manufacturing season has brought
a few subtle changes to the medium frame snow
throwers.
1.2.
Disclaimer: This service manual was intended
for use by trained technicians. The information
contained in the manual is current and accurate
at the time of writing, but is subject to change
without notice.
1.3.
The medium frame 2- stage snow throwers are
designed with the residential user with a large
amount of area to clear or just simply want to get
the job done sooner. The additional weight and
traction of a 2-stage snow thrower makes it more
suitable to heavy snow fall areas.
See Figure 1.3.
1.4.
The 500 and 600 series two-stage snow thrower
model lines are very similar to one another and
are both covered in his manual. Within the prod-
uct lines there are several variations that are
covered in this manual as well. The technician is
responsible for identifying the features on any
individual machine they are working on, and
referring to the appropriate sections of this man-
ual. Those features (variations) include:
•
Power Steering or locked drive
•
Direct or cable operated gear selector
•
Optional lighting
•
Optional 120V. electric start
Figure 1.3
31AE5HTG799
Model#
•
Various dash panel and engine shroud styles
2.
CABLE ADJUSTMENTS
2.1.
Stop the engine and allow it to cool, disconnect
the spark plug wire and ground it to the engine.
2.2.
Confirm that the fuel level is low enough to pre-
vent spillage through the gas cap vent, or seal
the vent with a plastic bag between the fuel cap
and the filler neck.Carefully tip the snow thrower
forward so it rests on the auger housing.
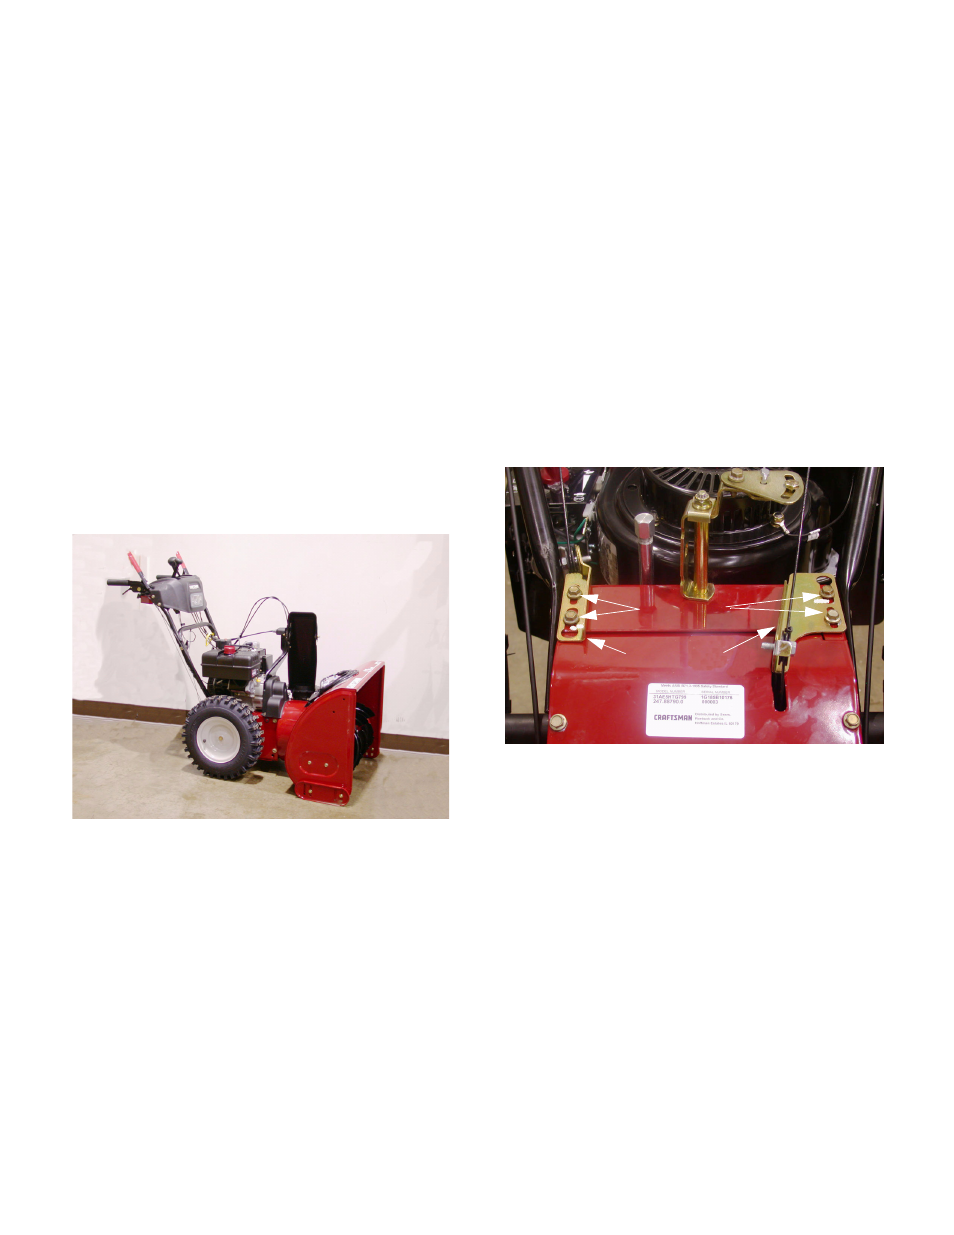
2.3.
Loosen the hex screws that secure the bracket
that guides the cable needing adjustment(3/8”
wrench). See Figure 2.3.
2.4.
Slide the bracket upward to add slack to the
cable or downward to add tension to the cable.
NOTE: The cables should be straight without
any tension to the drive or auger when the han-
dle is not engaged.
NOTE: If either bracket reaches the end of its
travel without achieving correct adjustment, use
a straight-edge to confirm that the handle bars
were not bent in transport or storage.
2.5.
The cables are adjusted correctly when light
pressure (1lb {.46kg}) results in 1/2” (12.7mm) of
defection on the cable-and- there is no “creep”
on the drive system.
Figure 2.3
Hex Screws
Adjustment
Brackets
500 and 600 SERIES 2-STAGE SNOW THROWER