Removal of the joystick chute control – Cub Cadet 600 series User Manual
Page 20
500 and 600 SERIES 2-STAGE SNOW THROWER
16
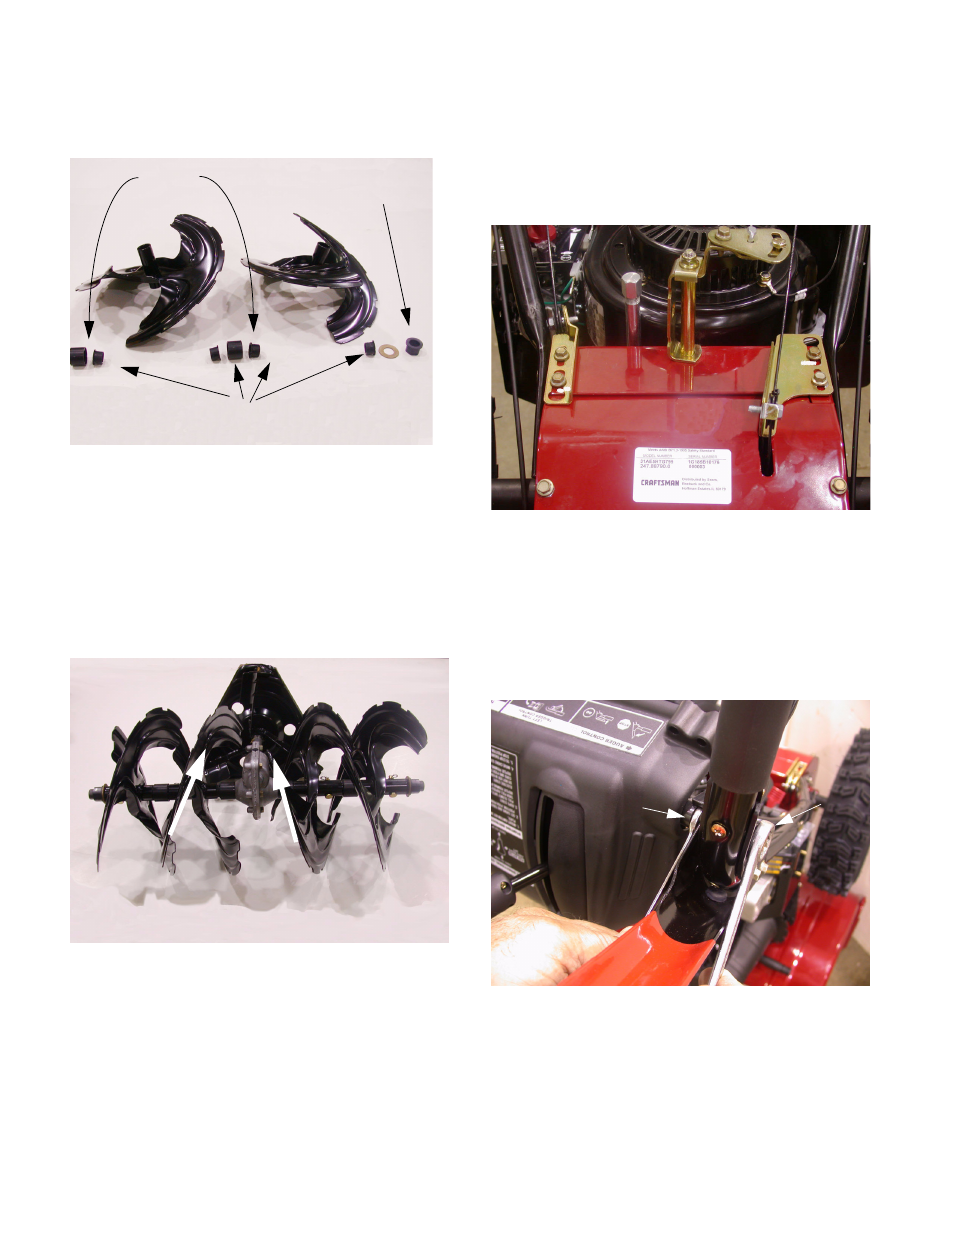
14.9. Inspect the spacers, and bushings and check for
possible damage to augers. See Figure 14.9.
14.10.Examine the removed auger assembly: If it failed
because of something other than normal wear,
Identify and correct the cause before returning
the snow thrower to service.
14.11. Install the auger assembly by reversing the
removal procedure.
14.12.Run/test the auger before returning to service.
NOTE: When the augers are installed correctly
the foremost blades will have a inward slant to
form an “A” frame
15.
REMOVAL OF THE JOYSTICK CHUTE CON-
TROL
15.1. Loosen, but do not remove the (2) screws hold-
ing the auger cable with a 3/8” socket. See Fig-
ure 15.1.
NOTE: Make a mark on the adjustment bracket
to the machine for reassembly.
15.2. Remove the Z-fitting from the Auger handle with
a pair of needle nose pliers.
15.3. Remove the shoulder bolt with a 3/4” wrench
and 1/2” wrench. See Figure 15.3.
Figure 14.9
Flange bushings
Spacers
Hex Bushing
Figure 14.12
Figure 15.1
Figure 15.3
”
3/4””
Wrench
1/2”
Wrench