Series 5000 – Cub Cadet 5000 Series User Manual
Page 9
Series 5000
5
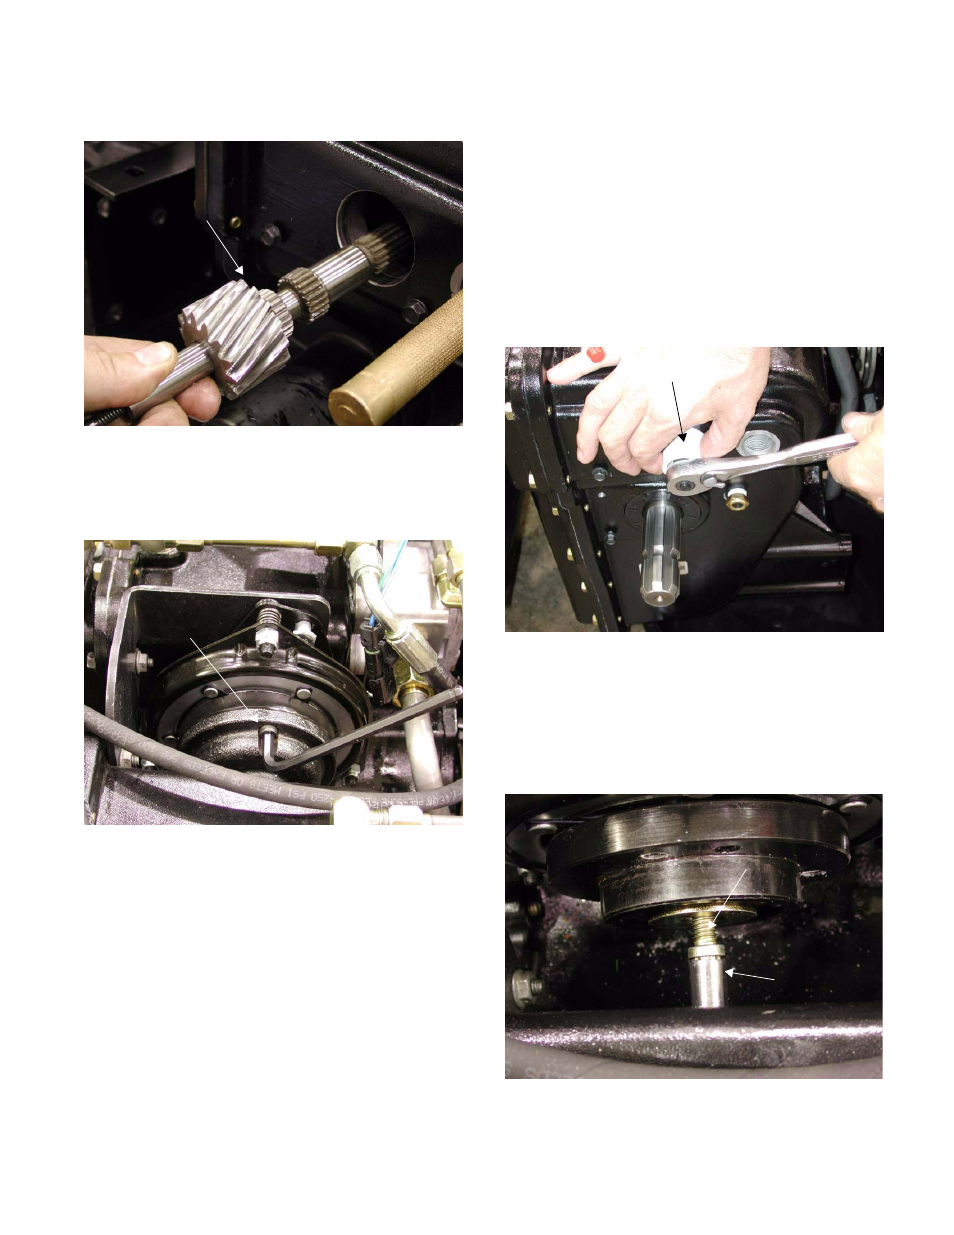
2.24. Remove the rear PTO shaft and 540 drive gear.
2.25. Remove the three socket head cap screws.
securing the cast iron cover to the rear of the
PTO clutch using a 1/4 allen wrench.
Figure 2.24
540 PTO Gear
Figure 2.25
Socket Head
Cap Screw
2.26. Place a pry bar in the rear universal joint on the
drive shaft to keep the shaft from rotating.
WARNING: The next step involves removing the
bolt securing the clutch to the PTO input shaft.
When performing the step do NOT pull the bolt
back far enough for it to fall inside the rear trans-
mission housing.
WARNING: When performing the next step use
a 5” piece of 1” pvc pipe to insure that the front
bearing in the rear section of the transmission
housing does not fall into the transmission.
2.27. Remove the 12 point bolt securing the clutch to
the PTO input shaft using a 3/8” 12 point socket.
NOTE: Upon assembly torque this bolt to 540 -
600 inch pounds (45 - 50 foot pounds). Use lock-
tite 242 when installing the bolt.
Figure 2.26
PVC Pipe
Figure 2.27
Bolt
Socket