Series 5000 – Cub Cadet 5000 Series User Manual
Page 7
Series 5000
3
2.2.
Remove three point hitch.
2.3.
Remove the two screws securing PTO 540 PTO
backshaft shield to the transmission using a 3/8
wrench.
2.4.
Remove the fifteen screws securing the three
point hitch mounting bracket to the frame using a
9/16 socket and 9/16 wrench.
2.5.
Remove the four screws securing the three point
hitch mounting bracket to the transmission hous-
ing using a 3/4 wrench.
2.6.
Cut the zip tie securing the hydraulic breather
tube to the ROPS at the rear of the gas tank.
2.7.
Cut the zip tie securing the fuel line to the wiring
harness at the front of the gas tank.
2.8.
Remove the two screws securing the front seat
mounting bracket to the gas tank using a 9/16
socket.
2.9.
Remove the two screws securing the gas tank to
the ROPS using a 9/16 socket.
2.10. Remove the two screws securing the gas tank to
the front seat bracket unit
2.11. Remove the eight screws securing the lower
section of the ROPS to the frame using a 9/16
socket and a 9/16 wrench.
2.12. Remove the ROPS.
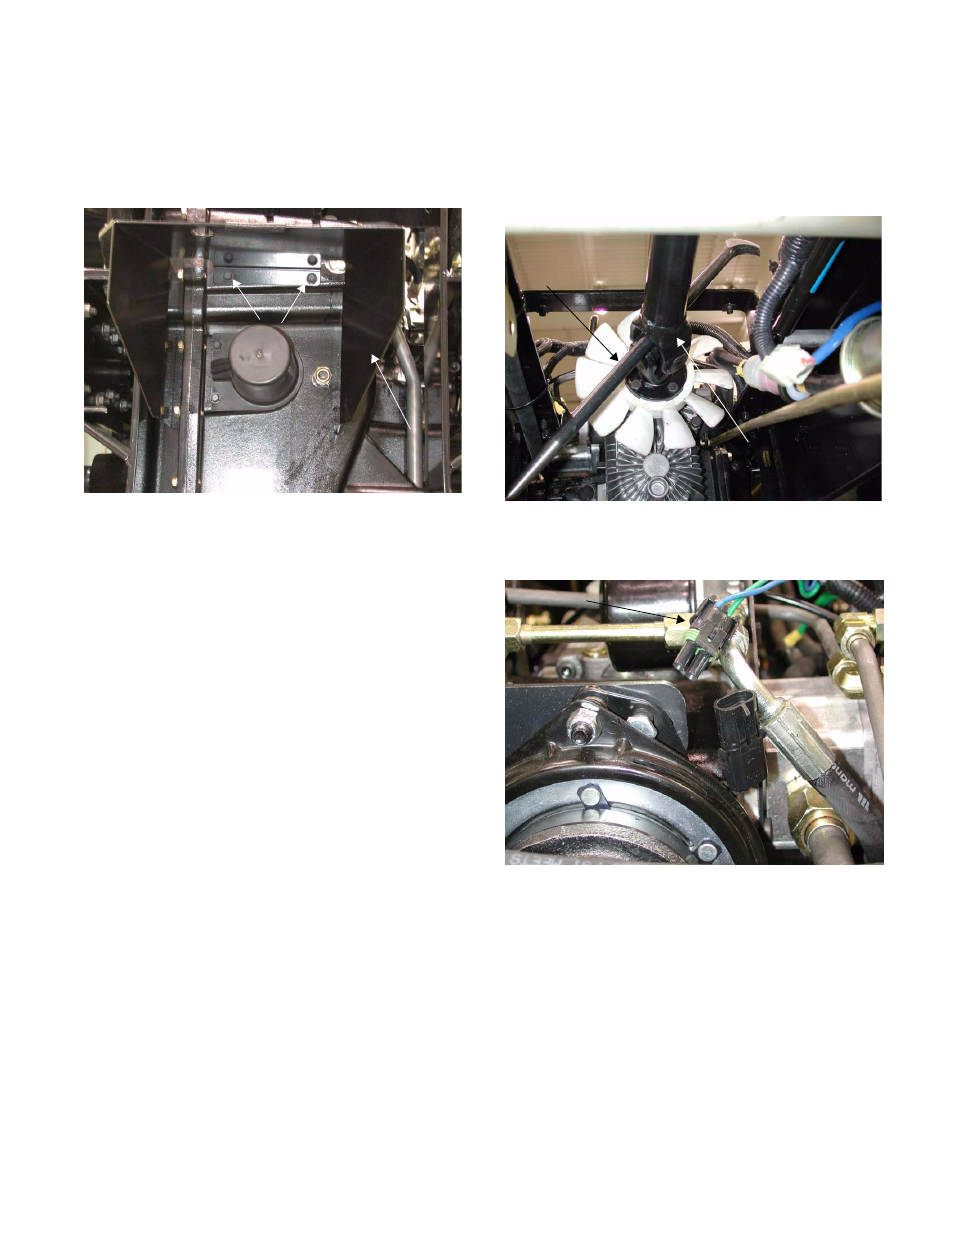
Figure 2.3
540 PTO
Shield
Backshaft
Screws
2.13. Secure the PTO clutch. This can be done either
by placing a universal joint and pipe onto the
PTO backshaft or by engaging the clutch (recon-
nect the battery) and placing a stop in the drive
shaft universal joint.
2.14. Disconnect the clutch.
2.15. Loosen the top socket head cap screw on the
PTO clutch.
2.16. Rotate the clutch by turning the universal joint on
the PTO backshaft. This allows access to
another hex cap screw on the PTO clutch.
Loosen, but do not remove, the second hex
head cap screw.
2.17. Repeat step 24 for the third socket head cap
screw.
2.18. Remove the PTO shaft plug seal from the rear of
the transmission housing.
Drive Shaft
Universal
Joint
Pry
Bar
Clutch
Connector
Figure 2.14