COP-USA CD66MK-HW User Manual
Page 23
- 20 -
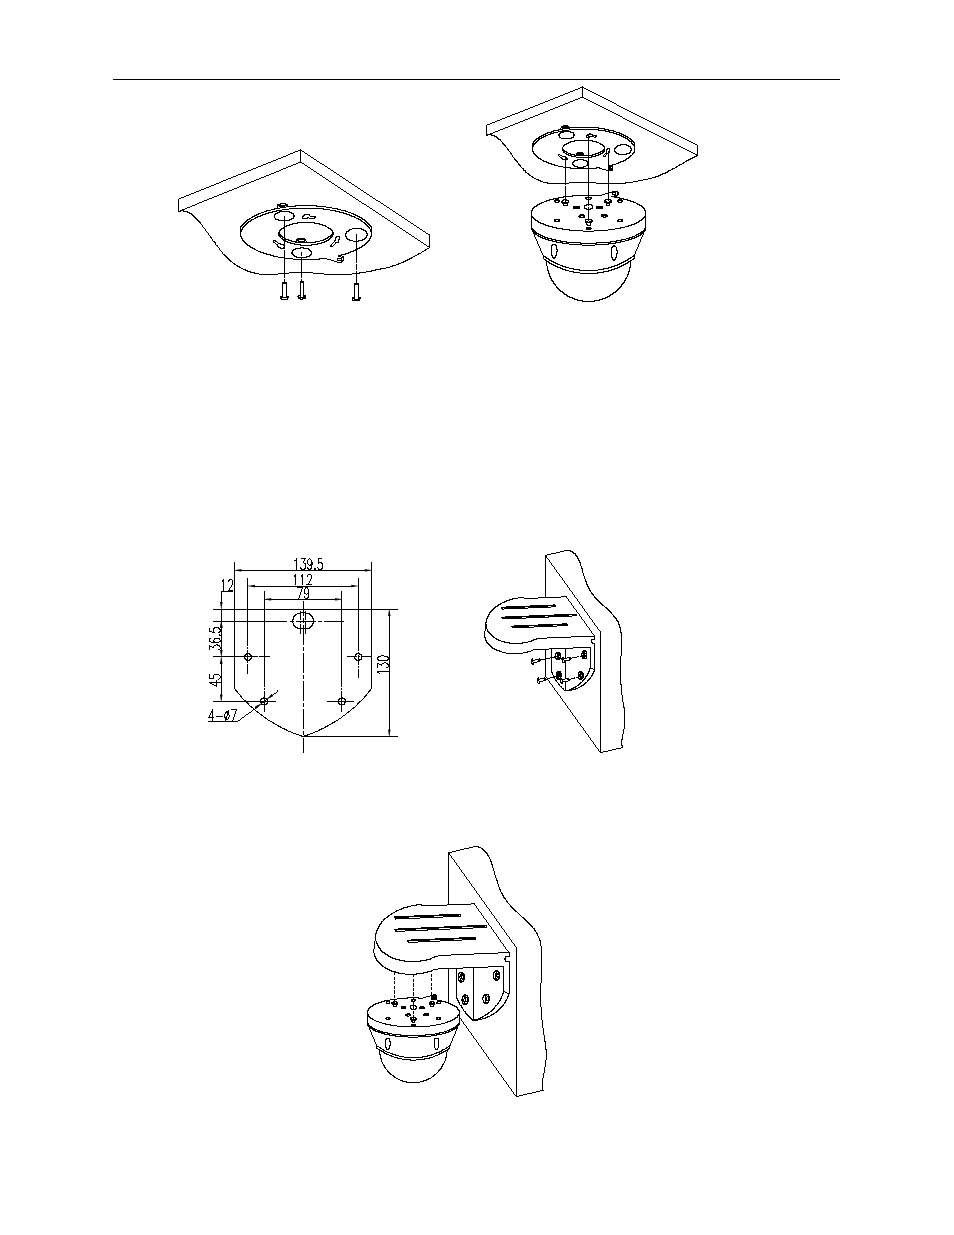
Figure 8 Figure 9
e)
Finally fix the camera bottom board and camera connecting board with M3 Screws.
2
)
Steps of wall installation.
a)
Open the packing cartons, take out of the dome and accessories carefully.
b)
Drill holes according to the position of the bracket bottom pedestal, and then fix the
bracket on the wall with 4 pieces of M6 screws.
(Figure 10).
c)
Fixing the bracket on the wall with 4 pieces of M6 Screws.
(Figure 11).
Figure 10 Figure 11
d)
Taking out of the dome, and put three pieces of screws into the fixing hole, rotate it in
a clockwise direction until it’s tighten.
(Figure 12).
Figure 12