2 cm – BUCHI ELS Detector C-650 User Manual
Page 48
C-650
Operation Manual, Version B
8 Troubleshooting
48
•
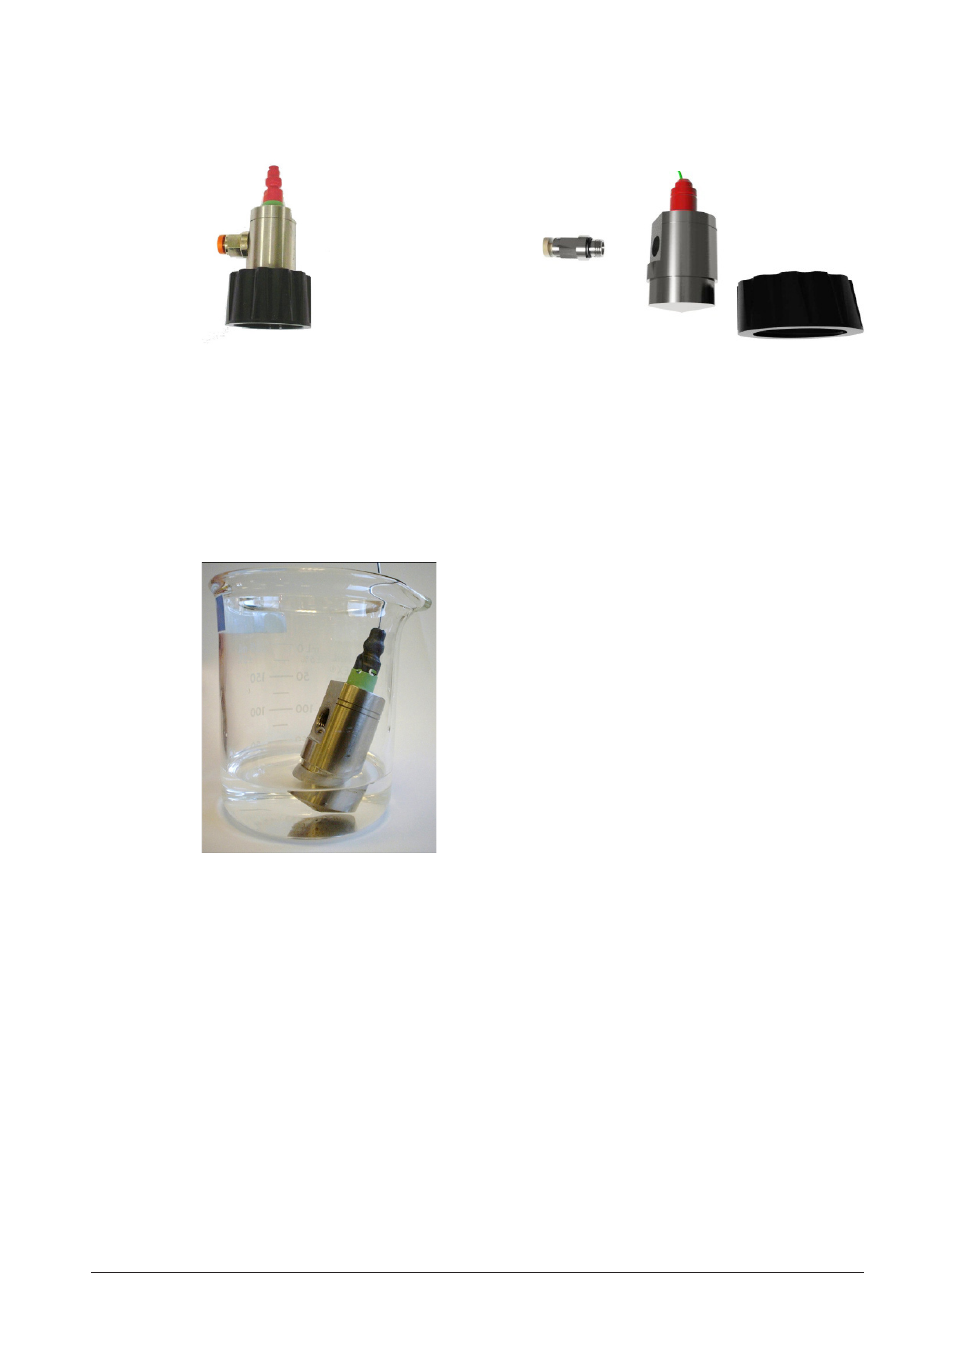
Remove the gas inlet quick fitting and the black plastic nut to avoid damaging the seals with
the cleaning solvent.
Fig 8.28: Removing parts from the nebulizer
To clean the nebulizer:
•
Fill an ultrasonic bath with water. Fill a beaker (50 or 100 mL) with approximately 2 cm of an
appropriate solvent. The solvent is dependent on the nature of the material that is present in
the nebulizer. In most cases, ethanol is a satisfactory solvent.
•
Place the nebulizer vertically in the beaker 2 cm solvent bath. The nebulizer outlet should be
placed at the bottom of the bath and the nebulizer inlet liquid tubing should be pointing up.
Take care to ensure that the rear part of the nebulizer is not in contact with the solvent.
2 cm
Fig 8.29: Cleaning the nebulizer
•
Clean the nebulizer for approximately 30 minutes with the solvent, and then replace the
solvent with water and clean for an additional 30 minutes.
To re-install the nebulizer or replace it by a new one or another nebulizer model
•
For re-installing the nebulizer after a nebulizer cleaning, re-install the gas inlet quick fitting
and the black plastic nut with its seal.
•
Reverse the order of previous steps (nebulizer removing). In case the black gas tubing has
been removed, make sure you are using the correct orientation, where the white one-way
valve is at the lower end (near the gas arrival).
•
Make sure there is no liquid or gas leak at all connections and check for possible leakage
that could affect the detector performance or create laboratory pollution when you turn on
the pump.
•
Install the black front panel cover, first fix its right side, and then push its left side.
•
Test the nebulizer to ensure that it is working properly.