6 installing the flow splitter, 1 connecting the flow splitter, 2 adjusting the flow rate of the elsd splitter – BUCHI ELS Detector C-650 User Manual
Page 25: Connecting the flow splitter
C-650
Operation Manual, Version B
5 Putting into operation
25
5.6
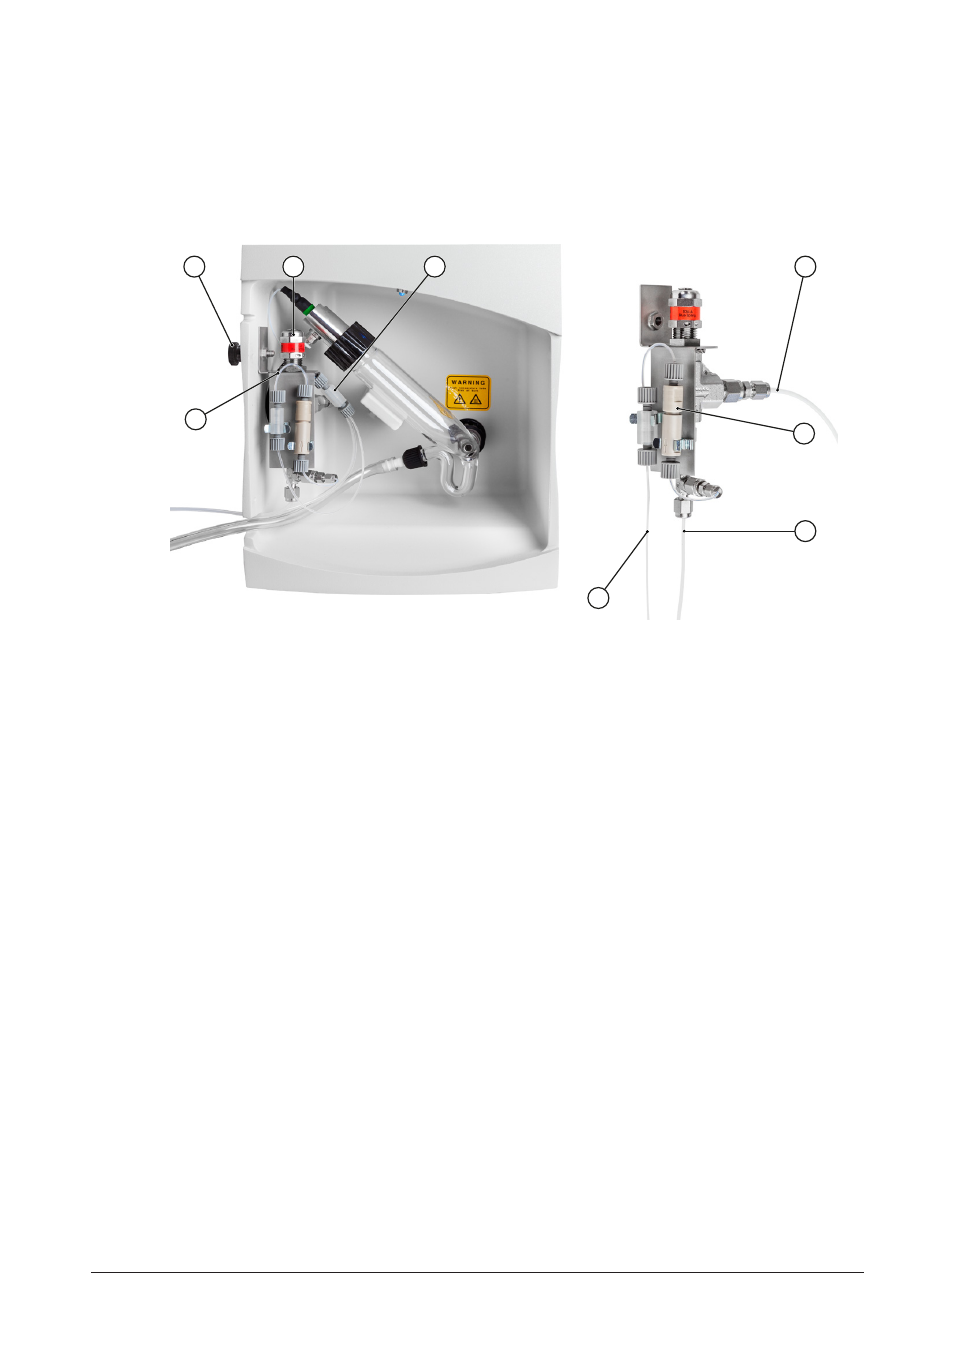
Installing the flow splitter
5.6.1
Connecting the flow splitter
The flow splitter comes as complete kit (article number 11059007) and has to be mounted inside
the detector as shown below:
1
3
6
7
4
8
2
5
Fig 5.12: Detection chamber/Flow splitter
a Fastening screw
e Inline filter
b Flow adjustment knob
f Flow from column outlet
c Union fitting to connect the splitter to
the nebulizer
g Flow to ELSD nebulizer
h Restriction capillary ID 0.10 mm
d Flow to fraction collector
1. Fasten the splitter with the fastening screw a to the left side of the ELSD.
2. Connect the following tubings to the splitter kit:
• Outlet f from the column
• Connection tubing d to the fraction collector
NOTE
Do not connect the splitter to the ELSD nebulizer before having adjusted the flow rate to
1 mL/min.
Recommendation:
For preparative chromatography applications connect the column to the splitter after the condi-
tioning step.
5.6.2
Adjusting the flow rate of the ELSD splitter
1. Remove the protecting sticker from the flow adjustment knob and keep the predefined
adjustment.
2. Start the pumping system with the appropriate eluent for your application.
3. Check the flow rate. If the flow rate is not adjusted at 1 mL/min, adjust the flow rate with
the flow adjustment knob until the delivered flow rate represents about 1 drop/second,
which is about 1 mL/min (±10 %). Measure the flow rate using a graduated cylinder