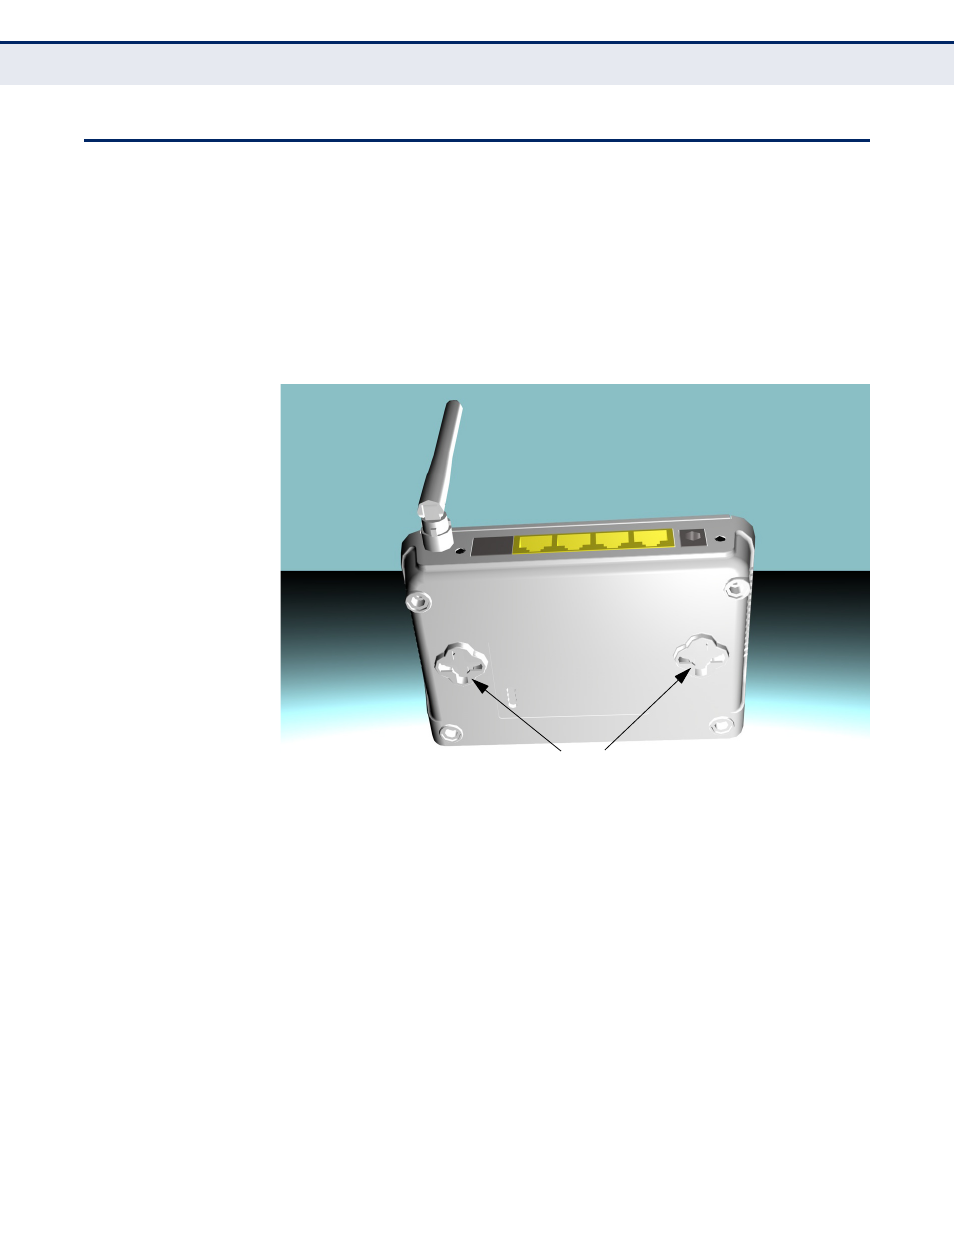
Mounting the device, Mounting on a wall, Figure 9: wall mounting – ALFA NETWORK AIP-W505 User Manual
Page 28
C
HAPTER
3
| Installing the 11n Router
Mounting the Device
– 28 –
M
OUNTING
THE
D
EVICE
The 11n Router can be mounted on any horizontal surface, or on a wall.
The following sections describe the mounting options.
M
OUNTING
ON
A
W
ALL
The 11n Router should be mounted only to a wall or wood surface that is at
least 1/2-inch plywood or its equivalent. To mount the unit on a wall,
always use its wall-mounting slots. The unit must be mounted with the RJ-
45 cable connector oriented upwards to ensure proper operation.
Figure 9: Wall Mounting
To mount on a wall, follow the instructions below.
1.
Mark the position of the two screw holes on the wall. For concrete or
brick walls, you will need to drill holes and insert wall plugs for the
screws.
2.
Insert two 20-mm M4 tap screws (not included) into the holes, leaving
about 2~3 mm (0.08~0.12 inches) clearance from the wall.
3.
Line up the two mounting points on the unit with the screws in the wall,
then slide the unit down onto the screws until it is in a secured position.
Mounting Slots