1) alc with factory setup mode (preset on), 2) alc with field setup mode (preset off), Light control setting (alc/manual) – Panasonic WV-BS504 User Manual
Page 22
Attention! The text in this document has been recognized automatically. To view the original document, you can use the "Original mode".
• Display SET UP on the monitor screen.
If necessary, refer to Setup Menu Display on page 10 for details on
displaying the SET UP on the monitor screen.
• Move the cursor to ALC/MANUAL and select ALC or MANUAL by
using the joystick. When you select ALC, set back light compen
sation.
Note:
The back light compensation submenu associated \A/ith this menu
is described separately and should be set up after installing the
camera at the site and observing the actual site picture.
(1) ALC with Factory Setup Mode (PRESET ON)
• Select ALC and press the CAM (SET) key to display the back light
compensation menu,
• Move the cursor to PRESET and select ON by using the joystick. The
back light compensation is automatically set.
• Move the cursor to RET by using the joystick and press the CAM
(SET) key to return to SET UP,
3. Light Control Setting (ALC/MANUAL)
Camera setting menu
** SET UP **
CAMERA ID
OFF *
ALC/MANUAL
'ALCZiJ
SHUTTER
OFF
AGC
ON
SENS UP
OFF
SYNC
INT
WHITE BAL
ATW *
WIDE D-RAMGE OFF
MOTION DET
OFF
AF MODE
MANUAL*
RET SPECIAL *
Back light compensation menu
» ALC
coht
*
BACK LIGHT COMP
PRESET
MASK SET
LEVEL
07F,
(2) ALC with Field Setup Mode (PRESET OFF)
• Select ALC and press the CAM (SET) key to display the back light
compensation menu.
• Move the cursor to PRESET and select OFF by using the joystick.
The field setup menu appears on the monitor screen as shown in the
illustration.
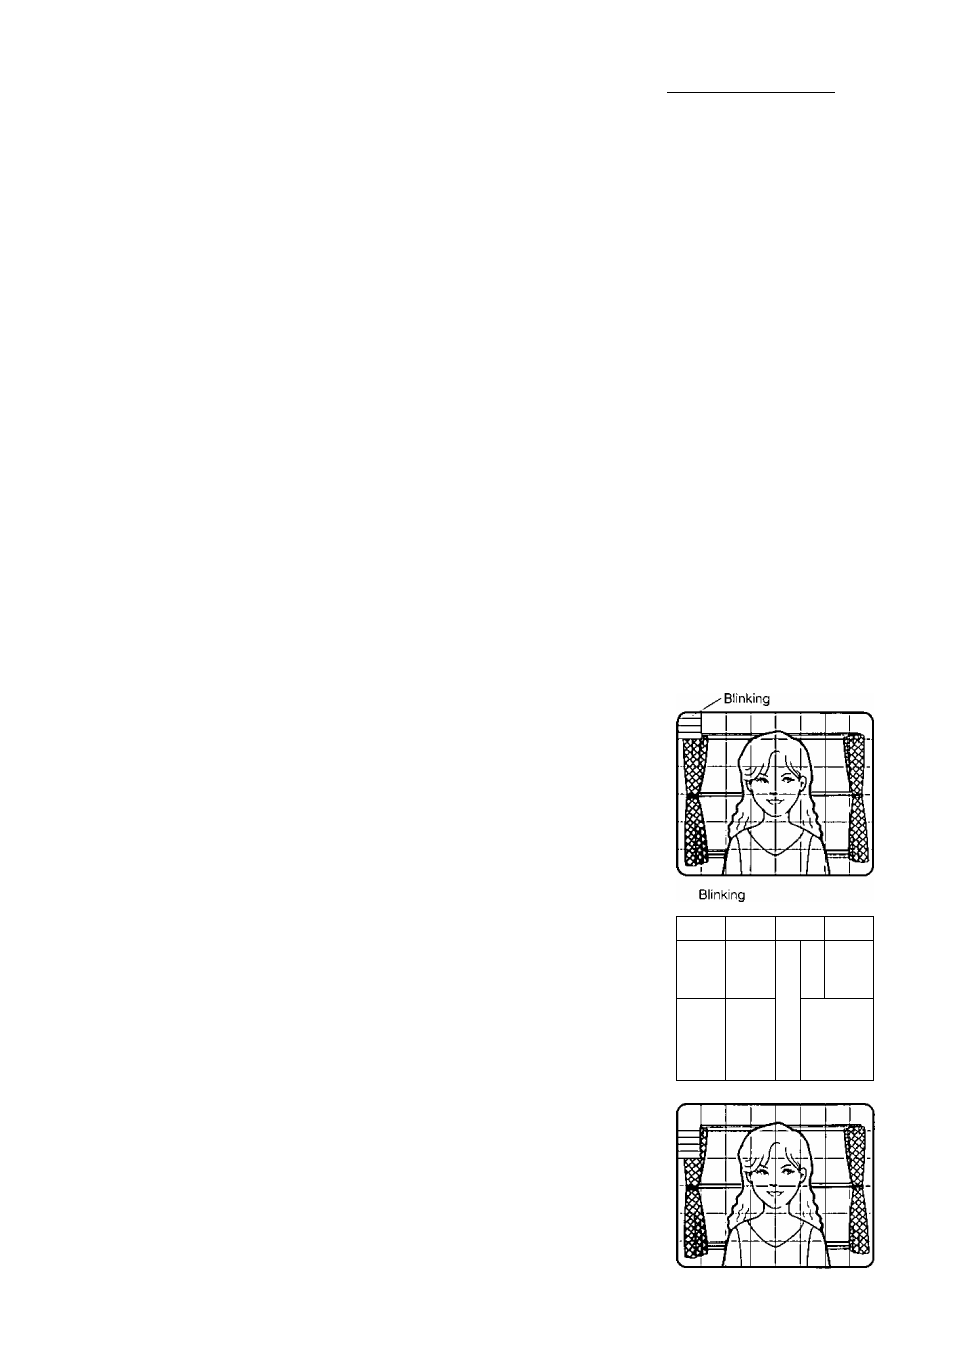
• Move the cursor to MASK SET and press the CAM (SET) key.
The 48 mask areas appear on the monitor screen. The cursor is
blinking in the top left corner of the screen.
• Press the CAM (SET) key to mask this area. The mask and the cursor
start blinking alternately.
Move the cursor to the desired area by using the joystick to mask the
next area and press the CAM (SET) key to mask that area. The mask
turns white.
When the cursor is moved on an area that has already been masked,
the mask and cursor start blinking.
Press the CAM (SET) key if you want to cancel masking of this area.
Press the F2 button of the WV-CU550A if you want to cancel masking
of all areas. (For the WV-RM70, press Left switch and Right switch
simultaneously.)
After masking is completed, press the MON (ESC) key. The 48 mask
areas on the monitor screen disappear and the field setup menu
appears.
* ALC CONT *
BACK LIGHT COMP
RET END
V_______________________________
J
rP
1
LJ_
P/
^
J
r 1 \ ^
1
Turns to white —-
Blinking —
- 2 0 -