Installation procedures, A) using the rear support strap (з), B) using the rubber cushion (option) – Panasonic CQ-DF602U User Manual
Page 45
Attention! The text in this document has been recognized automatically. To view the original document, you can use the "Original mode".
□ Installation Procedures
First complete the electrical connections, and then
check them for correctness. page 48)
The included mounting collar (T) is designed special
ly for this unit. Do not use it to attach any other
model.
Insert mounting collar 0 into the dashboard, and
bend the mounting tabs out with a screwdriver.
Mounting tabs
CD Mounting bolt (5 mm0)
Fastening the mounting collar
The tabs to be bent vary depending on
the car. .Bend them with a screwdriver to
fasten the mounting collar 0 securely in
the dashboard.
Dashboard
— 0 Mounting collar
Note:
• To securely install the unit, fully bend
a number of the tabs so that there is
no rattling.
• Be sure to fasten the unit securely
when joining it with the mounting col
lar 0.
о
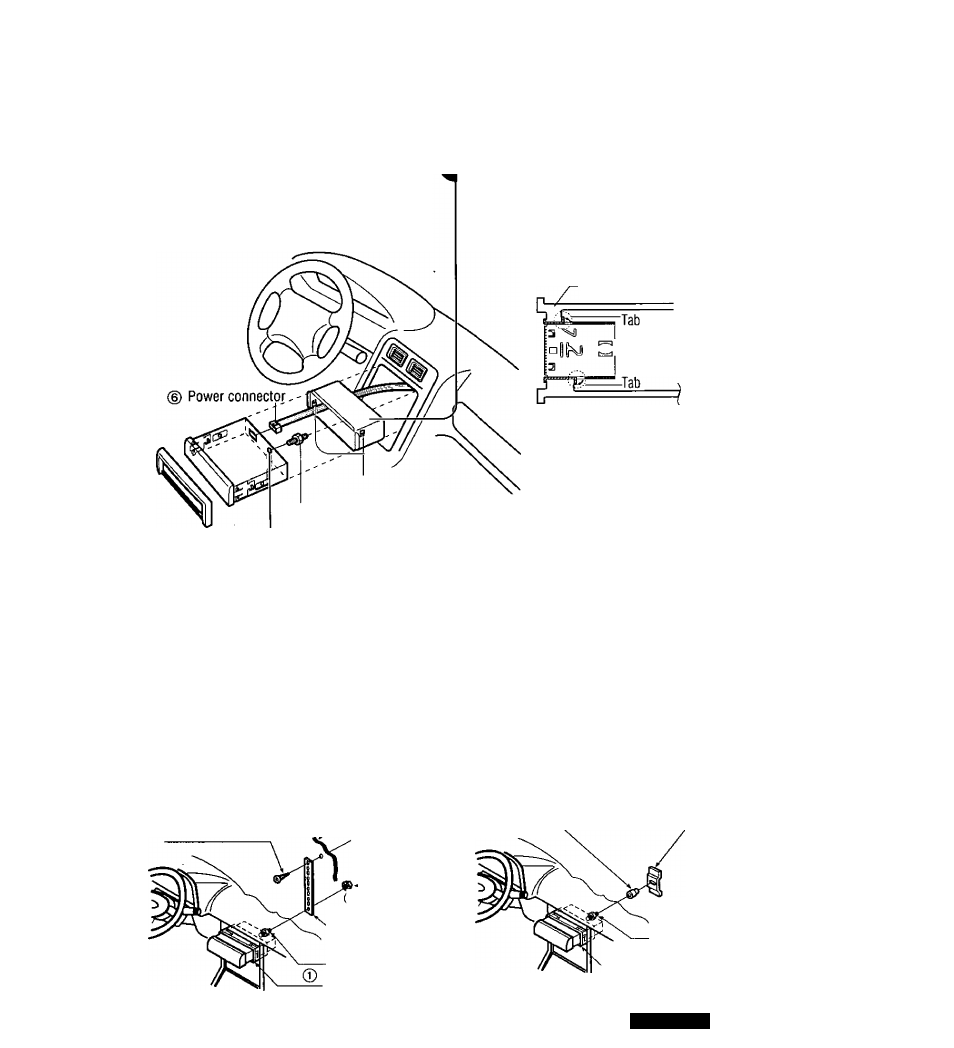
Secure the rear of the unit.
After fixing mounting bolt © and power connector
©, fix the rear of the unit to the car body by either
method (a) or (b) shown below.
Insert trim plate ©.
After
installation,
reconnect
the negative
0
battery termi
nal.
©
(a) Using the rear support strap (з)
Fire wall of car
© Tapping screw
/
(5 mm0x16 mm) /
3 mm0
0 Hex. nut
(5 mm0)
3) Rear support
strap
© Mounting bolt
(5 mm0)
Mounting collar
(b) Using the rubber cushion (option)
Rear support bracket
Rubber cushion (option) (provided on the car)
© Mounting bolt
(5 mm0)
0 Mounting collar
CQ-DF602U
45