Satellite Freedom 2 (old) User Manual
Page 5
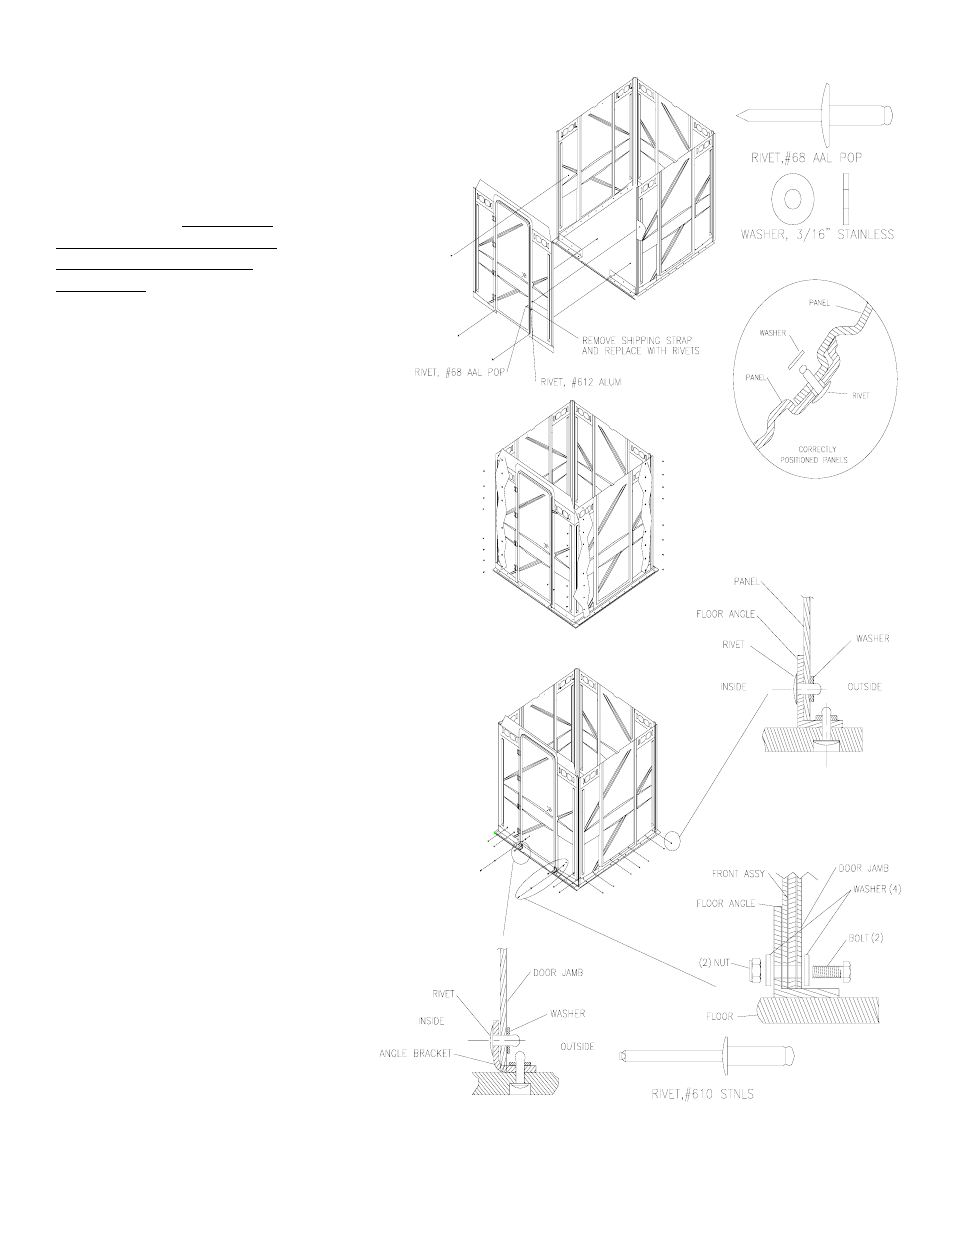
5. ATTACH FRONT
ASSEMBLY
Using #68 aluminum large
flange rivets and back-up
washer attach the front to the
panels through the 5
th
hole from
the bottom, and the bottom 2
predrilled holes. NOTE THE
PANELS MUST BE IN THE
CORRECT INTERLOCK
POSITION.
6.
POSITIONING THE
DOOR GAP: Install #68
stainless rivet thru .194" hole
(at the bottom of the door
jamb) into L bracket and
place 3/16" washer on the
outside and pop. Repeat for
other side.
7.
REMOVE SHIPPING
STRAP ON THE FRONT
Remove screw and drilling out
rivet. Replace rivet with the
#612 alum rivet, no washer.
Screw hole is used for door
handle.
8.
TRANSFER DRILL AND
FINISH ATTACHING THE
PANELS & FRONT
Using a ¼” drill bit, transfer
drill from the inside of the
toilet the remaining eight
locations in each corner and
attach the panels and front
using #68 large flange
aluminum rivets and back-up
washers. Transfer drill the
panels and front with the floor
angles. Finish attaching the
rivets and washers in the floor
angle from inside the toilet.
Attach a ¼-20 bolt, (2) washers
and nut on both sides of the
door.
PN 14579/REV, X
page 5