Satellite Maxim 2000 User Manual
Page 5
PN 16186/REV F
Page 5
1.
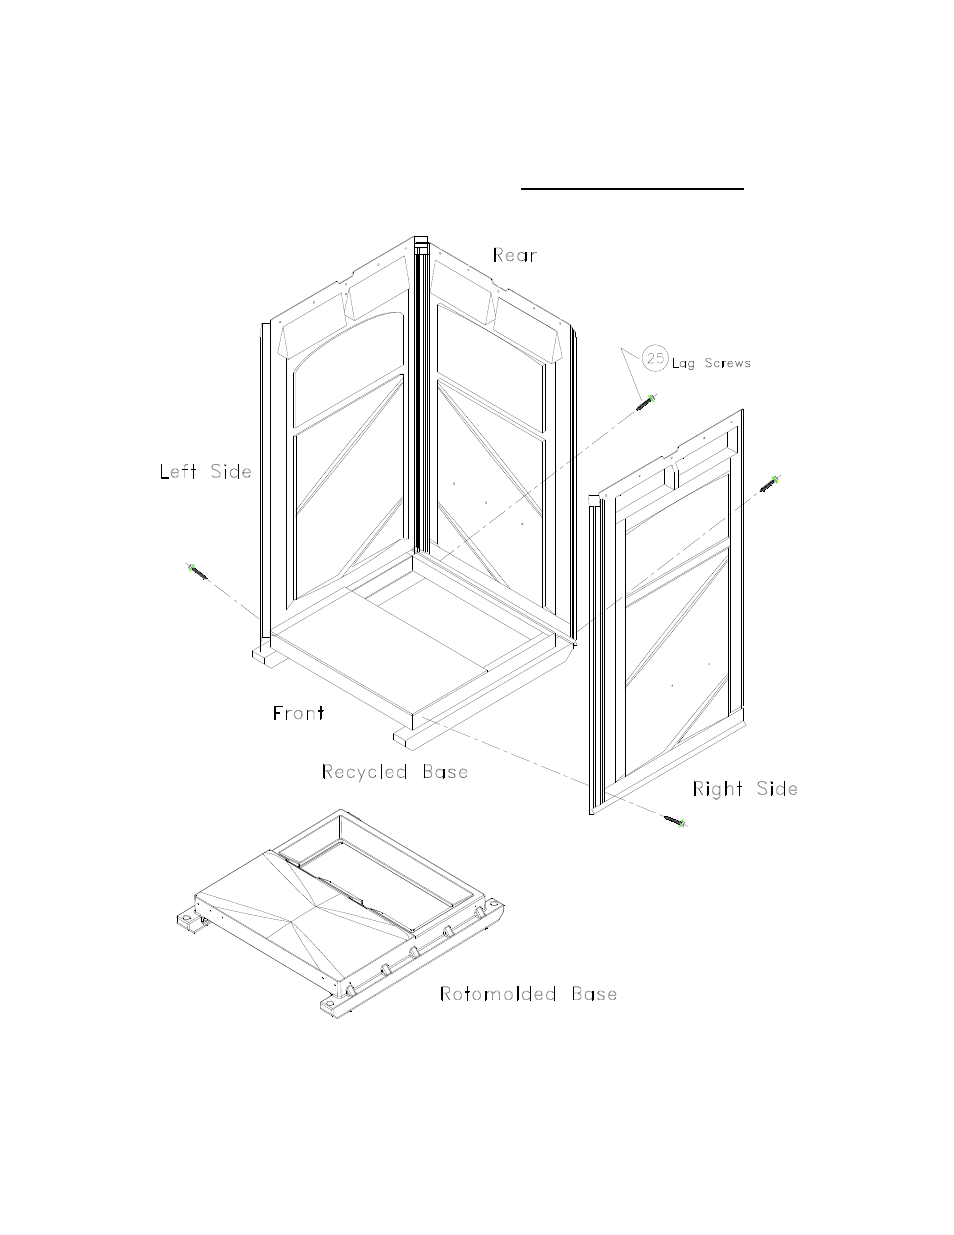
Install Panels to Base:
*Attach corners of panels using (2) screws. As shown. Make sure to use dimple in recycled base and
cored hole in Rotomold base.
*Repeat same process on rear panel.
*Tighten screws until rubber washer begins to flatten. DO NOT OVER TIGHTEN.
*Helpful Tip: Fasten one of the screws in one of the side and rear panel holes to hold the panels
together while you finish other side.
See also other documents in the category Satellite TV Accessories:
- Tufway (17 pages)
- Global (T Extrusion) (8 pages)
- Freedom (12 pages)
- High Tech 2 Flush (9 pages)
- High Rise Lift Kit (1 page)
- Maxim 3000 (8 pages)
- Global (HD Extrusion) (8 pages)
- Liberty (9 pages)
- High Rise (12 pages)
- Mondo (8 pages)
- Taurus (8 pages)
- High Tech 2 (6 pages)
- High Rise Roof (2 pages)
- Freedom 2 (old) (9 pages)
- Slimmate (1 page)
- MX2 Wet Lift (2 pages)
- Flush Western Bowl Roto Base (2 pages)
- Western Foot Flush (2 pages)
- MX3 Accessory Location (2 pages)
- MX3 Turbo SS Bowl (2 pages)
- MX3 Turbo Plst Bowl (3 pages)
- MX3 Wet Lift (3 pages)
- MX3 Turbo Foot Flush (6 pages)
- MX3 (1 page)
- Gender Indicator (1 page)
- Paperguard 3 Roll (3 pages)
- Slimmate 2 (1 page)
- Western Flush 2 (2 pages)
- Hand Flush FF Bowl (3 pages)
- Dispenser 4 Roll (3 pages)
- Tufway Accessory Location (2 pages)
- Freedom to SRO (1 page)
- Maintenance Service Truck (4 pages)
- Slide Tank (32 pages)