Vintage Cellars CC-CX8800 User Manual
Page 13
www.cellarcool.com | Page 11
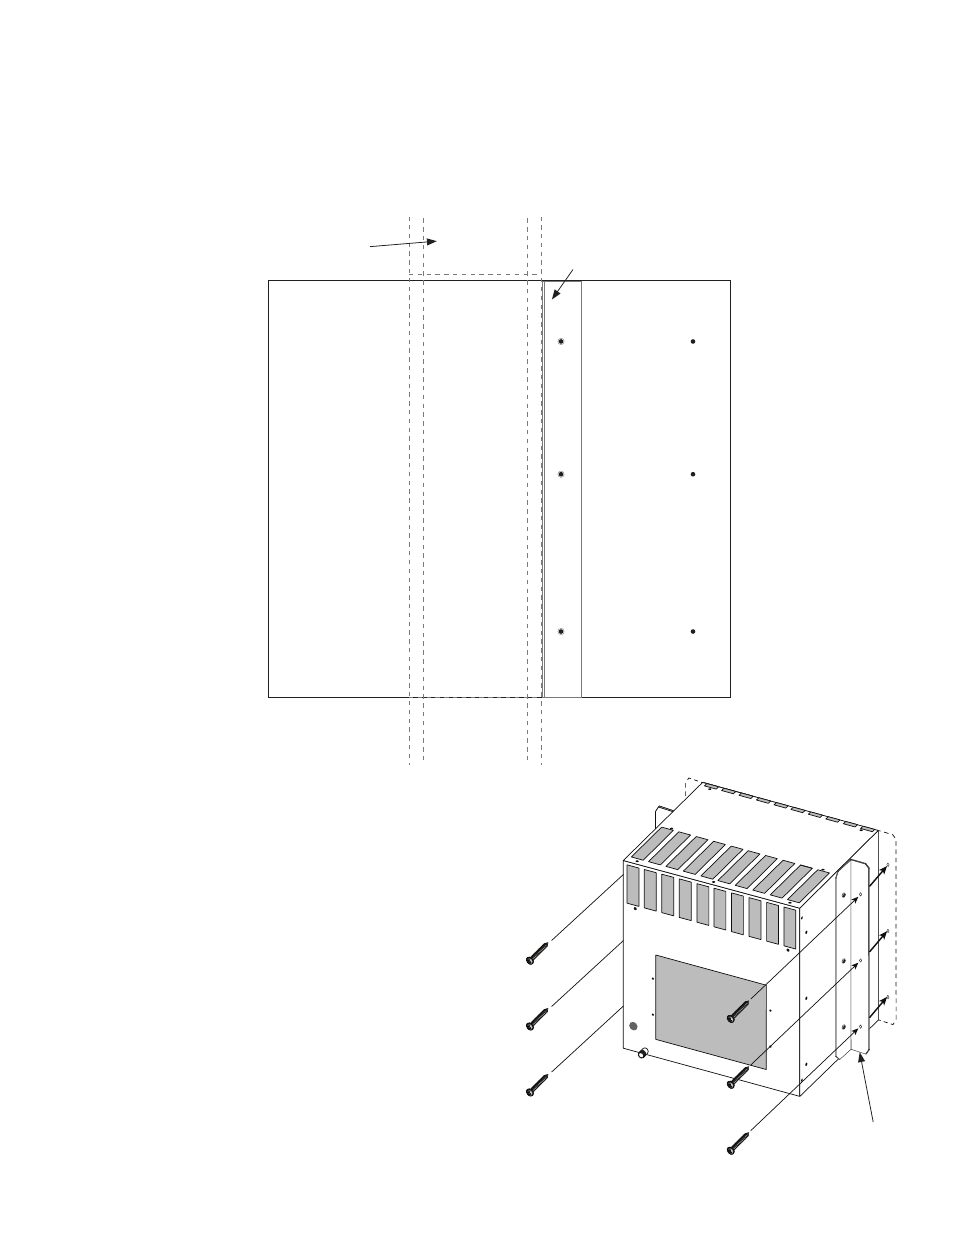
Mounting Bracket Installation
Select your desired bracket mounting location (see diagram below), this location determines the depth of the installation. For example,
position #1 keeps most of the unit out of the cellar while position #2 makes the back of the unit near flush on the exterior wall. Place
the flanges onto unit, pay special attention to the direction the foam side is facing as it needs to be towards the wall. For the cx2200,
cx3300, and cx8800 Models: Use the (6) 3/8" Phillips Head Screws to fasten the bracket to the unit. It is imperative not to use self tap-
ping screws longer than 1/2” in length. For the cx4400 Model: Use the (6) 3/8” Phillips Head Screws to fasten the bracket to the unit. It
is imperative not to use screws longer than 3/8” in length.
Installing the Mounting Flange
2. From OUTSIDE the cellar: (Note: on each side of the side of the unit you will
notice 6 indents, these mark 2 different installation depths.) Select one of the
2 mounting depths and attach each mounting bracket to the unit with the
supplied self tapping screws.
3. Finally, secure the mounting brackets to the wall through
the pre-drilled holes with the (10) supplied #6 1 3/4" hex
head screws. The screws should penetrate the studs to provide
adequate support for the unit (see illustration).
4. Seal all cracks and gaps around the unit from inside the
cellar with an air-tight sealant or caulking to prevent air
leakage.
5” inch thick wall
(wall thickness may vary)
Mounting Bracket
Wine Cellar
Exhaust Area
#2
#1
Mounting Flange
Back of Unit
Exterior of Cellar Wall