Fig. k, Fig. j – Thetford 19621 - Seal Replacement Package User Manual
Page 4
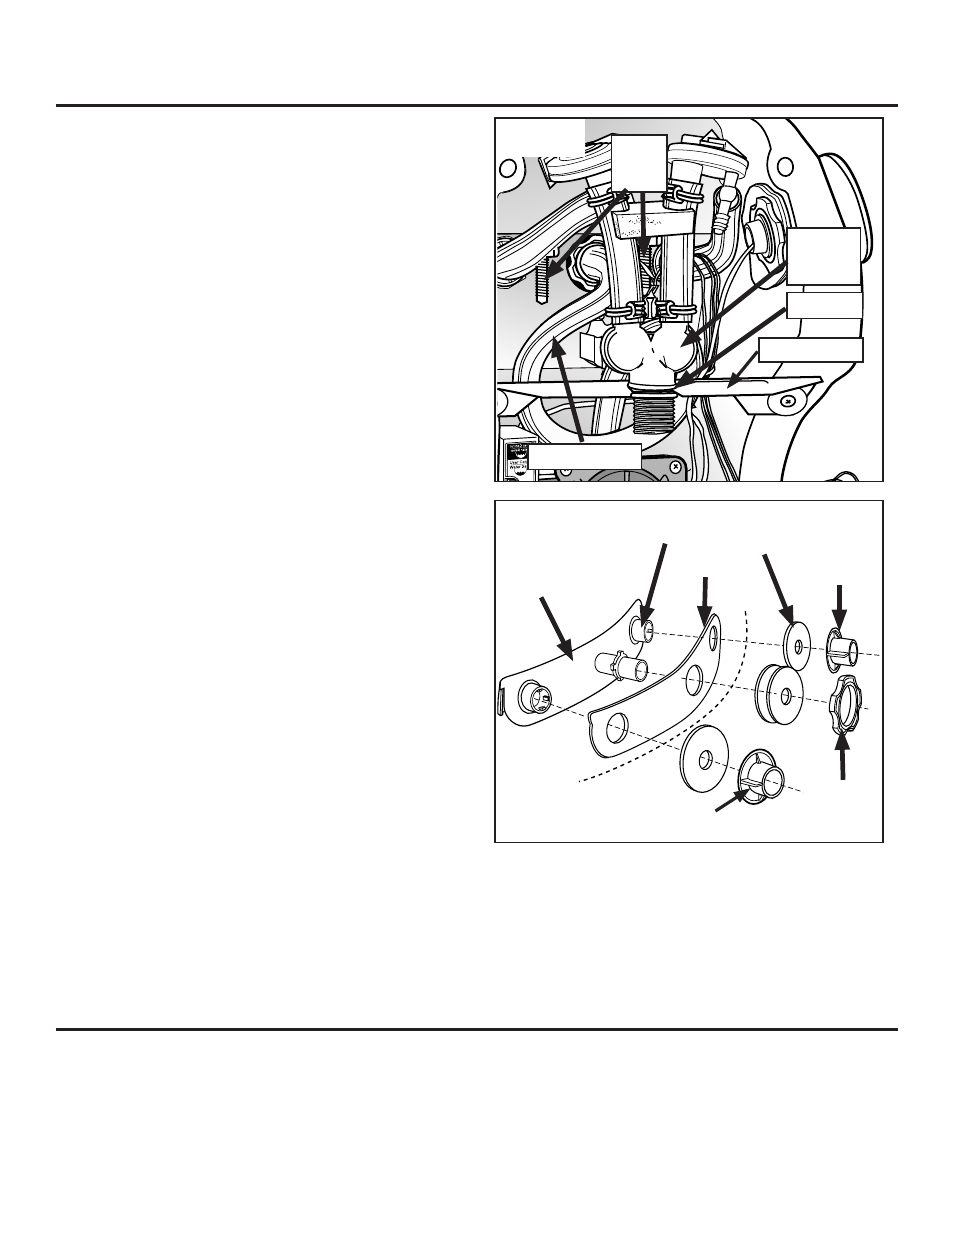
Fig. K
Nozzle Connector
Locking Nut
Nozzle As-
sembly
Gasket
Foam
Nozzle
Seal
Nozzle Con-
nector
Nozzle
Back wall of
china bowl
5. Holding Hinge Post Nuts from inside (Fig. J), turn screwdriver
counterclockwise to unscrew Hinge Posts. Remove Nuts and Bolts
(but not Seat/Lid).
6. Take note of Overflow Tube position for future reference. Pull
Overflow Tube off center Nozzle Connector.
7. To remove 2 outside Nozzle Connectors (Fig. I), push them in,
twist counterclockwise and pull back. (They may be caulked tight
and difficult to remove. Use pliers if necessary.)
8. Remove Locking Nut from center Nozzle by turning counterclock-
wise until it releases. Save Locking Nut.
9. Scrape away 3 Seals and Sealant with a sharp-edged tool. Use
mineral spirits to remove
all residue from china.
To Replace Parts
(Fig. K)
1. Push small Foam Seal over Flush Cover barb. Position new Flush
Cover/Nozzle Assembly in bowl. (Be sure Foam Seal is stuffed
completely/flush into opening.)
2. Place Locking Nut on center Nozzle. Holding Nozzle Assembly
firmly in position from inside Toilet Bowl, Turn Locking Nut clock-
wise to lock. (
Note: all 4 prongs must mate with locking ears to
achieve proper lock.)
3. Adhere Nozzles to Connectors. Again Holding Nozzle Assembly
firmly, push in hard and rotate clockwise (you will feel it lock).
4. Reattach center Overflow Tube. Tuck in Tube. To form a water
trap, it must be curved at approximately same position as when
removed.
5. Align/adjust Flush Cover/Nozzle Assembly level to Toilet inside
bowl.
6. Align Seat/Cover Assembly. Replace Hinge Posts and reattach
Nuts. Tighten firmly (Fig. J).
7. Swing entire Valve/Hose Assembly upright. Holding Metal Bracket
firmly to avoid bending it, slide Solenoid Valve back into slot in
Bracket. Rearrange Wire Harness.
8. Reconnect Hoses to outside Flush Nozzles. Push on firmly (Fig.
J).
9. Attach new Tie Strap holding Solenoid Valve to Metal Bracket (Fig.
K).
To Replace Toilet To Floor
1. Secure new Closet Flange Seal, lip side up, to Toilet.
2. Position Toilet over flange.
3. Reconnect Water Supply Line.
4. Reconnect 12-volt power supply to Toilet.
5. Reconnect RV’s power supply to the Toilet.
6. Turn on RV’s water supply. Press Toilet flush button to close blade
and to flush test.
7. Secure to floor with Lag Screws. Tighten.
8. Resecure Bolt Caps.
Overflow Tube
Water Sole-
noid Valve
Fig. J
Tie Strap
Hinge
Post
Bolts
Metal Bracket
Part #19621
Seal Replacement Package
Page 4