3 cage assembly, 1 apply the silicone bead, 2 install walls – Rice Lake Mobile Group Animal Scale - MAS-M - Operators Manual User Manual
Page 15: Apply the silicone bead, Install walls
Assembly 11
2.3 Cage Assembly
2.3.1
Apply the silicone bead
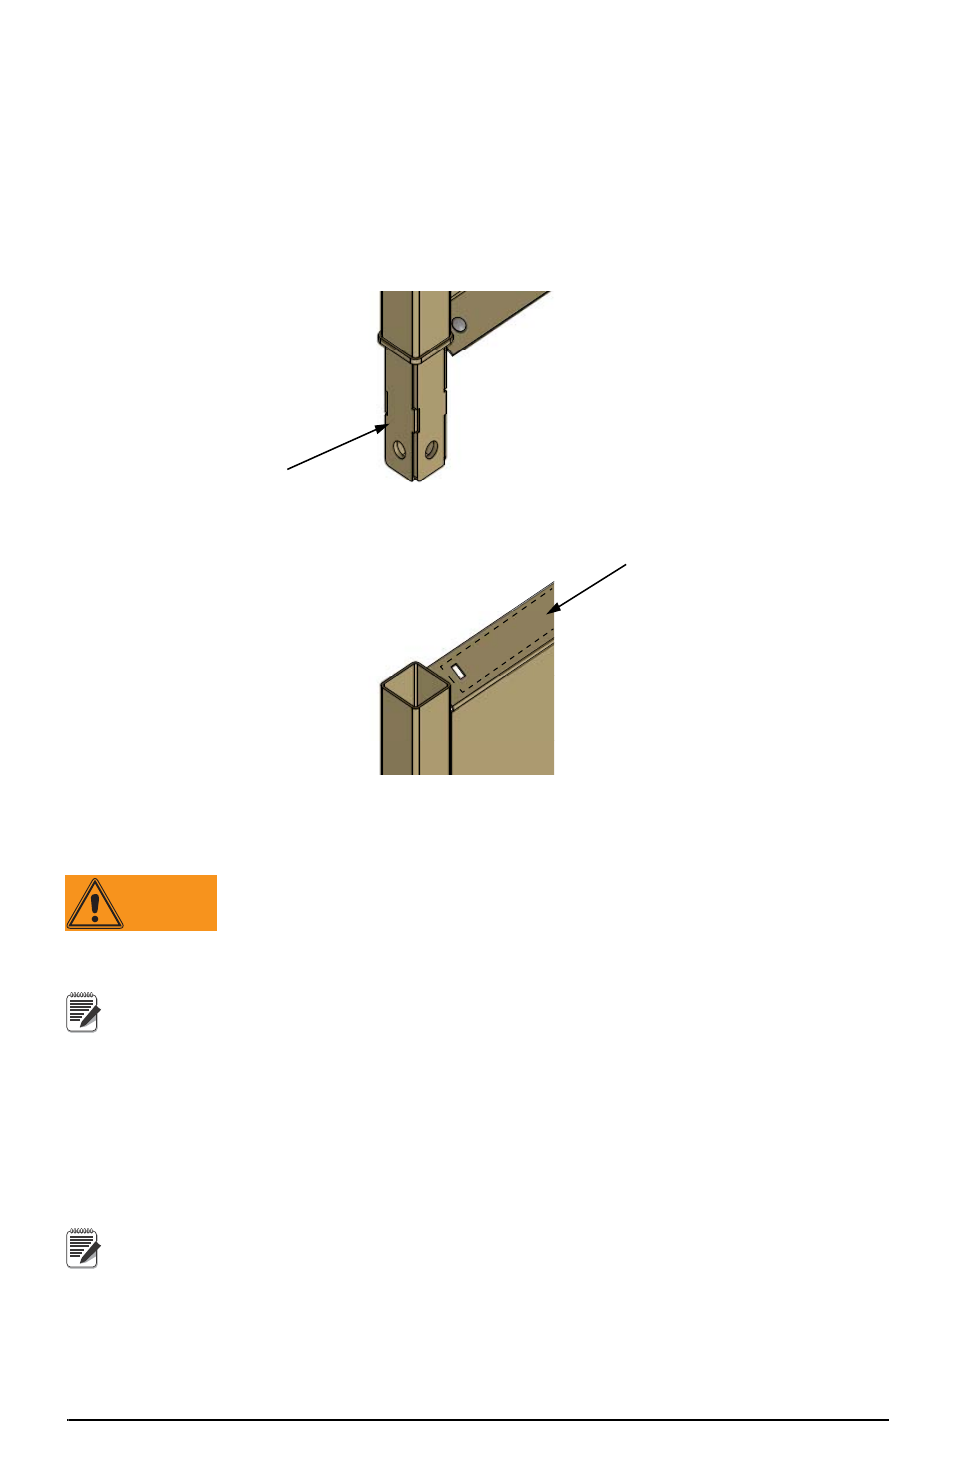
Before installing the walls a silicone bead must be added.
1. Clean the upper flange of the floor and the lower wall flange with mineral
spirits.
2. Apply an 1/8” bead of silicone along the upper edge of the floor panel along the
entire length as shown in Figure 2-5.
Figure 2-5. Silicon Bead
2.3.2
Install walls
Wall installation should be done with 2 people or an overhead
crane.
1. Lift the first wall by using one sling in the center.
The wall with the operator’s instructions is mounted on the left side.
2. Stand the wall vertical and place the inserts from the wall into the tubes of the
cage floor. The more vertical the wall the easier assembly will be.
3. Repeat for the opposite wall.
4. Install the top cross members.
5. Insert the 3/4 x 3 1/2” bolts through the cage wall and inserts on the indicator
side of the cage, head of bolt to the inside.
A come-along from the top of the cross member to bottom of the cage
corner post may be required.
For 18 ft scales a 1/2 x 3” bolt and nylon locknut is installed on the center
post with the nut on the outside.
Silicone
Wall Insert
WARNING
Note
Note