Node connector wiring – ProgressiveRC 10S FMA Cellpro User Manual
Page 16
16
Recording charge data
The Charge Control Software can record charge data for each charging session.
1. Press the
Start/Stop button on the charger to start a session.
2. When prompted, enter a file name. You can enter a file name you previously used, but you
must confirm that you want to overwrite older data.
Charge data is stored in a semicolon-delimited format, which can be imported into a spreadsheet
for analysis.
Updating charger firmware
The Charge Control Software automatically checks for new firmware each time it is launched
(assuming the computer is connected to the Internet). If new firmware is available, it is down-
loaded to your computer. When you are ready to update the charger:
1. Be sure the charger is connected to the computer, and is powered up.
2. Disconnect all packs from the charger.
3. In the Charge Control Software window, switch to the Firmware tab.
4. Select the firmware you want to download.
5. If the previous firmware download was interrupted, activate the
My Charger is Dead option.
6. Click Update Firmware.
7. Wait—and do nothing—until updating is complete.
IMPORTANT: During firmware downloading, do not disconnect the charger from
power, do not disconnect the charger from the computer, and do not exit the Charge
Control Software.
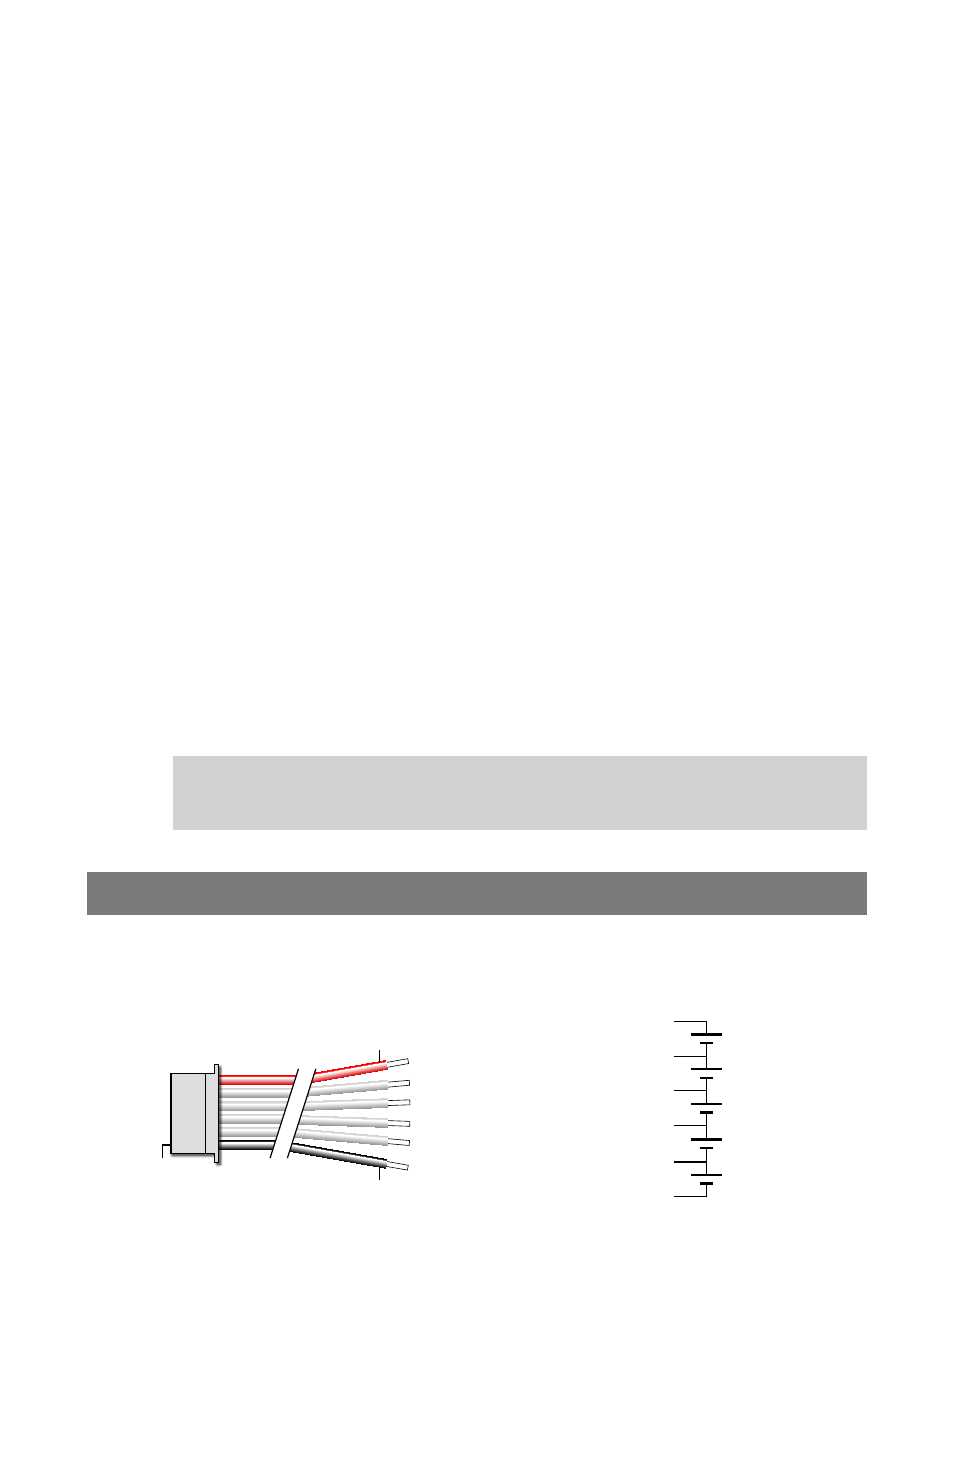
Node connector wiring
This diagram shows how a 6 pin node connector is wired to a 5s pack.
Pin 1
Red
Black
Pack positive
Node 4
Node 2
Node 3
Node 1
Pack negative
Cell 4
+
–
Cell 3
+
–
Pack negative
(blk), 0V
Node 3, 11.1V*
Node 4, 14.8V*
Cell 5
+
–
Pack positive
(red), 18.5V*
Cell 2
+
–
Node 2, 7.4V*
5s Pack
Cell 1
+
–
Node 1, 3.7V*
* Nominal voltage with
respect to pack negative.