Elecraft KX3-4M User Manual
Page 19
19
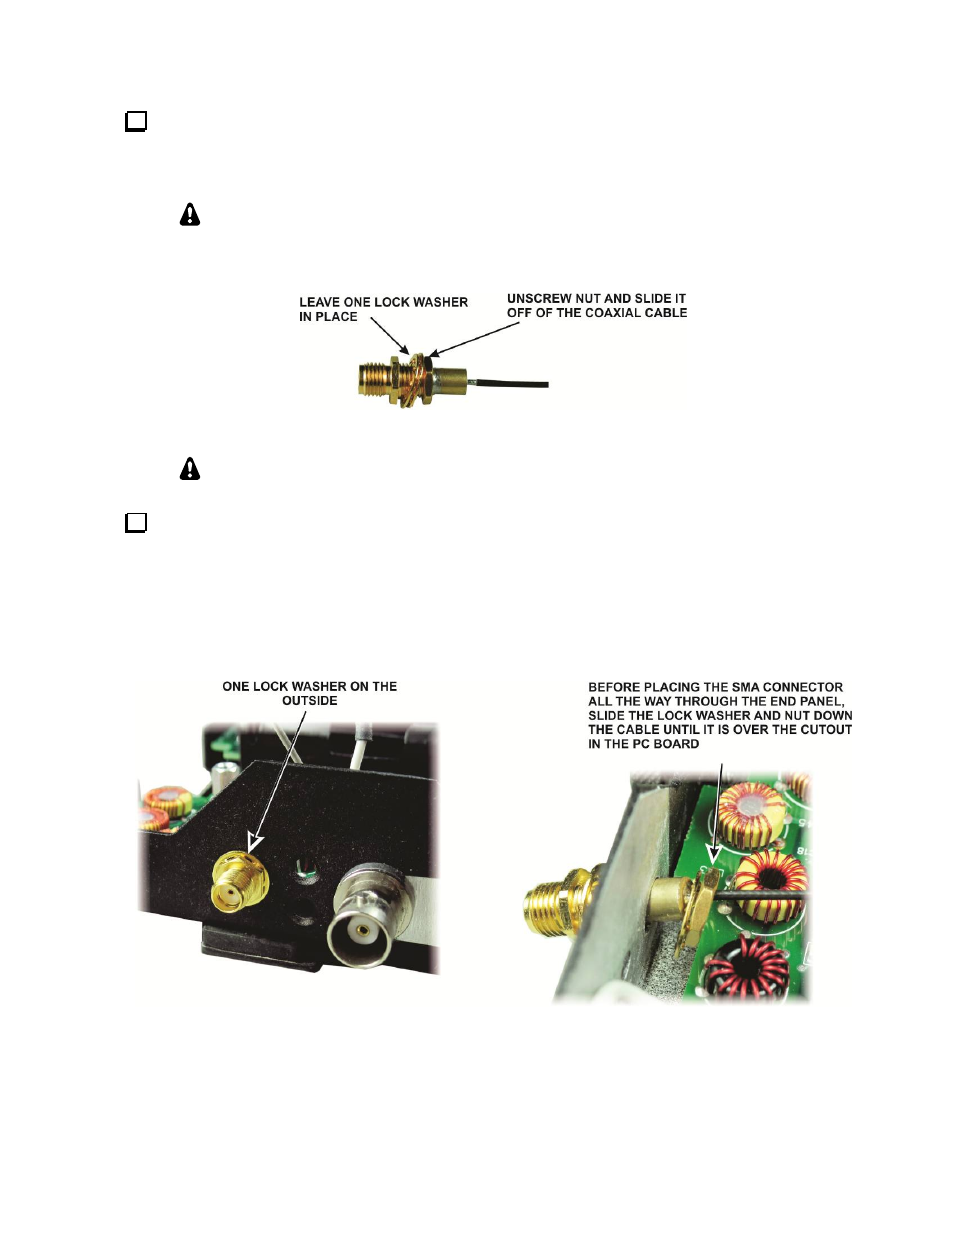
Locate the miniature coaxial cable with the SMA connector at one end. If the connector has a nut and
lock washer on it (see Figure 9), remove only the nut, sliding it down and off the end of the coax. If your
connector does not have the nut and lock washer on it, locate them in the hardware bag and slide the lock
washer onto the connector.
If the nut turns stiffly due to the solder at the end of the threaded section, thread it
on and off again several times so it turns very smoothly. That will make the installation
of the connector easier in the following the steps.
Figure 9. Preparing the SMA Connector for Installation.
One side of the SMA connector is flat. When you install it in the next step, align the
flat side of the connector with the flat side of the D-shaped hole in the end panel.
Thread the coaxial cable through the hole in the end panel that was occupied by the plug you removed.
Before fitting the connector through hole in the end panel, slide one lock washer and the nut over the coax
until they rest in the gap at the end of the PC board as shown in Figure 10 and then start the nut onto the
SMA connector threads as you slide it through the hole. Be sure the connector does not touch L43 or L40
on the KX3 RF board. If needed, move the inductors slightly to provide clearance as shown in Figure 11.
There is a solder-filled via on the RF board directly under the connector. That via is a ground connection
between the top and bottom of the RF board so it doesn’t matter if it touches the SMA connector.
Figure 10. Installing the SMA Antenna Connector.