Dynojet 250iPX: Installation Guide User Manual
Page 20
Model 200iPX/250iPX Upgrade Installation Guide
C H A P T E R 1
Dyno Preparation
1-12
D
ISCONNECTING
THE
C
ABLE
T
RACK
AND
M
OVING
THE
C
ABLES
1
Remove the 1/4-20 screw securing the cable track bracket to the wheel clamp and
move the cable track aside. Replace this screw in the wheel clamp.
2
Remove the two 4-40 screws securing the wheel clamp cable track bracket to the
cable track.
3
Flip the wheel clamp cable track bracket over and secure to the cable track using
the two 4-40 screws removed earlier.
4
Remove the two 8-32 screws securing the cable track bracket to the junction box
and set aside.
5
Lift the cable track and the two cables and place on the left side of the tire
carriage.
6
Remove the two screws securing each blower connector to the junction box and
set aside.
7
Pick up the blower connectors and cables and move to the left side of the
carriage.
Note: Be sure to make note which is the left blower connector and which is the
right blower connector.
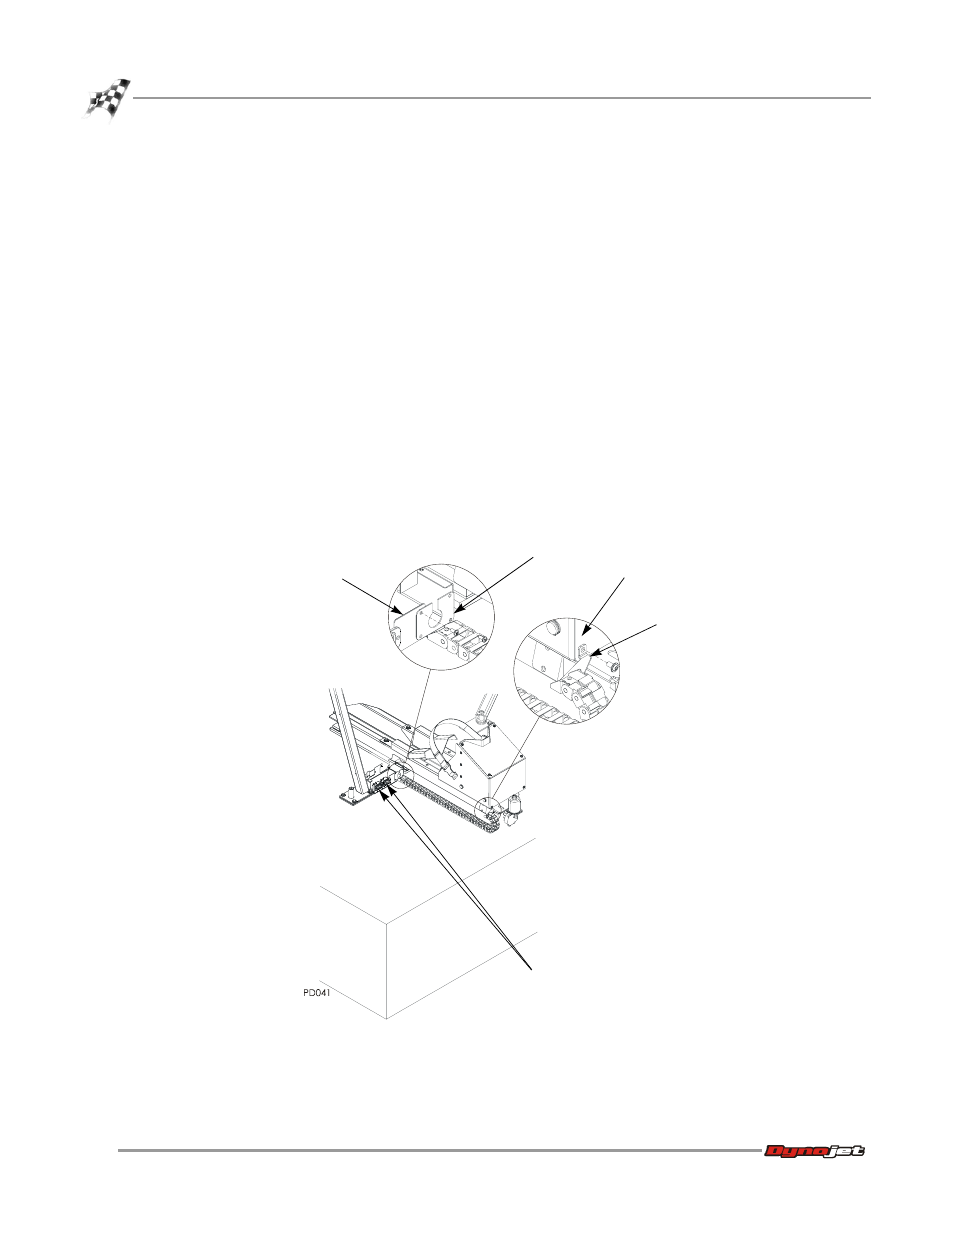
Figure 1-9: Remove the Cable Track and Blower Connectors
junction box
cable track bracket
wheel clamp
wheel clamp cable
track bracket
blower connectors