Operator installation – Detex AO19-3 User Manual
Page 5
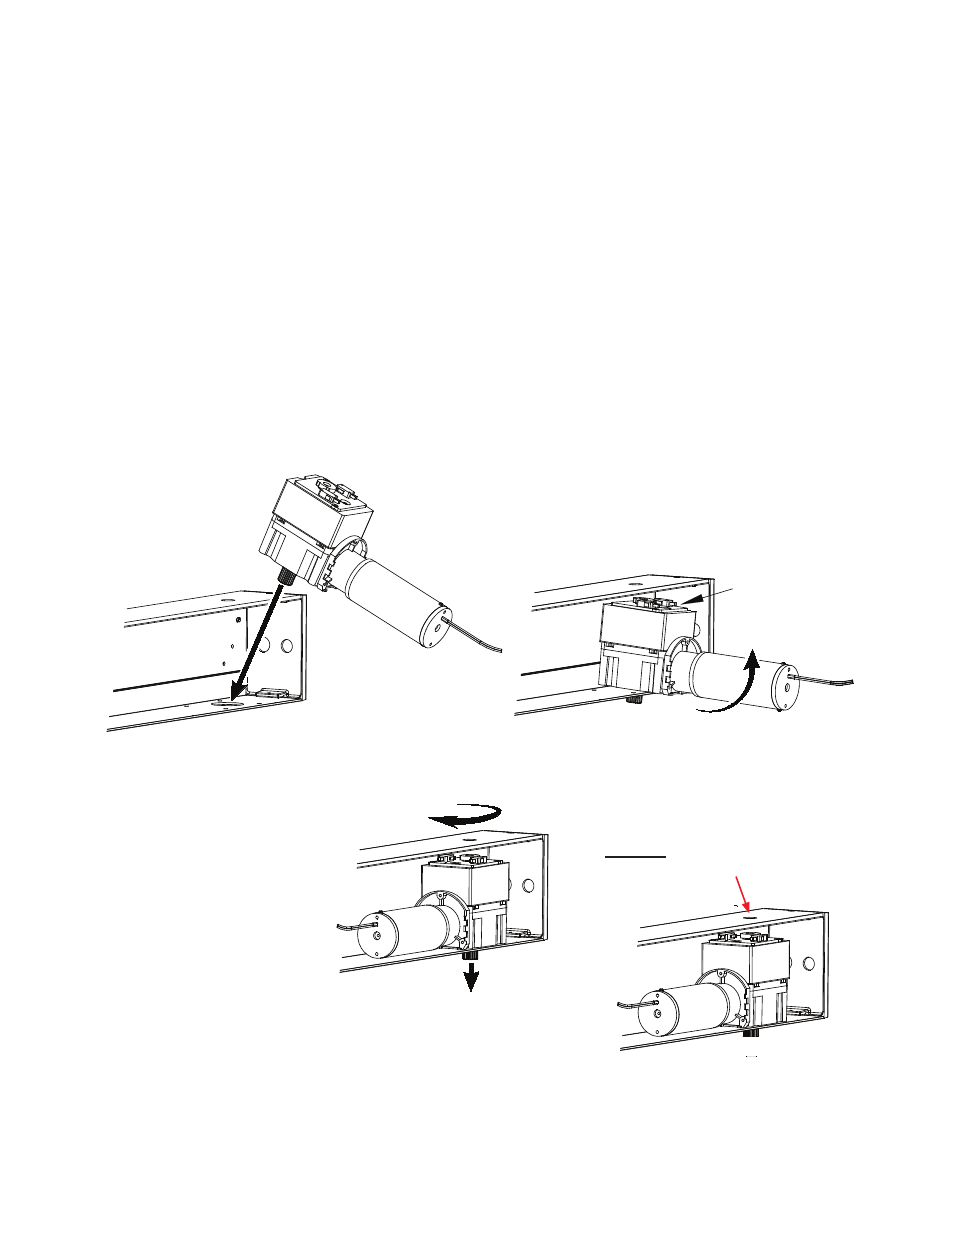
With motor / gearbox
perpendicular to enclosure,
insert splined shaft into
shaft hole
Rotate motor / gearbox
to almost horizontal position
being careful not to let switch
assembly hit enclosure
(Note: For clarity, switch wires not shown in views)
Switch Assembly
Rotate motor / gearbox into
enclosure, letting shoulder of
gearbox drop down into shaft
hole. Align screw holes at bottom
& install all 4 screws before
tightening
104854 Page 5
Operator Installation
Each Operator is labeled Primary or Secondary and the unit case is labeled on each end, either
Primary or Secondary.
Remove an Operator from the box and match it to the proper end of the case.
With the motor end away and slightly below the open edge of the case, insert the operator shaft
through the hole in the bottom of the case.
Carefully lift and turn the motor into the case, being careful not to damage the switches on top of the
operator.
Secure the Operator to the bottom of the case with the 1/4-20 x 1 3/4” Phillips flathead screws
(provided).
Attach the motor ground wire (green) to the back of the case where labeled with the 10-24 x 1/4”
Phillips button head screw (provided).
Connect the white plug of the Operator harness into the control.
Repeat process for opposite side.
With motor / gearbox
perpendicular to enclosure,
insert splined shaft into
shaft hole
Rotate motor / gearbox
to almost horizontal position
being careful not to let switch
assembly hit enclosure
(Note: For clarity, switch wires not shown in views)
Switch Assembly
Rotate motor / gearbox into
enclosure, letting shoulder of
gearbox drop down into shaft
hole. Align screw holes at bottom
& install all 4 screws before
tightening
DO NOT route ANY WIRES
thru enclosure top holes