Mortise cylinder installation, Cd (cylinder dogging), Cylinder installation – Detex Exit Switch - Weatherized User Manual
Page 4: Follow steps "a" through "g" for ea installations
1
L
2
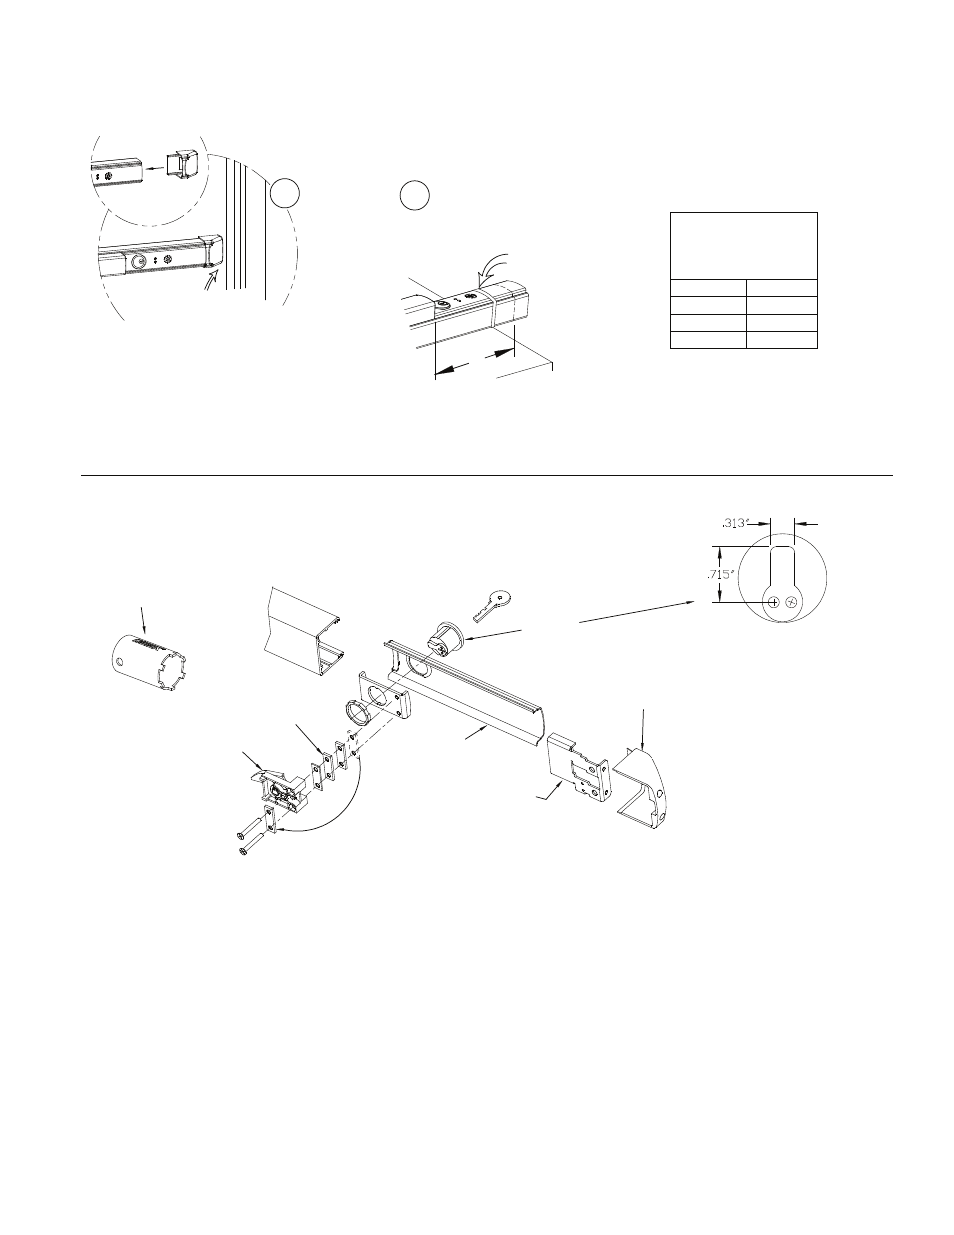
Check for device and door
frame clearance.
If no cut-off needed,
proceed to the next page.
Cut fillerplate and extrusion
STRAIGHT & SQUARE to
desired length and deburr
Slide endcap assembly
onto extrusion
Secure with tape
before cutting
CAUTION:
CHECKING FOR DEVICE CLEARANCE
(Cut-Off procedure if required)
For aluminum Advantex finish cutdown applications: After cutting, the baseplate extrusion can be reversed to place
the cut end inside the head cover. To do so, loosen the setscrew inside the aluminum baseplate extrusion and slide
extrusion out, reverse, & slide back in. Tighten setscrew.
Minimum
Fillerplate
Length
Type
Length (L)
2-1/2"
LX x LD
3"
LX x (HD/CD)
7-1/2"
EA
Endcap
Mounting
Bracket
CD (Cylinder Dogging)
MORTISE CYLINDER INSTALLATION
Mortise
Cylinder
Figure A1
Fillerplate
Dogging
Assembly
Spacers
Cylinder Installation
Endcap
Follow steps "a" through "g" for EA installations
a. Remove endcap and endcap mounting bracket.
b. Remove fillerplate.
c. Remove and discard shipping insert and nut. Loosen (2) screws from dogging assembly.
d. Install mortise cylinder (sold separately) with large hex nut provided.
e. Trial fit dogging assembly. If cylinder is too short, remove spacers as necessary and reattach them
under the (2) screw heads (See Figure A1). Fasten the (2) screws to the rest of the assembly.
NOTE: The key should easily turn in both directions.
f. Rotate key counterclockwise
g. Assembly complete. Continue with Panic Hardware instruction.
Mortise Cylinder with
standard Yale cam
required
Cylinder nut socket
p/n 103779
(sold separately)
104873 Page 4