5 wall-mounting the sthi, Wall-mounting the sthi -3, Installing the sthi – Cabletron Systems STHI User Manual
Page 28: Page 3-3, Supporting 100 ohm utp cable, With
Installing the STHI
Page 3-3
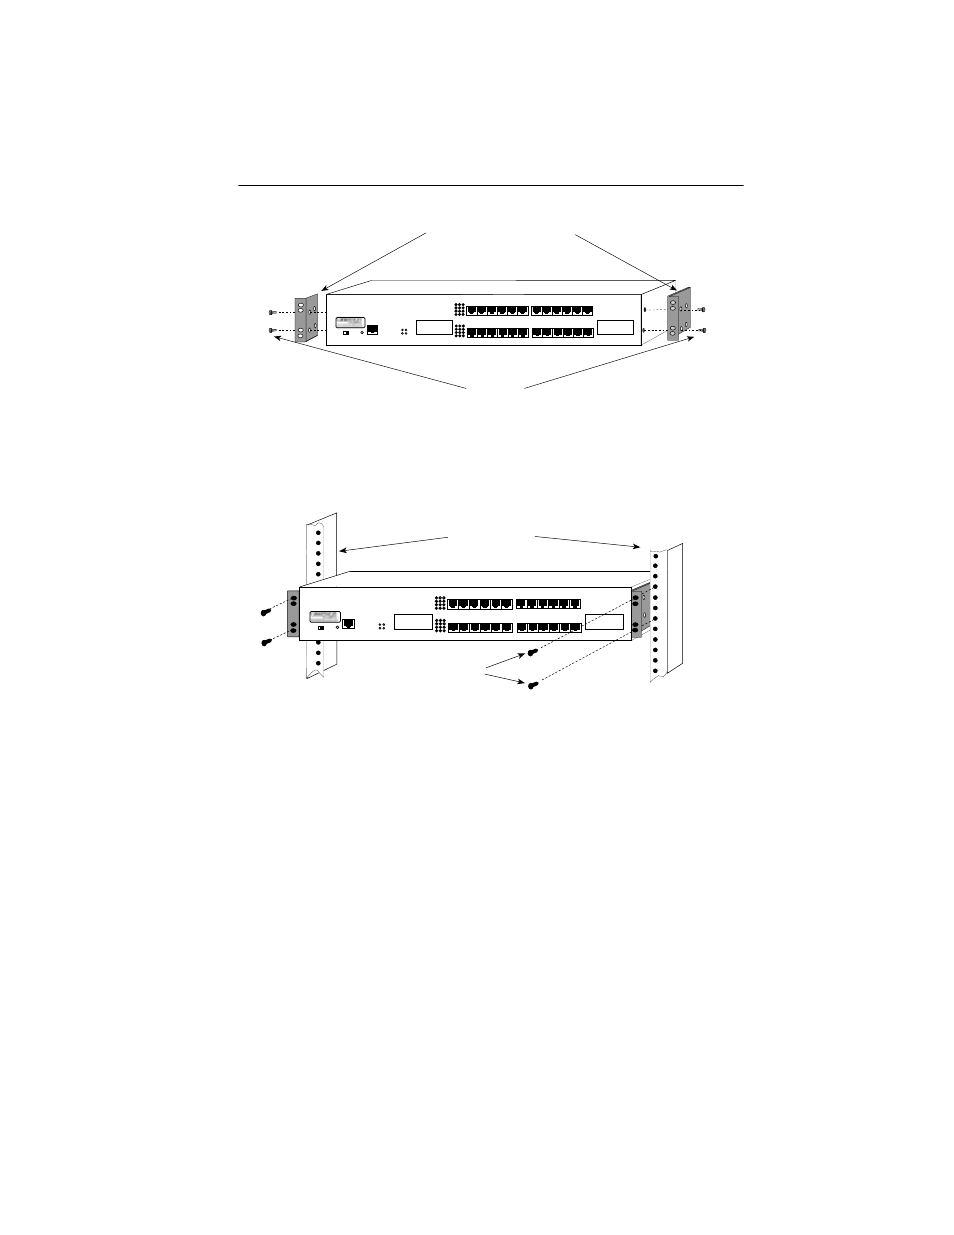
Figure 3-2. Installing the Rack-Mount Brackets
3.
With the mounting brackets installed, position the STHI between the
vertical frame members of the 19-inch rack and fasten it securely with
the mounting screws as shown in Figure 3-3.
Figure 3-3. Installing the STHI in a Rack
3.1.5
Wall-Mounting the STHI
When an STHI is installed on a wall, it must face downward so that all
attached cables will hang straight out from the TCUs, rather than prying
at angles to the ports.
1.
Use the provided 3/8” screws to attach the wall-mounting brackets to
the bottom of the STHI as shown in Figure 3-4. There are two brackets,
one for each side.
Screws (4)
Rack Mounting Brackets (2)
LANVIEW
®
SUPPORTING 100 OHM UTP CABLE
HubSTACK
STHI-24
TOKEN RING HUB
WITH
24X 23X 22X 21X 20X 19X
18X 17X 16X 15X 14X 13X
12X 11X 10X 9X 8X 7X
6X 5X 4X 3X 2X 1X
RI
RESET
CPU
ACT
MGMT
16 Mb/s
SPEED
16M
4M
COM
RO
Screws (4)
19-Inch Rack
LANVIEW
®
SUPPORTING 100 OHM UTP CABLE
HubSTACK
STHI-24
TOKEN RING HUB
WITH
24X 23X 22X 21X 20X 19X
18X 17X 16X 15X 14X 13X
12X 11X 10X 9X 8X 7X
6X 5X 4X 3X 2X 1X
RI
RESET
CPU
ACT
MGMT
16 Mb/s
SPEED
16M
4M
COM
RO