Dell PowerVault DL2100 User Manual
Page 135
Installing System Components
135
10 Rotate the socket-release lever down until it snaps into place.
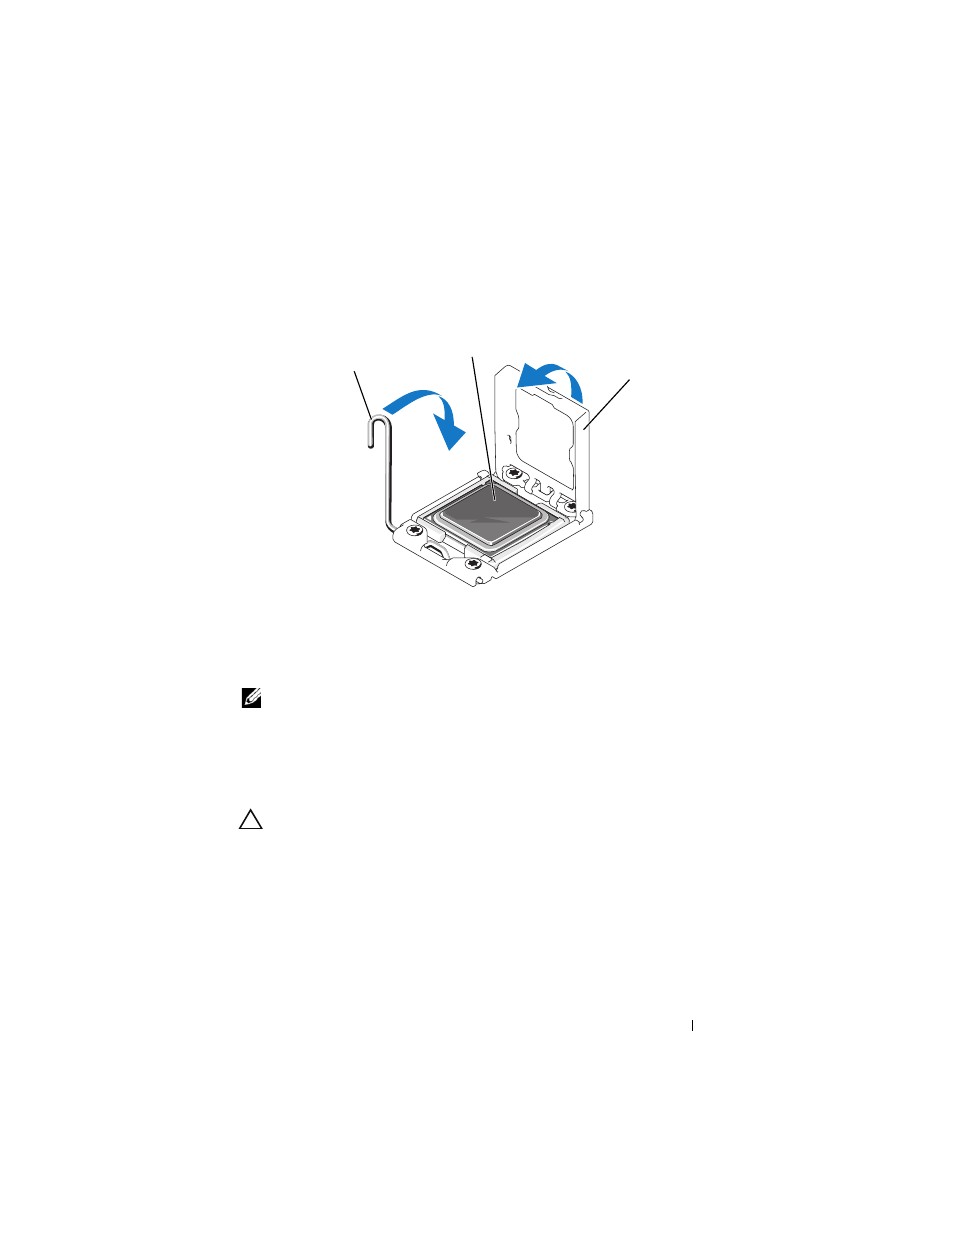
Figure 3-30.
Closing the Processor Shield
11 Install the heat sink.
NOTE:
Your kit may contain a replacement heat sink if you are installing a
processor that consumes additional power. The new heat sink may not appear
different than the original one; however, it has improved thermal dissipation
specifications and must be used.
a
Using a clean lint-free cloth, remove the thermal grease from the heat
sink.
CAUTION:
Applying too much thermal grease can result in excess grease coming
in contact with and contaminating the processor socket.
b
Open the grease packet included with your processor kit and apply a
spot of thermal grease equal to the size of a finger nail to the top
center of the new processor.
c
Place the heat sink on the processor. See Figure 3-27.
d
Close the heat-sink release levers or replace the screws at the corners
of the heat sink. See Figure 3-27.
1
socket-release lever
2
processor
3
processor shield
1
2
3
- AXIM X3 (158 pages)
- AXIM X3 (366 pages)
- AXIM X3 (178 pages)
- AXIM X3 (2 pages)
- PowerVault MD3220 (174 pages)
- PowerVault MD3220 (32 pages)
- PowerVault MD3220 (76 pages)
- PowerVault MD3220 (11 pages)
- PowerVault MD3220 (76 pages)
- PowerVault MD3220 (272 pages)
- PowerVault MD3220 (32 pages)
- PowerVault MD3220 (2 pages)
- PowerVault MD3220 (74 pages)
- PowerVault MD3220 (28 pages)
- PowerVault MD3220 (32 pages)
- PowerVault MD3220 (32 pages)
- PowerVault MD3220 (237 pages)
- PowerVault MD3220 (32 pages)
- PowerVault MD3220 (32 pages)
- PowerVault MD3220 (388 pages)
- PowerVault MD3220 (32 pages)
- PowerVault MD3220 (6 pages)
- PowerVault 114x (49 pages)
- PowerVault 114x (7 pages)
- POWERVAULT MD3600F (2 pages)
- POWERVAULT MD3600F (222 pages)
- PowerVault MD3200i (22 pages)
- PowerVault MD3200i (32 pages)
- POWERVAULT MD3600F (2 pages)
- POWERVAULT MD3600F (222 pages)
- PowerVault MD3200i (34 pages)
- POWERVAULT MD3600F (17 pages)
- PowerVault MD3200i (32 pages)
- POWERVAULT MD3600F (90 pages)
- POWERVAULT MD3620F (16 pages)
- POWERVAULT MD3600F (38 pages)
- POWERVAULT MD3600F (318 pages)
- PowerVault MD3200i (32 pages)
- PowerVault MD3200i (75 pages)
- PowerVault MD3200i (32 pages)
- PowerVault MD3200i (32 pages)
- POWERVAULT MD3600F (90 pages)
- PowerVault MD3200i (21 pages)
- PowerVault MD3200i (32 pages)
- PowerVault MD3200i (32 pages)