Expansion-card riser board, Removing the center riser board, Replacing the center riser board – Dell Precision R5400 (Mid 2008) User Manual
Page 41
Back to Contents Page
Expansion-Card Riser Board
Dell Precision™ R5400 Service Manual
Removing the Center Riser Board
Replacing the Center Riser Board
Removing the Center Riser Board
1.
Perform the steps in
Before Working on Your Computer
.
2.
Remove the center expansion-card cage from the computer (see
Removing an Expansion-Card Cage
).
3.
Remove all expansion cards from the expansion-card riser board (see
Removing an Expansion Card
).
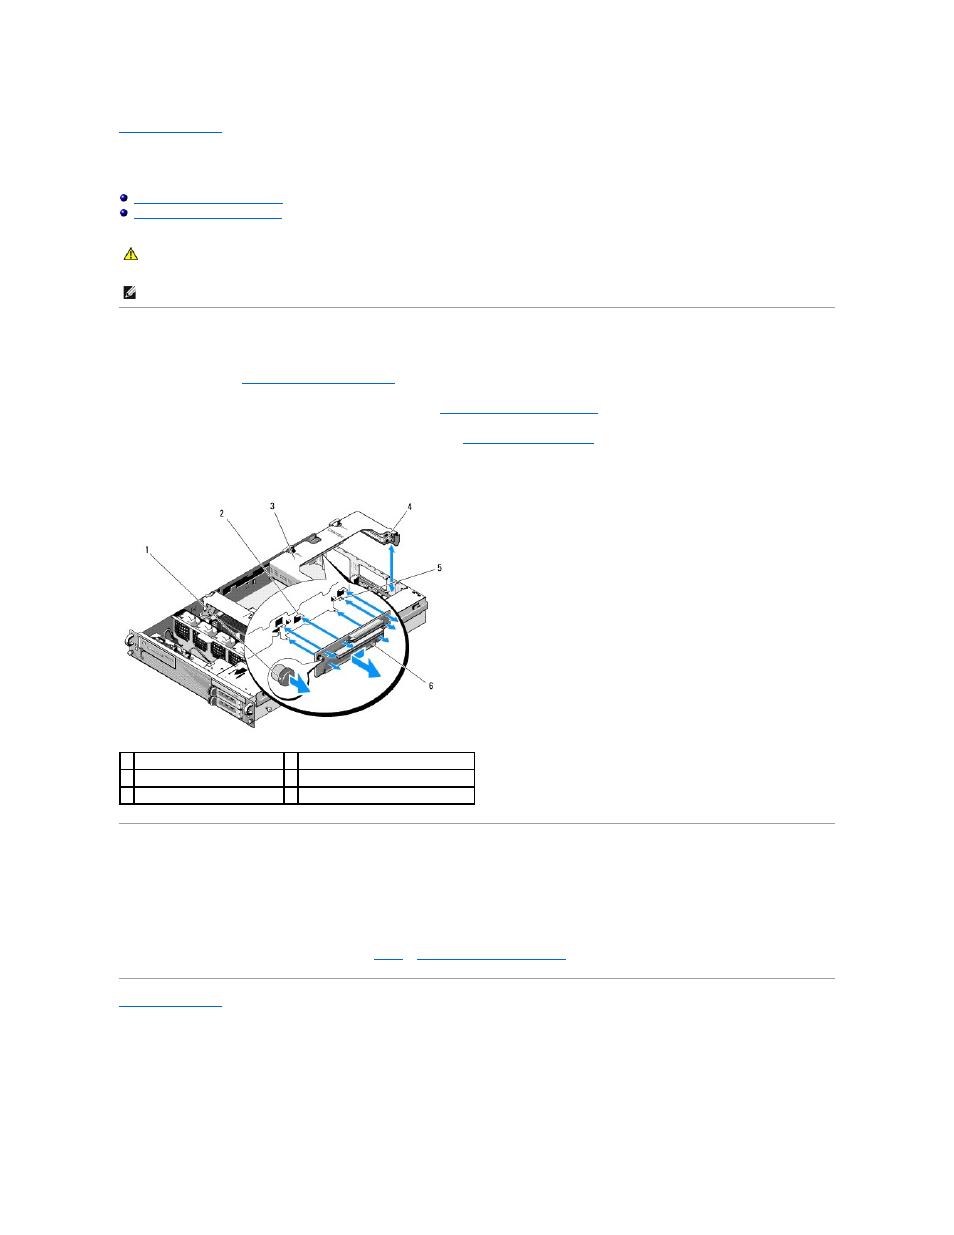
4.
While lifting the blue spring-loaded release knob on the riser board, slide the board horizontally, away from the expansion-card latch end of the cage,
until the riser board is freed from the five guide hooks.
Replacing the Center Riser Board
1.
Holding the riser board by the release knob, place the board so that the guide pin fits in the corresponding hole in the board.
2.
With the release knob raised, slide the board toward the expansion-card latches until the guide hooks and release knob click securely into place.
3.
Replace any expansion cards that you removed in
Removing the Center Riser Board
.
Back to Contents Page
CAUTION:
Only trained service technicians are authorized to remove the computer cover and access any of the components inside the computer.
Before working inside the computer, read the safety information that shipped with the computer. For additional safety best practices information,
see the Regulatory Compliance Homepage at www.dell.com/regulatory_compliance.
NOTE:
The riser board can be replaced in the center expansion-card cage only, not the outer cage.
1 spring-loaded release knob
2 guide hooks (5)
3 center expansion-card cage
4 expansion-card latch end of cage
5 guide pin
6 riser board