Control panel assembly, Removing the control panel assembly, Replacing the control panel assembly – Dell Precision R5400 (Mid 2008) User Manual
Page 14
Back to Contents Page
Control Panel Assembly
Dell Precision™ R5400 Service Manual
Removing the Control Panel Assembly
Replacing the Control Panel Assembly
Removing the Control Panel Assembly
1.
Perform the steps in
Before Working on Your Computer
.
2.
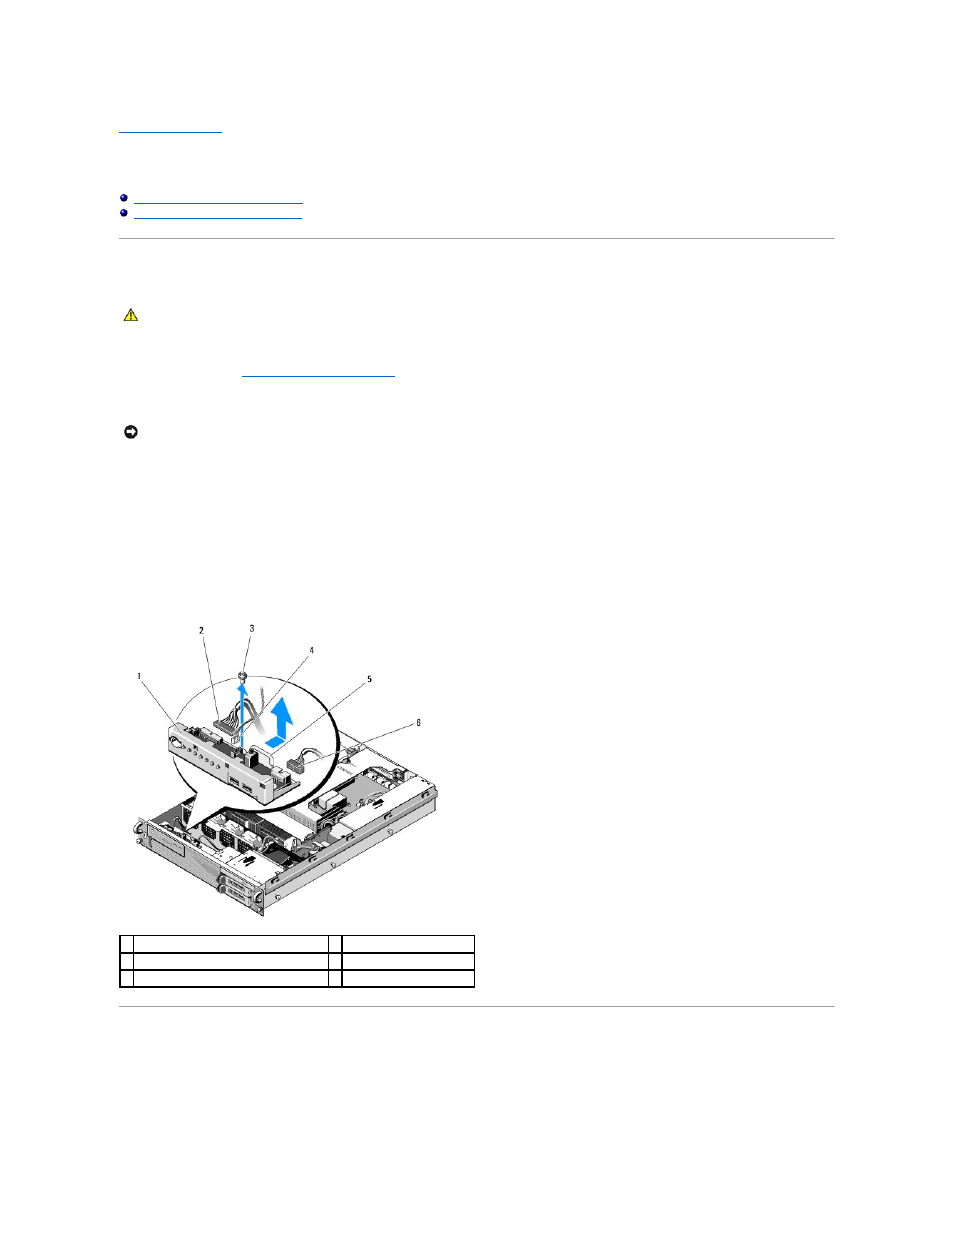
Disconnect the control panel cable from the control panel board.
a.
Squeeze the plastic tabs on the ends of the cable connector.
b.
Gently work the connector out of the socket.
c.
Disconnect the speaker cable from the control panel board.
d.
Disconnect the front USB-connector cable from the control panel board.
e.
Remove the screw that secures the control panel assembly to the computer chassis.
f.
Grasp the metal tab/handle to slide the assembly back, and lift the assembly from the chassis.
Replacing the Control Panel Assembly
1.
Place the control panel assembly in the computer chassis, slide it forward until the screw holes align and the power button fits in its front-panel opening,
and replace the securing screw.
2.
Connect the front USB-connector cable to the control panel board.
CAUTION:
Only trained service technicians are authorized to remove the computer cover and access any of the components inside the computer.
Before working inside the computer, read the safety information that shipped with the computer. For additional safety best practices information,
see the Regulatory Compliance Homepage at www.dell.com/regulatory_compliance.
NOTICE:
To avoid damage to the cable, pull on the connector, not the cable, to unseat the connector.
1 control panel assembly
2 control panel cable
3 control-panel assembly securing screw
4 speaker cable
5 metal tab/handle
6 front USB-connector cable