Dell PowerVault 725N (Rackmount NAS Appliance) User Manual
Page 37
The three memory module sockets are located on the system board adjacent to the power supply. See
.
You can upgrade the system memory by installing combinations of registered memory modules. If you receive an error message stating that maximum memory
has been exceeded, see "
Indicators, Messages, and Codes
" for more information. You can purchase memory upgrade kits from Dell.
Installing Memory Modules
1.
Turn off the system and attached peripherals, and disconnect the system from the electrical outlet.
2.
Remove the system cover. See "
Removing and Replacing the System Cover
."
3.
Locate the memory module sockets in which you want to install or replace the memory module(s). See
4.
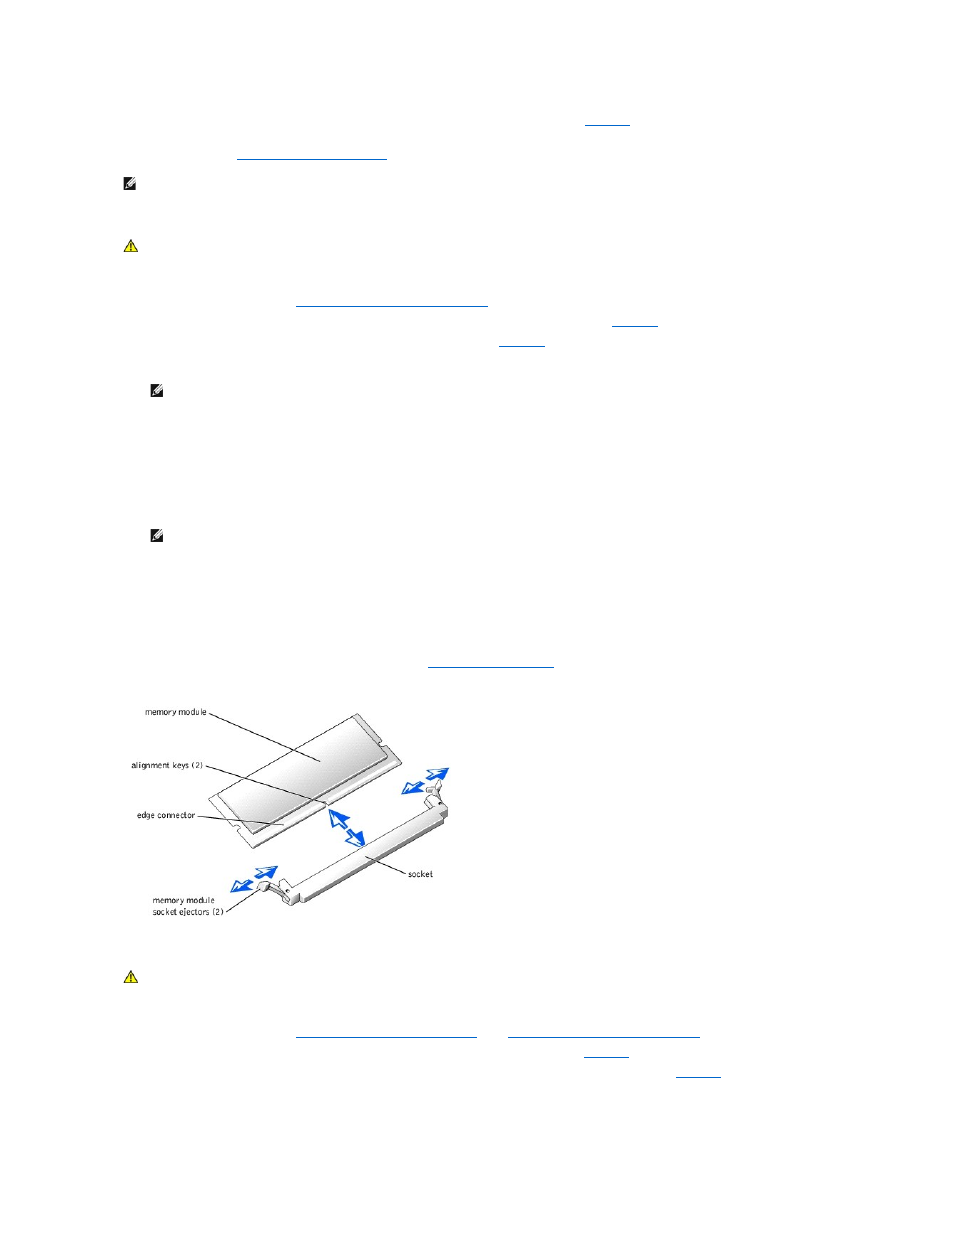
Press the ejectors on the memory module socket down and out, as shown in
, to allow the memory module to be inserted into the socket.
5.
Align the memory module's edge connector with the alignment keys of the memory module socket, and insert the memory module in the socket.
6.
Press down on the memory module with your thumbs while pulling up on the ejectors with your index fingers to lock the memory module into the
socket.
When the memory module is properly seated in the socket, the ejectors on the memory module socket align with the ejectors on the other sockets that
have memory modules installed.
7.
Repeat step 3 through step 6 of this procedure to install the remaining memory modules.
8.
Replace the system cover, and then reconnect the system and peripherals to the power source and turn on the system.
9.
(Optional) Press
The system should have already changed the value to reflect the newly-installed memory.
If the value is incorrect, one or more of the memory modules may not be installed properly.
10.
Repeat step 1 through step 8 of this procedure, checking to ensure that the memory modules are firmly seated in their sockets.
11.
Run the system memory test in the System Diagnostics. See "
Running System Diagnostics
."
Figure 5-5. Installing and Removing a Memory Module
Removing Memory Modules
1.
Turn off the system and attached peripherals, and disconnect the system from the electrical outlet.
2.
Remove the system cover. See "
Removing and Replacing the Front Panel
" and "
Removing and Replacing the System Cover
."
3.
Locate the memory module sockets from which you want to remove the memory module(s). See
.
4.
Press down and out on the ejectors on each end of the socket until the memory module pops out of the socket. See
.
5.
Replace the system cover, and then reconnect the system and peripherals to the power source and turn on the system.
NOTE:
The memory modules must be PC-2100 compliant. For technical specifications for memory modules, see your User's Guide.
CAUTION:
See your System Information Guide for complete information about safety precautions, working inside the computer, and protecting
against electrostatic discharge.
NOTE:
The memory module socket has two alignment keys that allow you to install the memory module in the socket in only one way.
NOTE:
When you turn on the system, press the power button for less than two seconds. If you press the power button for longer than 3 seconds,
the NAS system shuts down and automatically rebuilds its RAID arrays, which could impact system performance for several hours.
CAUTION:
See your System Information Guide for complete information about safety precautions, working inside the computer, and protecting
against electrostatic discharge.