Adding system memory, Removing an expansion card – Dell PowerVault 725N (Rackmount NAS Appliance) User Manual
Page 36
1.
Turn off the system and attached peripherals, and disconnect the system from the electrical outlet.
2.
Remove the system cover. See "
Removing and Replacing the System Cover
."
3.
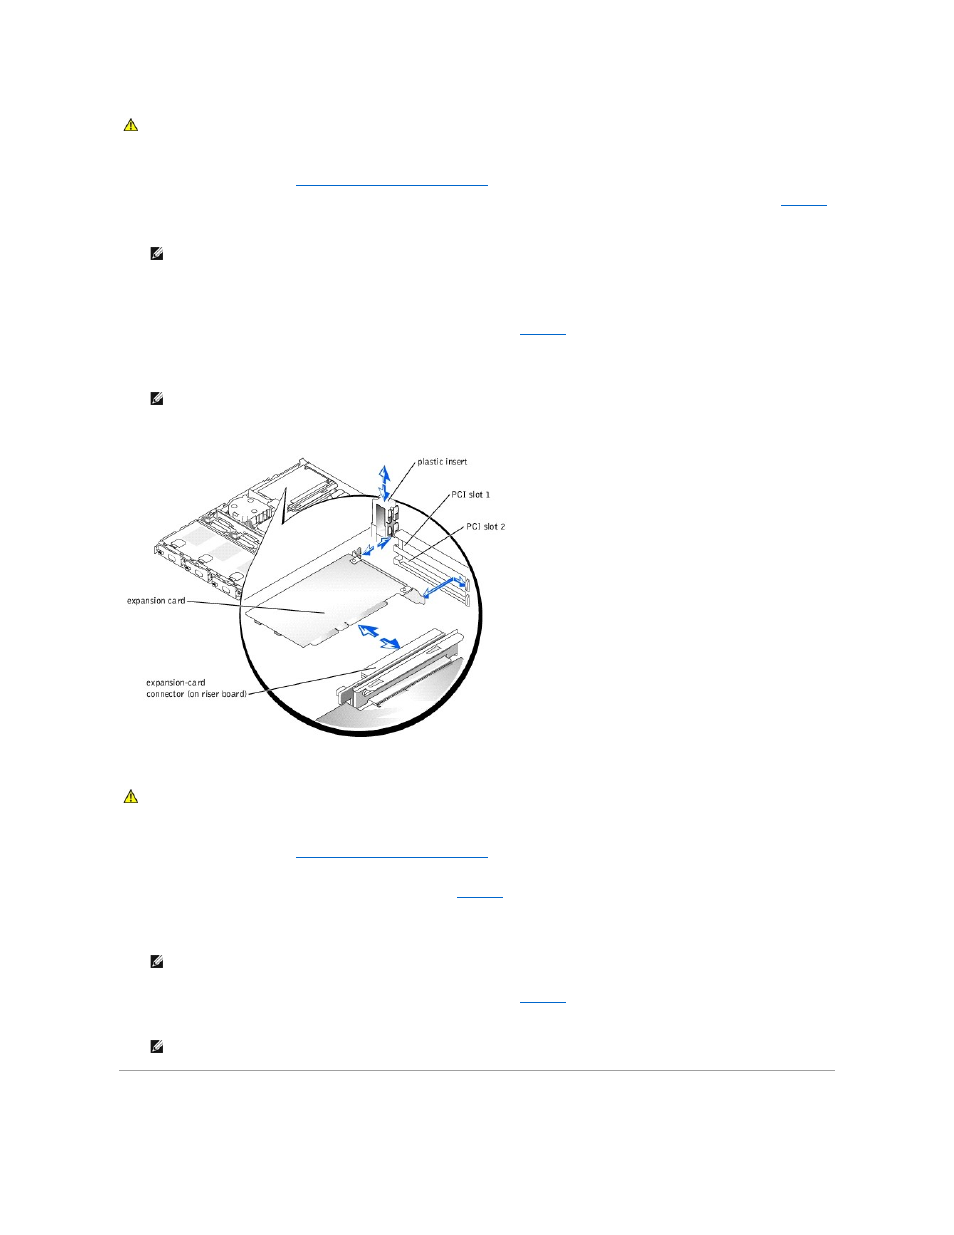
PCI 1 slot is on top and the PCI 2 slot is on bottom.
4.
Insert the expansion card firmly into the expansion-card connector on the riser board until the card is fully seated, being careful not to remove the riser
card from the system board.
5.
Replace the plastic insert, ensuring that the insert is oriented exactly as shown in
.
6.
Connect the expansion-card cable to the external expansion card connector.
7.
Replace the system cover, and then reconnect the system and peripherals to the power source and turn on the system.
Figure 5-4. Installing an Expansion Card
Removing an Expansion Card
1.
Turn off the system and attached peripherals, and disconnect the system from the electrical outlet.
2.
Remove the system cover. See "
Removing and Replacing the System Cover
."
3.
Disconnect the cable that is connected to the expansion card.
4.
Remove the plastic insert adjacent to the expansion card slots. See
5.
Grasp the expansion card and carefully pull it away from the riser-card connector.
6.
If you are permanently removing the card, replace the metal filler bracket over the empty card-slot opening.
7.
Replace the plastic insert, ensuring that the insert is oriented exactly as shown in
.
8.
Replace the system cover, and then reconnect the system and peripherals to the power source and turn on the system.
Adding System Memory
CAUTION:
See your System Information Guide for complete information about safety precautions, working inside the computer, and protecting
against electrostatic discharge.
NOTE:
Keep this bracket in the event you need to remove the expansion card. Filler brackets must be installed over empty expansion card slots to
maintain Federal Communications Commission (FCC) certification of the system. The brackets also keep dust and dirt out of the system and help
keep the system properly cooled by promoting airflow inside the system.
NOTE:
When you turn on the system, press the power button for less than two seconds. If you press the power button for longer than 3 seconds,
the NAS system shuts down and automatically rebuilds its RAID arrays, which could impact system performance for several hours.
CAUTION:
See your System Information Guide for complete information about safety precautions, working inside the computer, and protecting
against electrostatic discharge.
NOTE:
Filler brackets must be installed over empty expansion card slots to maintain Federal Communications Commission (FCC) certification of the
system. The brackets also keep dust and dirt out of the system and help keep the system properly cooled by promoting airflow inside the system.
NOTE:
When you turn on the system, press the power button for less than two seconds. If you press the power button for longer than 3 seconds,
the NAS system shuts down and automatically rebuilds its RAID arrays, which could impact system performance for several hours.