Bio-Rad TC20™ Automated Cell Counter User Manual
Page 20
14
Counting Samples with Multiple Cell Populations
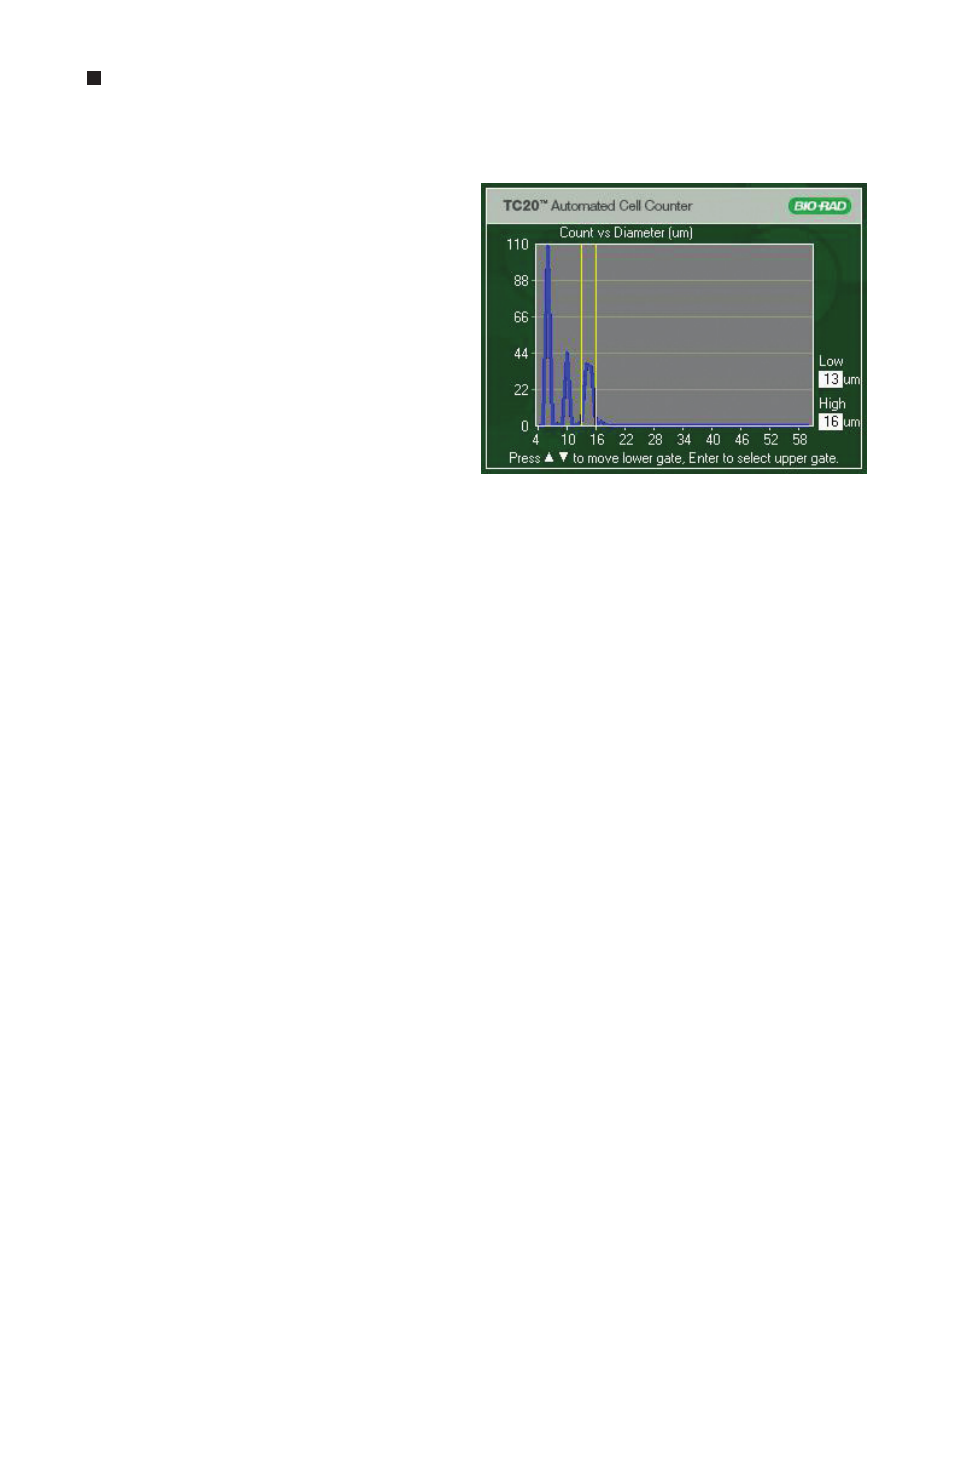
When counting samples with multiple
cell populations that vary greatly in size
(for example, fibroblasts with lymphocyte
background) enable the User defined
gates (Figure 7). A histogram (Figure 13)
will be displayed at the beginning of the
cell count; you can adjust the size gates
to select the population of interest.
Important: This histogram displayed
at the beginning of the count shows
all objects present in the sample. After
you have confirmed cell size range to
be analyzed (delineated by position of
the cell size gates) objects within that
specified cell size range are analyzed
as cells, those with diameters outside of
that size range are excluded from the cell count.
If User defined gates are Disabled, the TC20 cell counter will automatically (without
input from the user) determine what the population of interest is.
If unsure which part of the histogram represents your population of interest, enable the
manual mode and move the size gates to the extremes of the histogram. Then open the
exported JPEG on your computer using the TC20 data analyzer and move the size gates
until only the cells you are interested in are annotated in the image. Use the displayed size
gate positions (in microns) as a guide for subsequent counts on the TC20 cell counter.
To select a population on the histogram displayed at the beginning of the cell count:
1. When the histogram is displayed the low size gate is flashing and positions of gates
(in microns) are displayed in the lower right corner.
2. Use the up or down arrow keys to move the low gate to the desired position.
3. Press Enter to select the high gate. Use the up or down arrow key to move the high
gate to the desired position.
4. Press Enter to confirm position of both gates.
5. Press Enter to proceed with the count, or press Home to start over. Press Home
anytime during the process to start over.
6. Press Home twice to return to the Home screen.
Sample Naming
When sample naming is enabled (see Setting Up Automatic Data Export and
Sample Naming for details) you will be prompted to select a sample name for each
cell count. You can select a name containing up to eight alphanumeric characters.
This unique sample name will be used as the JPEG file name and will be part of the
result record listed in the Previous counts.
To save time, the sample name you selected for the previous count will automatically
be populated for the next count and can be modified, for example manually serialized.
Performing Cell Counts
Fig. 13. Counting samples with multiple cell
populations.