Assemble oc check valve group, Assemble the oc gauge tree – Great Plains V300 Assembly Instructions User Manual
Page 8
Great Plains Mfg., Inc.
8
Opener Down Pressure Kit
148-771M
11/08/2006
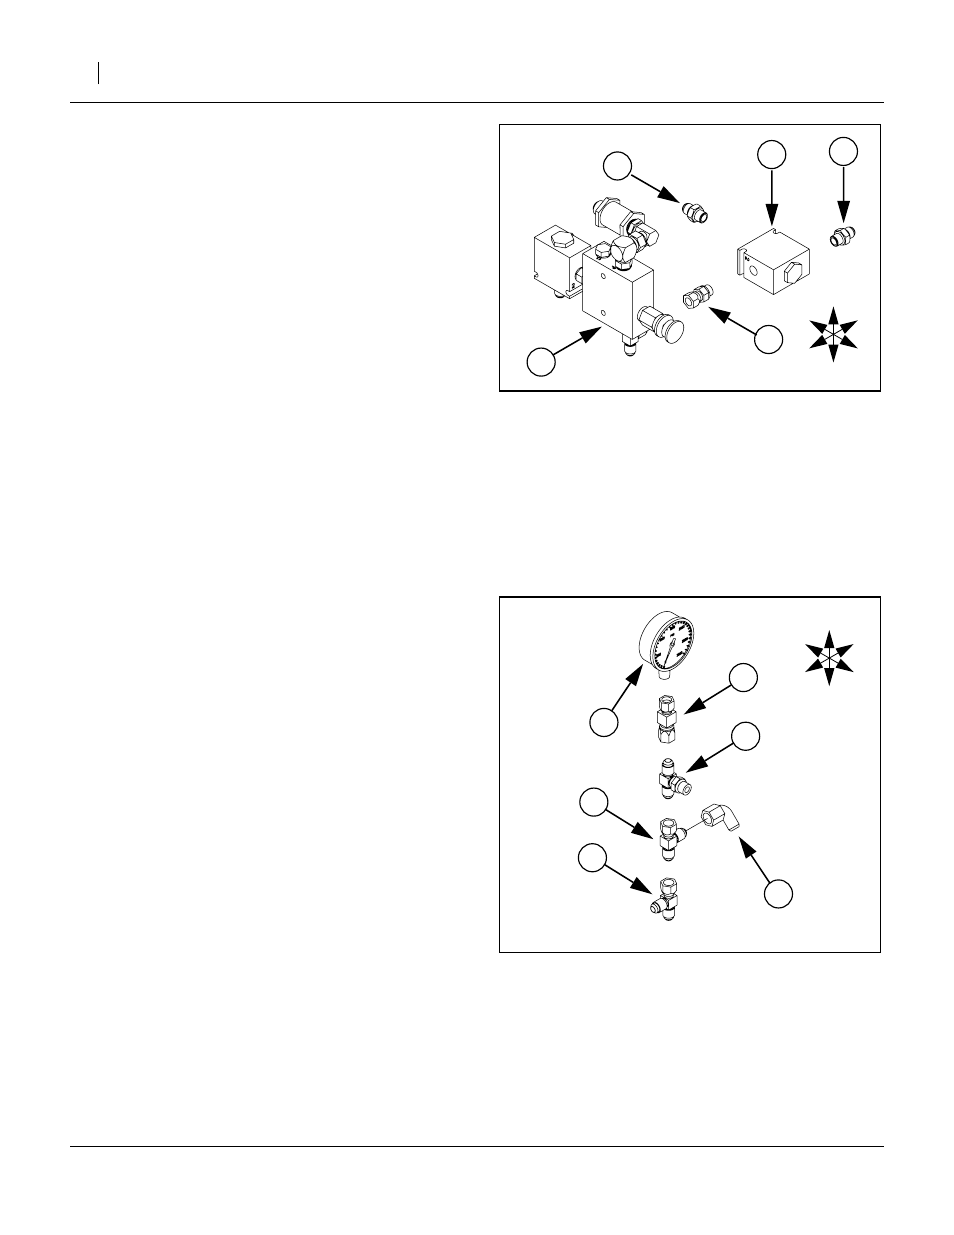
Assemble OC Check Valve Group
(VALVE PO CHECK 4:1 W/9/16FORB).
Note: The ports of check valve (47) are stamped with
numbers “1”, “2” and “3”. Orient the valve so that
Port
➀
is to the Left, port
➁
to the Right and port
➂
to the Rear.
(AD 9/16MORB 9/16MJIC).
Screw the male O-ring boss end into port
➀
of
valve body (47).
(AD 9/16MORB 9/16MJIC).
Screw the male O-ring boss end into port
➂
of
valve body (47).
(AD 9/16MORB 9/16FJIC).
Screw the male O-ring boss end onto check valve
assembly (47) at port
➁
. Tighten jam nut.
58. Screw the check valve assembly (47), onto the
male JIC fitting at the Bottom of adjustment valve
assembly (44). Rotate check valve assembly (47)
so that port
➂
faces Rear before tightening JIC nut.
Assemble the OC Gauge Tree
(TE 9/16MORB 9/16MJIC 9/16MJIC).
Orient the tee end ports up and down. The O-ring
boss port will face Front in final assembly.
(AD 9/16FJIC 1/4FNPT).
Screw JIC end onto the Top of fitting (60). Tighten.
(TE 9/16MJIC 9/16MJIC 9/16FJIC).
Screw female JIC end onto the Bottom of fitting
(60). Orient the side port to point Left, and tighten.
(EL 9/16MJIC 9/16FJIC).
Screw it onto the center port off tee fitting (50). Ori-
ent the male end to point down and slightly for-
ward, and tighten.
(TE 9/16MJIC 9/16MJIC 9/16FJIC).
Screw female JIC end onto the Bottom of fitting
(50). Orient the side port to point Right. Tighten.
(PRESSURE GAUGE 3000 PSI).
Apply pipe compound and screw into fitting (61).
Tighten so that the gauge faces Front.
Figure 12
OC Check Valve
25176
T
B
R
L
F
R
➂ ➀
➁
Figure 13
OC Gauge Tree
25177
T
B
R
L
F
R