Transmig vaf4hd – Tweco VAF4HD Transmig User Manual
Page 41
TRANSMIG VAF4HD
Manual 0-5269
3-23
INSTALLATION, OPERATION AND SETUP
Installing Tweco No. 5 Adaptor
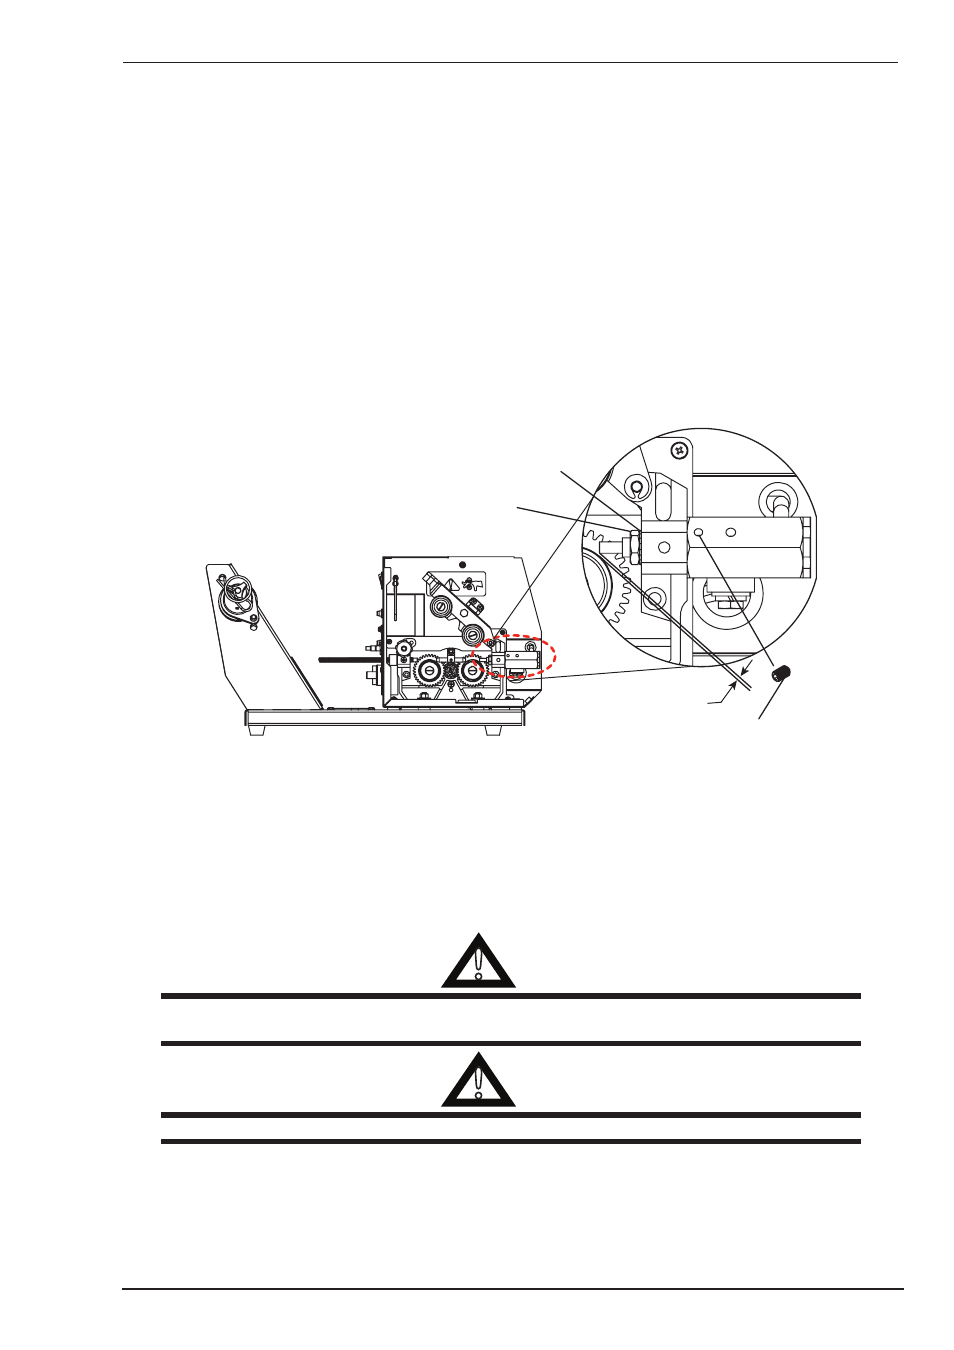
1. From the front of the Tweco No. 5 Adaptor, slide the outlet guide through. Insert the Tweco No. 5 Adaptor
into the body of the feed plate. Note that top surface of Tweco No. 5 Torch Adaptor shall be parallel with
the base plate.
2. Place the M12 Lock Washer and M12 Lock Nut over the threaded end of the Tweco No. 5 Torch Adaptor.
Make sure the weld cable and the gas hose fit neatly through the internal panel and the gas hose has no
kinks that might restrict gas flow.
Tighten the M12 Lock Nut securely.
3. Install the Feed Roll and Idler Gear.
4. Push the outlet guide forward, to ensure that it has less than approximately 1mm clearance to the feed
roll. Refer to “D” in Figure 3-20.
Use 2mm Allen Key supplied to install the M4 x 6 set screw supplied as shown and tighten, to secure the
outlet guide in place.
Lock Washer, M12
Lock Nut, M12
D
Set Screw, M4 ×6
Art # A-11769
Figure 3-20
5. Use Phillips screw driver to install the M6 × 14 screw in the wirefeed plate.
6. Lower the Pressure Roll Arm and swing the Pressure Adjusting Knob back into place. Replace the Finger
Guard and tighten the two M6 Thumb Screws. Please refer to Figure 3-15.
7. Replace the Front Panel and wiring as outlined in Figures 3-15 and 3-14.
8. Replace the Cover Panel as outlined in Figures 3-13 and 3-12.
!
WARNING
Ensure that when replacing the Front Panel and Cover Panel the earth wires are correctly and securely
connected. Also ensure that the cover panel screws have the correct star washers in place.
!
WARNING
Fully tighten all fasteners.