tekmar 483 tN4 Gateway User Manual
Page 18
© 2011
D 483 - 12/11
18 of 20
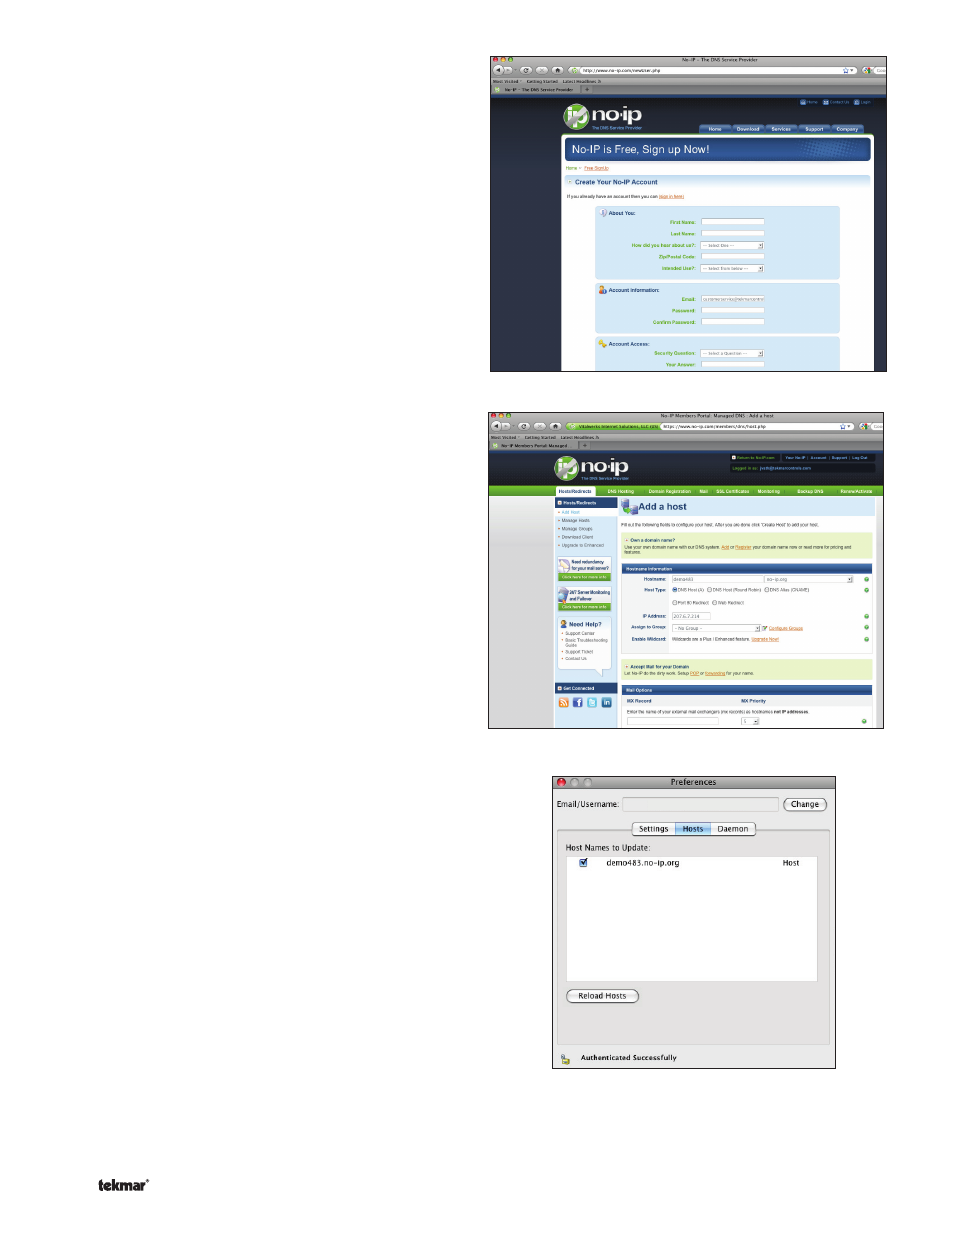
Dynamic IP Address
If the ISP has provided a dynamic IP address, then a free
dynamic DNS service is recommended. There are many
free dynamic DNS services available. tekmar suggests to
use a free service from No-IP.
STEP 1) Go to the web site at http://www.no-ip.com
STEP 2) Create an account.
---------------------------------------------------------------------------
IMPORTANT NOTE:
An e-mail address is used to activate the No-IP account.
The same e-mail account cannot be used again to create
another No-IP account. Therefore, it is recommended to
use the building owner’s e-mail address. This requires the
building owner to read the e-mail and click on the link to
activate the No-IP service.
---------------------------------------------------------------------------
STEP 3) Open the e-mail sent from No-IP and click on
the link to activate the account. This must be
done within 48 hours of creating the account.
STEP 4) Go to web site at http://www.no-ip.com and login
using your account information.
STEP 5) Click “Add a host”.
STEP 6) Enter the desired hostname and the domain
using the pull down menu. Record the hostname
and domain name for future reference. Click
“Add a Host”.
STEP 7) A confirmation page with all the settings will be
shown.
All No-IP settings are now complete and you can logout
of the No-IP web site. Now the No-IP update client must
be installed on the Mac web host computer.
STEP 8) Download the No-IP Dynamic DNS Update
Client software for Mac at http://www.no-ip.com/
downloads.php
STEP 9) Install the software to the Applications folder.
The computer username and password may be
required.
STEP 10) Click on Finder, then click on the Applications
Folder.
STEP 11) Find the No-IP DUC application and double click
to start.
STEP 12) Double click on the Lock symbol. Enter your
No-IP username and password and click ok.
STEP 13) Check mark your host name.
STEP 14) Click Daemon and then check mark “Launch
Daemon at System Startup”.
The installation of the No-IP service is now complete and
the window can now be closed by clicking on the red dot
in the upper left hand corner.
Creating an Account
Creating a Host Name
DynDNS Update Client