Photoflex FV-XT2MLDKIT Medium LiteDome Deluxe Kit User Manual
Page 2
Visit photoflex
lightingschool
.com® for the best free learning resource!
For detailed specifications,
product tutorial videos
and more, please visit
www.photoflex
®
.com
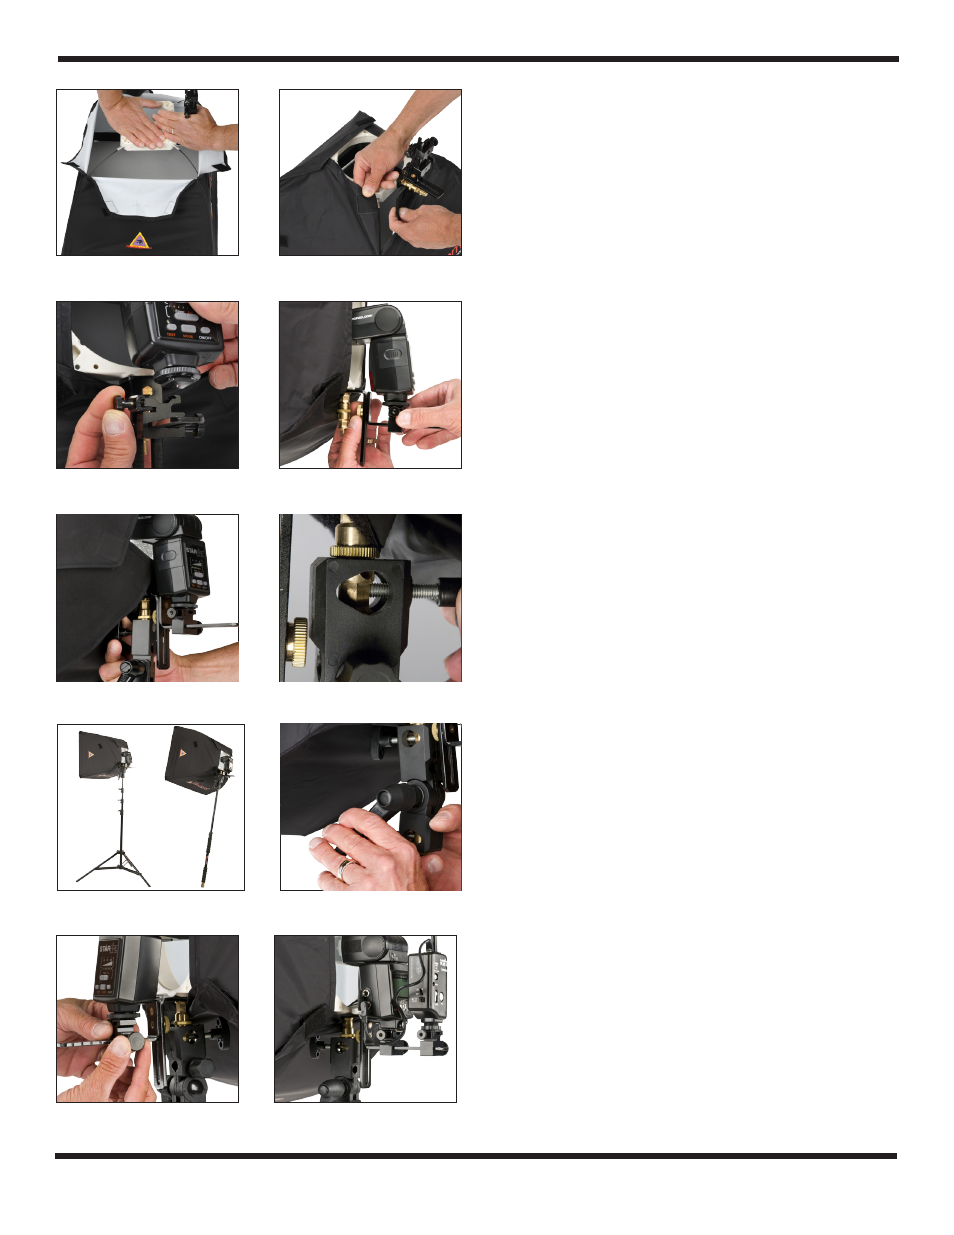
7. After all rods are inserted, with the softbox on the floor,
push down at each corner point to be sure each rod is
all the way into its connection hole (Fig. 9). Tip: For
disassembly, use this same technique of pushing down on
the rod corner to make it easier to remove the rod. You
may also release the QRC to allow for easier disassembly.
8. The flaps of the softbox near the connector ring can be
connected at the corners using the Velcro
®
sewn into the
flaps (Fig. 10).
9. The softbox can be changed to a vertical or horizontal
position on the connector ring by removing the rods from
the connector & reassembling after a 90 degree rotation.
Align the Vertical Adjustment Screw
10. The vertical adjustment screw for the Adjustable
ShoeMount adapter needs to be set and tightened before
the next step, as the MultiClamp blocks easy access to
this adjustment.
11. Place your shoe flash in position by attaching your
flash to the shoe mount closes to the softbox. Loosen
the adjustment screw on the ShoeMount just enough to
slide your flash shoe into the mount, then tighten the
adjustment screw securely (Fig. 11). If you will be using a
radio remote that is stacked under your shoe flash, be sure
to set it up the same way for this adjustment.
12. Adjust the height of the vertical riser so that your flash is
lined up in the center of the ring (Fig. 12).
Using the Heavy-Duty Aluminum Swivel to Attach Assembly
to a LiteStand
®
or LiteReach
®
10. Secure the swivel onto the stud that attached the
ShoeMount Hardware to the OctoConnector ring
(Fig. 13).
11. After inserting the stud into the swivel, tighten the
set-screw knob against one of the flat sides of the stud to
ensure a secure fit (Fig. 14).
12. Secure entire assembly to top of light stand or LiteReach
(Fig. 15).
13. The handle can be repositioned after tightening by pulling
the handle outward, away from the clamp, then moving to
desired position and resetting the handle (Fig. 16).
Connecting Your Flash
18. Adjust the ShoeMount set-screw on the horizontal rail to
position the flash as close as possible to the softbox
(Fig. 20).
19. There is a second ShoeMount included for use with a radio
remote (Fig. 21).
20. The radio remote can also be mounted upside down to
facilitate easier access to your flash (Fig. 22).
21. Some radio remotes can be used stacked between the
ShoeMount and flash (Fig. 23) Tip: Use your flash with
the widest angle setting or use a dome diffuser for added
diffusion
(Fig. 24).
Figure 13.
Figure 10.
Figure 9.
Figure 11.
Figure 15.
Figure 14.
Figure 12.
Figure 16.
Figure 21.
Figure 20.