Motor installation – E-flite Twist 3D 480 ARF User Manual
Page 9
9
E-flite Twist 3D 480 ARF Assembly Manual
Always use threadlock on metal-to-metal fasteners
to prevent them from vibrating loose.
2. Insert the bolt in the landing gear. Place an M3
washer, then an M3 nut on the bolt. Use needle
nose pliers and a 5.5mm nut driver to tighten the
nut, securing the wheel to the landing gear. Make
sure the wheel still rotates freely once the nuts are
fully tightened.
3. Repeat steps 1 and 2 to attach the remaining
wheel to the landing gear.
4. Attach the landing gear to the fuselage using
two M3 x 10 socket head bolts, two M3 washers
and two M3 lock washers. Slide the lock washer on
the bolt, then the washer, before securing the gear.
Use a 2.5mm hex wrench to tighten the bolts.
Motor Installation
Required parts
Fuselage assembly Flight battery
Speed control
Motor with hardware
Receiver
Hook and loop tape
Transmitter
Hook and loop strap
M3 washer (4)
M3 blind nut (4)
M3 lock washer (4) M3 x 10 socket head bolt (4)
Required Tools and Adhesives
Threadlock
Scissors
Hex wrench: 2.5mm
1. Remove the hatch from the fuselage by lifting it
up at the rear. The rear is held in position using a
magnet and the front has tabs that lock the hatch to
the fuselage. Set the hatch aside in a safe location
until later.
Always use threadlock on metal-to-metal fasteners.
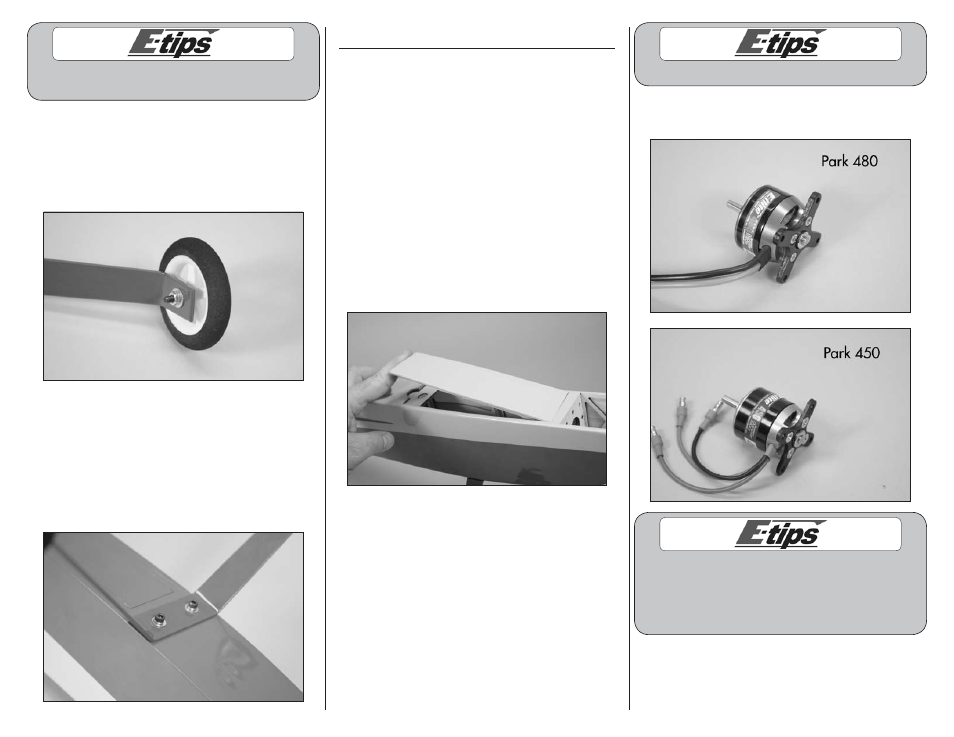
2. Prepare your motor by attaching the mount to the
motor using the hardware provided.
There are multiple holes located on the firewall to
mount a variety of motors. The Park 480 will mount
with a 45 degree orientation of the X-mount and
the Park 450 will mount with a vertical/horizontal
orientation as shown in the following photos.