Landing gear installation – E-flite Twist 3D 480 ARF User Manual
Page 8
8
E-flite Twist 3D 480 ARF Assembly Manual
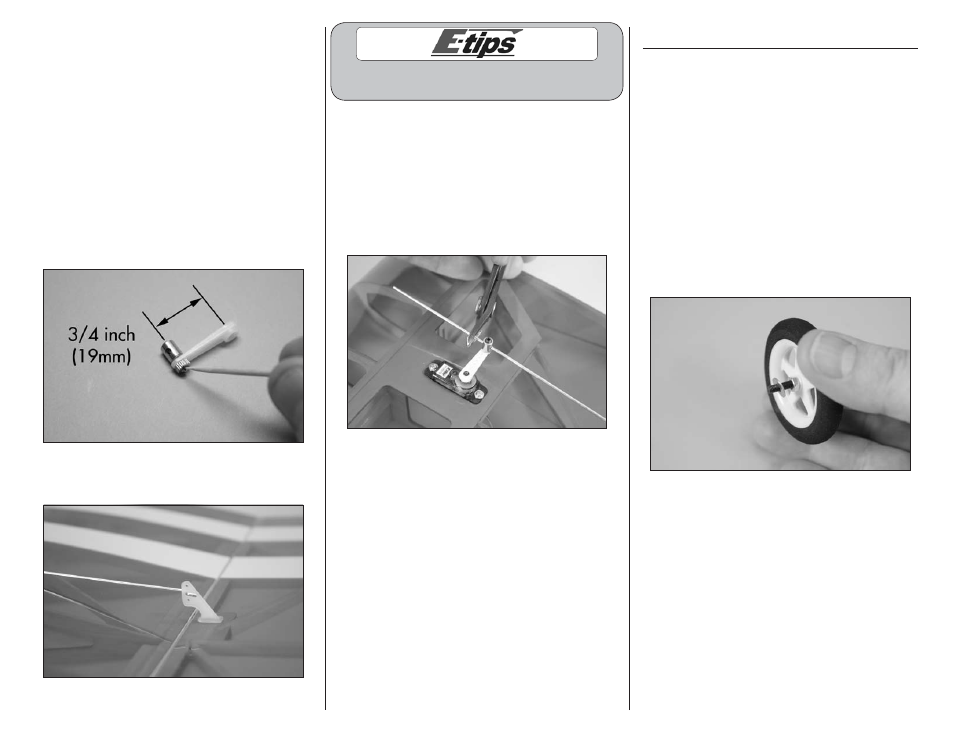
4. Use a pin vise and 5/64-inch (2mm) drill bit
to enlarge the hole in the arm that is 3/4 inch
(19mm) from the center of the arm. Attach the
pushrod connector to the servo arm. The included
washers may be used to reduce the amount of play
in the connector when it is installed. Tighten the nut
so that it is secure on the arm but is not too tight.
There should be a small amount of play between
the arm and the connector, and the connector
should be able to rotate freely on the arm. Use a
very small amount of medium CA on a toothpick
to secure the nut to the bottom of the connector
threads. Do not use thin CA for this step as it can
wick through the nut and glue the connector to the
arm. Make sure the connector still rotates freely in
the arm after the glue is cured.
5. Pass the Z-bend in the 2.0mm x 170mm
pushrod through the center hole of the control horn.
Always use threadlock on metal-to-metal fasteners
to prevent them from vibrating loose.
6. The pushrod wire will pass through the hole in
the micro screw-lock connector. With the servo
centered, secure the horn to the servo using the
screw provided with the servo and a #0 Phillips
screwdriver. With the control surface and servo
centered, use a 1.5mm hex wrench to tighten the
setscrew in the connector to secure the pushrod
wire. Use side cutters to trim the pushrod so it is
1/4 inch (6mm) past the connector as shown.
7. Repeat steps 1 through 6 to install the remaining
aileron control horn and pushrod.
Landing Gear Installation
Required parts
Fuselage
Wheel (2)
M3 nut (4)
M3 washer (6)
M3 lock washer (2) Aluminum landing gear
M3 x 10 socket head bolt (2)
M3 x 15 socket head bolt (2)
Required Tools and Adhesives
Pin vise
Drill bit: 1/8-inch (3mm)
Needle nose pliers Nut driver: 5.5mm
Hex wrench: 2.5mm
1. Slide the M3 x 15 socket head bolt through the
hole in the wheel. Thread an M3 nut on the bolt,
but leave it loose enough so the wheel can spin
freely on the bolt. Slide an M3 washer on the bolt.