E-flite Twist 3D 480 ARF User Manual
Page 18
18
E-flite Twist 3D 480 ARF Assembly Manual
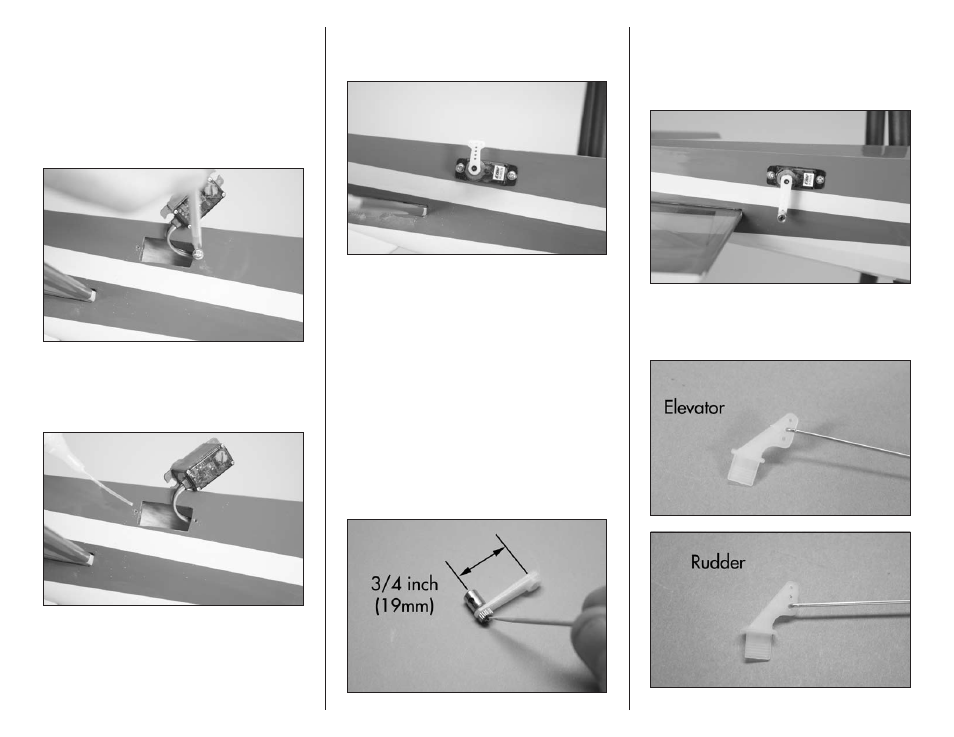
2. Fit the servo in the opening on the left side of
the fuselage for the elevator with the output shaft
facing the rear of the fuselage. Guide the lead
into the fuselage toward the receiver. Plug the lead
into the elevator port of the receiver. Use a #1
Phillips screwdriver to thread a servo mounting
screw into each of the holes to cut threads in
the surrounding wood. Remove the screw before
moving to the next step.
3. Apply 1–2 drops of thin CA in each of the holes
to harden the surrounding wood. This will harden
the threads so the screws do not easily strip the
surrounding wood.
4. Secure the elevator servo in the fuselage using
the screws provided with the servo and a #1
Phillips screwdriver.
5. Use a pin vise and 5/64-inch (2mm) drill bit
to enlarge the hole in the arm that is 3/4 inch
(19mm) from the center of the arm. Attach the
pushrod connector to servo arm. The included
washers may be used to reduce the amount of play
in the connector when it is installed. Tighten the nut
so that it is secure on the arm, but is not too tight.
There should be a small amount of play between
the arm and the connector, and the connector
should be able to rotate freely on the arm. Use a
very small amount of medium CA on a toothpick
to secure the nut to the bottom of the connector
threads. Do not use thin CA for this step as it can
wick through the nut and glue the connector to the
arm. Make sure the connector still rotates freely in
the arm after the glue is cured.
6. Remove the attached servo horn from the servo
using a #0 Phillips screwdriver. Attach the servo
arm prepared in step 7 on the elevator servos
using the screw removed from the servos and a #0
Phillips screwdriver.
7. Pass the Z-bend in the elevator pushrod through
the center hole (inner hole for the rudder) of the
control horn.