Canopy installation – E-flite Twist 3D 480 ARF User Manual
Page 19
19
E-flite Twist 3D 480 ARF Assembly Manual
8. Slide the pushrod into the hole in the pushrod
connector. Insert the control horn in the slot in
the elevator.
9. Slide the control horn backplate over the end
of the control horn from the opposite side of the
control surface. Snap the backplate so the horn is
held tight against the control surface. Apply 2–3
drops of thin CA to the backplate where it contacts
the control horn to keep it from accidentally coming
loose in flight.
Always use threadlock on metal-to-metal fasteners
to prevent them from vibrating loose.
10. Use the radio system to center the elevator
servo. Center the elevator so it is aligned with
the stabilizer. Tighten the setscrew in the pushrod
connector using a 1.5mm hex wrench to secure
the pushrod wire. Use side cutters to trim the
excess length of wire 1/4 inch (6mm) beyond the
connector as shown.
11. Repeat steps 1 through 10 to install the rudder
servo and hardware.
Canopy Installation
Required parts
Fuselage assembly Canopy
Pilot (optional)
Required Tools and Adhesives
Low-tack tape
Canopy glue
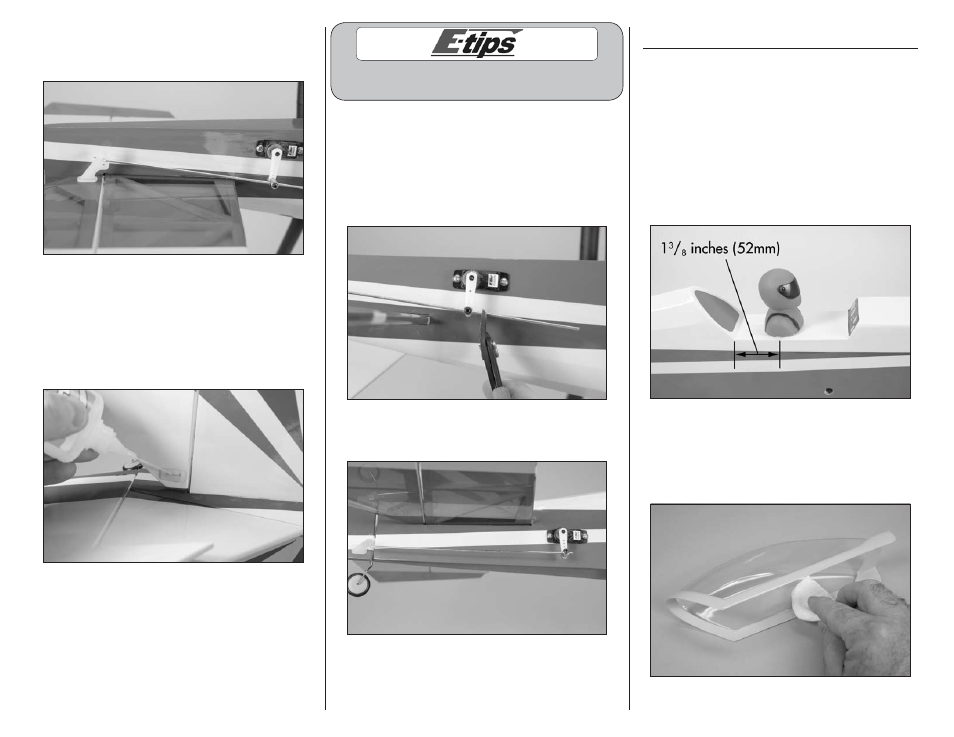
1. (Optional Pilot) Use silicone adhesive to glue the
pilot figure in the cockpit. The pilot will be centered
1
3
/
8
inches (52mm) forward of the back of the
cockpit as shown.
2. Thoroughly clean the inside of the canopy with
window cleaner and a paper towel. Avoid touching
the inside of the canopy after it has been cleaned
to prevent fingerprints and debris from being
inaccessible after the canopy is glued on.