E-flite Twist 3D 480 ARF User Manual
Page 16
16
E-flite Twist 3D 480 ARF Assembly Manual
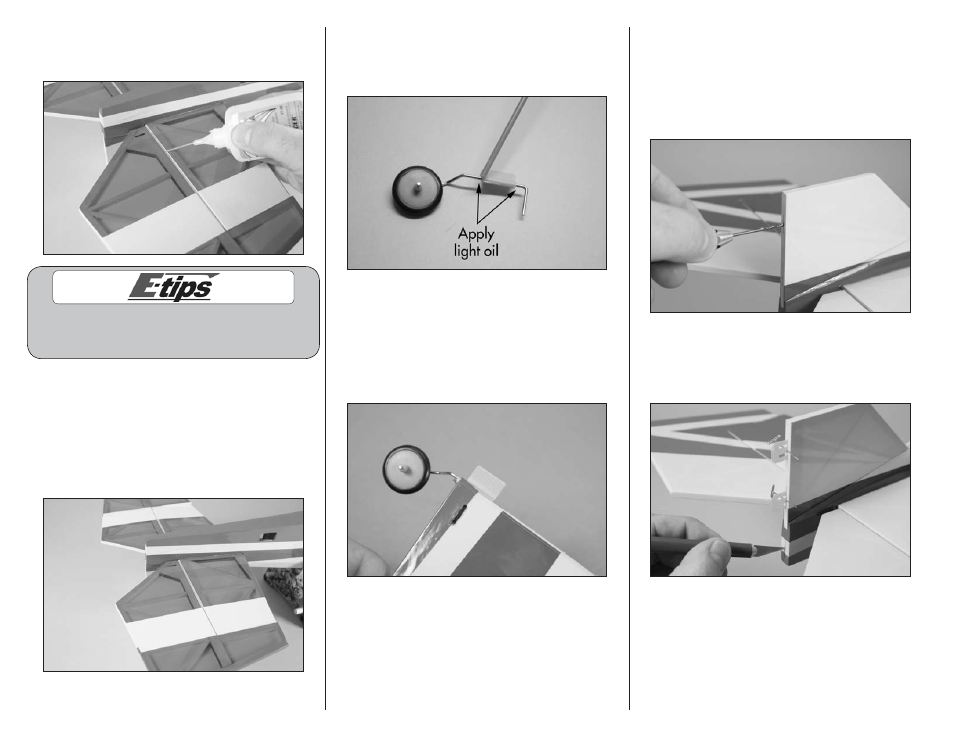
6. Saturate each of the hinges with thin CA on both
the top and bottom of the hinge. Set the assembly
aside to cure.
Do not use CA accelerator when gluing the hinges.
The CA must be allowed to soak into the hinge for the
best bond between the hinge and surrounding wood.
7. Once the CA and epoxy has cured, check
that all the hinges are secure by gently trying to
separate the elevators from the stabilizer. If any
hinges are loose, re-apply CA to the loose hinges.
Break in the hinges by working the stabilizer up
and down a number of times. This will reduce
the initial load on the servo when the servo is
connected for the first time.
8. Place a drop of light machine oil so it wicks into
the hinge knuckle along the tail gear wire. This
will keep the epoxy from entering the knuckle and
gluing the wire inside of it.
9. Fit the tail wheel assembly into the slot at the
bottom of the rudder. The bushing will rest in fully
in the slot. If not, use a hobby knife and #11 blade
to trim the slot until the knuckle fits. Once fit, lightly
sand the wire where it enters the rudder. Use a
small amount of 5-minute epoxy to glue the tail
wheel into position in the rudder.
10. Use a pin vise and 1/16-inch (1.5mm) drill
bit to drill a hole in the center of each hinge
slot to create a tunnel for the CA to wick into.
This will allow the CA to penetrate the hinge,
creating a better bond between the hinge and
surrounding wood. Prepare the rudder and
vertical fin at this time.
11. Insert the hinges in the fin. The T-pin will rest
flat on the trailing edge of the fin. Use a hobby
knife to remove the covering from the slot at the
bottom of the fuselage for the tail wheel bearing.