E-flite Twist 3D 480 ARF User Manual
Page 13
13
E-flite Twist 3D 480 ARF Assembly Manual
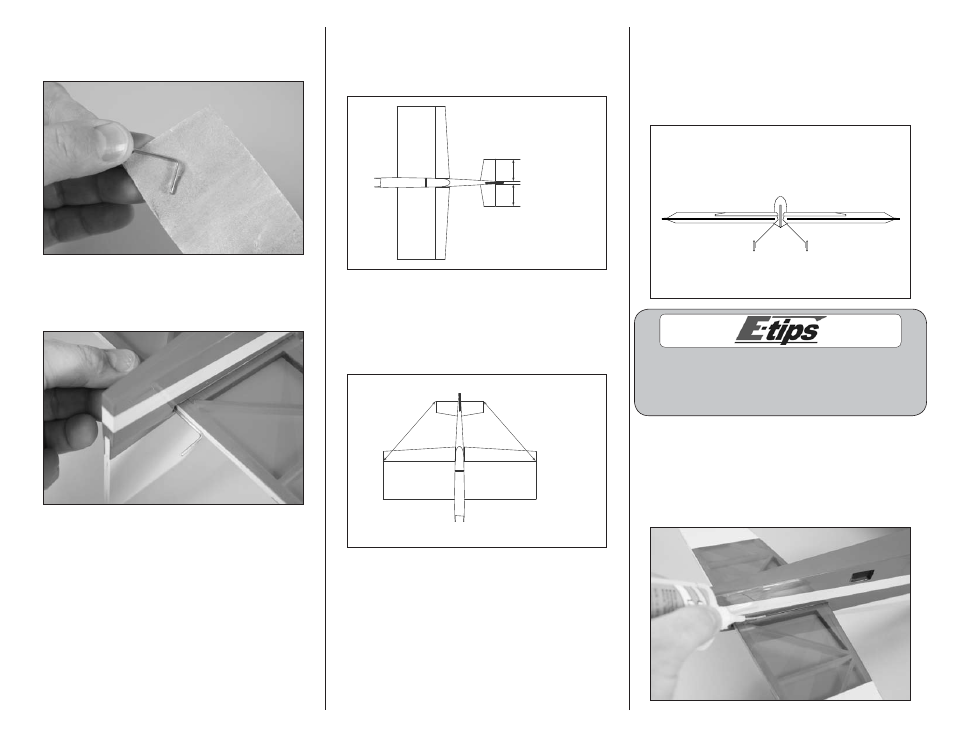
3. Remove the joiner wire from the elevators. Use
medium grit sandpaper to roughen the joiner rod
where it will contact the elevators.
4. Place the joiner wire in the slot for the stabilizer.
Once the joiner is in position, slide the stabilizer
into the slot in the fuselage.
5. Slide the stabilizer into the slot at the rear of the
fuselage. Measure the distance from each stabilizer
tip to the fuselage centerline to make sure the
stabilizer is centered.
A
A
A=A
6. Measure the distance from each stabilizer tip to
the outside corner of the aileron hinge line. These
measurements must match as close as possible.
Adjust the position of the stabilizer if necessary to
position the stabilizer.
A=A
A
A
7. Stand back 8–10 feet (2–3 meters) and view
the aircraft from the rear. Check the alignment
between the wing and stabilizer. They must be
equal distance on each side as shown. If not,
lightly sand the stabilizer saddle to correct any
alignment problems.
Align with top of wing
Do not use CA accelerator when gluing the
stabilizer to the fuselage. The CA must be
allowed to soak into the fuselage and stabilizer
for the best bond between the two surfaces.
8. Recheck recheck all of your measurements
to make sure everything is in alignment. Once
satisfied, wick thin CA into the joint between the
stabilizer and fuselage. Allow the CA to fully cure
before proceeding. Use care not to accidentally
glue the joiner wire.