2 titration vessel setup – Metrohm 756 KF Coulometer User Manual
Page 13
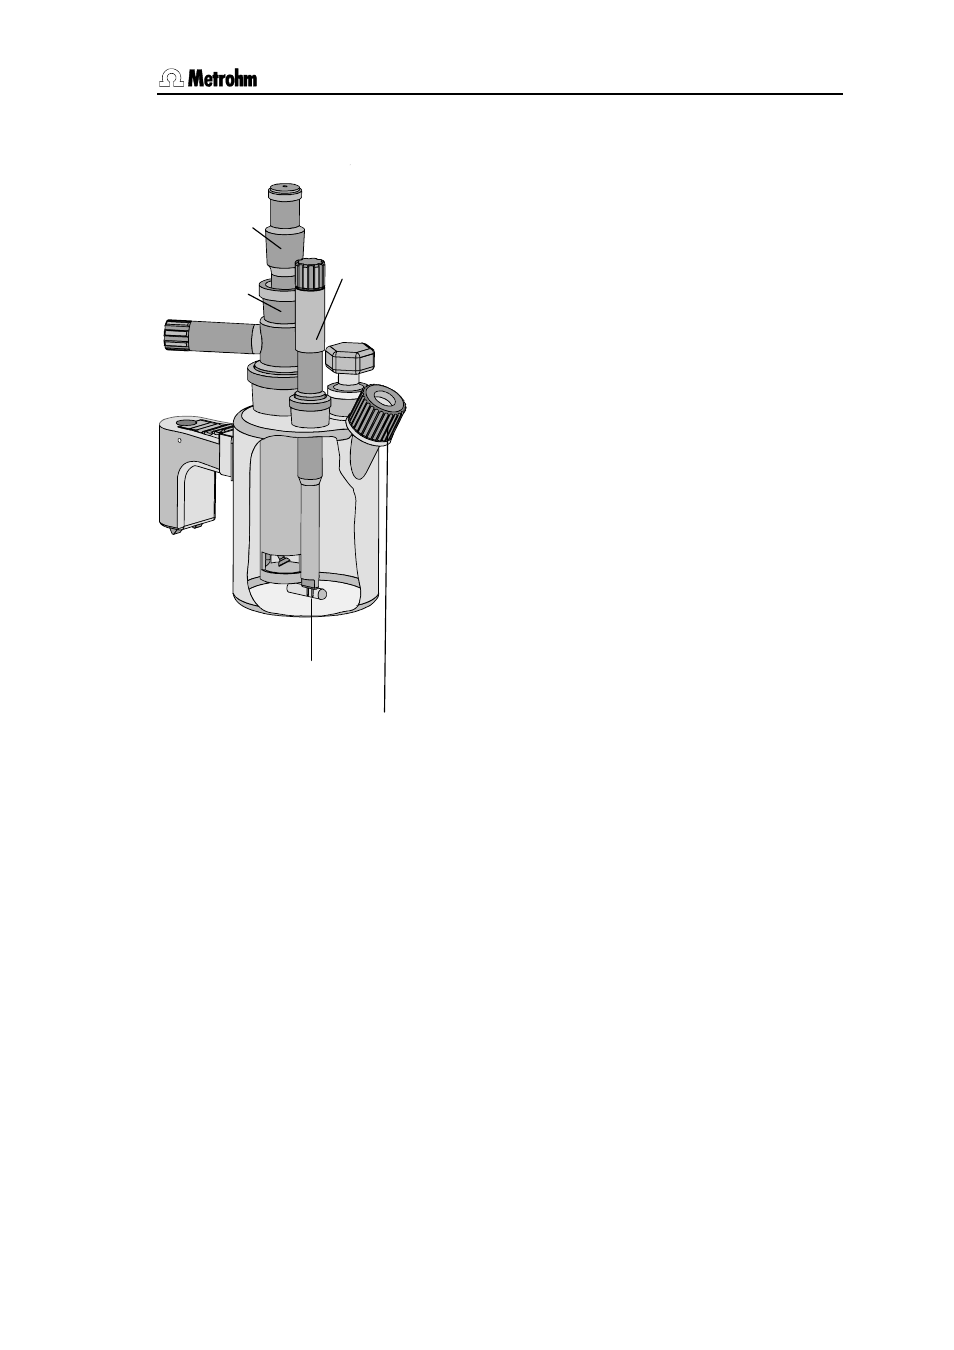
2.2 Titration vessel setup
756/831 KF Coulometer, Instructions of Use
5
2.2 Titration vessel setup
1) When cutting the ground joint sleeves take care that no rough
edges are formed. The ground joint sleeves must not project
beyond the lower edge of the joint.
If no ground joint sleeves are used then the joints must be
greased. In this case the joints must be checked periodically
and re-greased while otherwise problems with blocked joints
could occur.
2) For the generator electrode with diaphragm: Fill the generator
electrode with approx. 5 ml catholyte. Fill the titration vessel with
anolyte until the anolyte level is 1-2 mm above that of the ca-
tholyte (approx. 100 ml).
1. Attach titration vessel with holder to the support
rod.
2. Place stirring bar in titration vessel.
3. Cut 6.2713.XXX ground joint sleeves to the cor-
rect lengths and use them for all the joints of the
inserts
1)
.
4. Insert indicator electrode in the left-hand joint
opening, screw on 6.2104.020 electrode cable
and plug it into the "Ind.El" socket of the Coulom-
eter.
Mark the screw head of the electrode cable so
that it is impossible to confuse the indicator and
generator electrodes!
5. Insert generator electrode in the central joint
opening, screw on 6.2104.120 electrode cable
and plug it into the "Gen.El" socket of the Cou-
lometer.
6. Fill the drying tube with molecular sieve and insert
into generator electrode.
7. Place septum in the screw cap and screw this
onto the titration vessel. Only tighten it enough to
ensure that it is tight. (The septum should not be
deformed!)
8. Fill titration vessel with 80-100 ml reagent
2)
.
9. Close last joint opening: either with glass stopper,
aspiration device or gas inlet from oven (see
pages 114ff).
Drying tube
Generator
electrode
Stirring bar
Septum stopper
Indicator
electrode