Bowers Group Snapmatic User Manual
Page 2
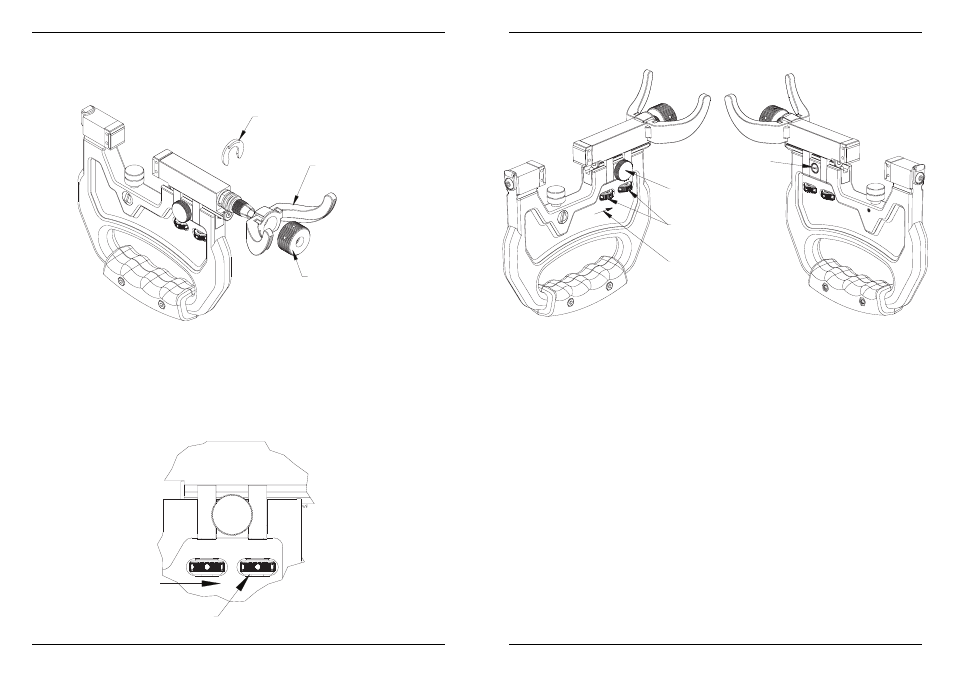
FITTING INDICATOR SHIELD
MONTAGE DE LA PROTECTION ANTI-CHOCS
ANVIL ADJUSTMENT
POSITIONNEMENT DES TOUCHES DE MESURE
THUMB WHEEL ORIENTATION
BOUTON DE RÉGLAGE – DROITE / GAUCHE
TIGHTENING LOCKNUTS
SERRAGE DES ÉCROUS MOLLETÉS
Retaining Ring
Entretoise
Indicator Shield
Protection anti-chocs
Thumb wheel
Bouton de réglage
Locknuts
Écrous molletés
Tighten
Sens de serrage
Thumb wheel screw
Vis de serrage du bouton
de réglage
CLAMP NUT
Collier de serrage
1. Unscrew and remove clamp nut, fit indicator shield and retaining ring and replace
clamp nut.
1. Desserrer et soulever le collier de serrage. Monter l’entretoise et la protection anti-
chocs. Remplacer et resserrer le collier de serrage.
1. Loosen lock nuts using Allen key as a lever (if required).
2. Rotate thumb wheel to adjust position of anvil and to set against master, finger tighten lock
nuts. (Important: do not try to rotate thumb wheel with slide locked in position).
3. Finally, evenly lightly tighten lock nuts using Allen key (if required) to secure slide.
1. Desserrer les deux écrous molletés en utilisant la clef à 6 pans comme levier (si besoin est)
2. Tourner le bouton de réglage pour changer la position de la touche de mesure, puis resserrer
les écrous molletés initialement avec les doits. Important : Ne jamais essayer de tourner le
bouton de réglage sans avoir au préalable desserré les écrous molletés.
3. Reserrer soigneusement les écrous molletés en utilisant la clef à 6 pans (si besoin est) afin de
fixer la touche de mesure en position.
The thumb wheel can be fitted to the rear of the gauge by removing the thumb wheel screw
and reversing the assembly.
Le bouton de réglage peut être monté sur la coté droite ou la coté gauche de l’appareil en le
devissant entièrement et en l’interchangeant avec la vis de serrage.
Tighten
Resserrer
Note gap when nuts tightened
Noter la distance entre les écrous et le cй