Bowers Group M&W Test Indicator 422 Series User Manual
Test indicator 422 series, Test indicator instructions

&RQWDFW3RLQWZLWKÝ3RVLWLRQ
7KH LQGLFDWRU LV GHVLJQHG WR SURYLGH D
WUXH UHDGLQJ ZKHQ WKH DQJOH EHWZHHQ WKH
FRQWDFWSRLQWDQGFRPSRQHQWLV
$Q\ FRQILJXUDWLRQ RI DQ DQJOH RWKHU
WKDQ QHHGV WKH GLVSOD\HG YDOXH WR
EHFRUUHFWHG )RUDSRVLWLRQRIWKH
FRUUHFWYDOXHLV
'LVSOD\HGYDOXH[
Test Indicator 422 Series
Please carefully review these instructions to ensure proper and accurate
use of your new Test Indicator.
visit
www.moore-and-wright.com
Partners in Precision
TEST INDICATOR INSTRUCTIONS
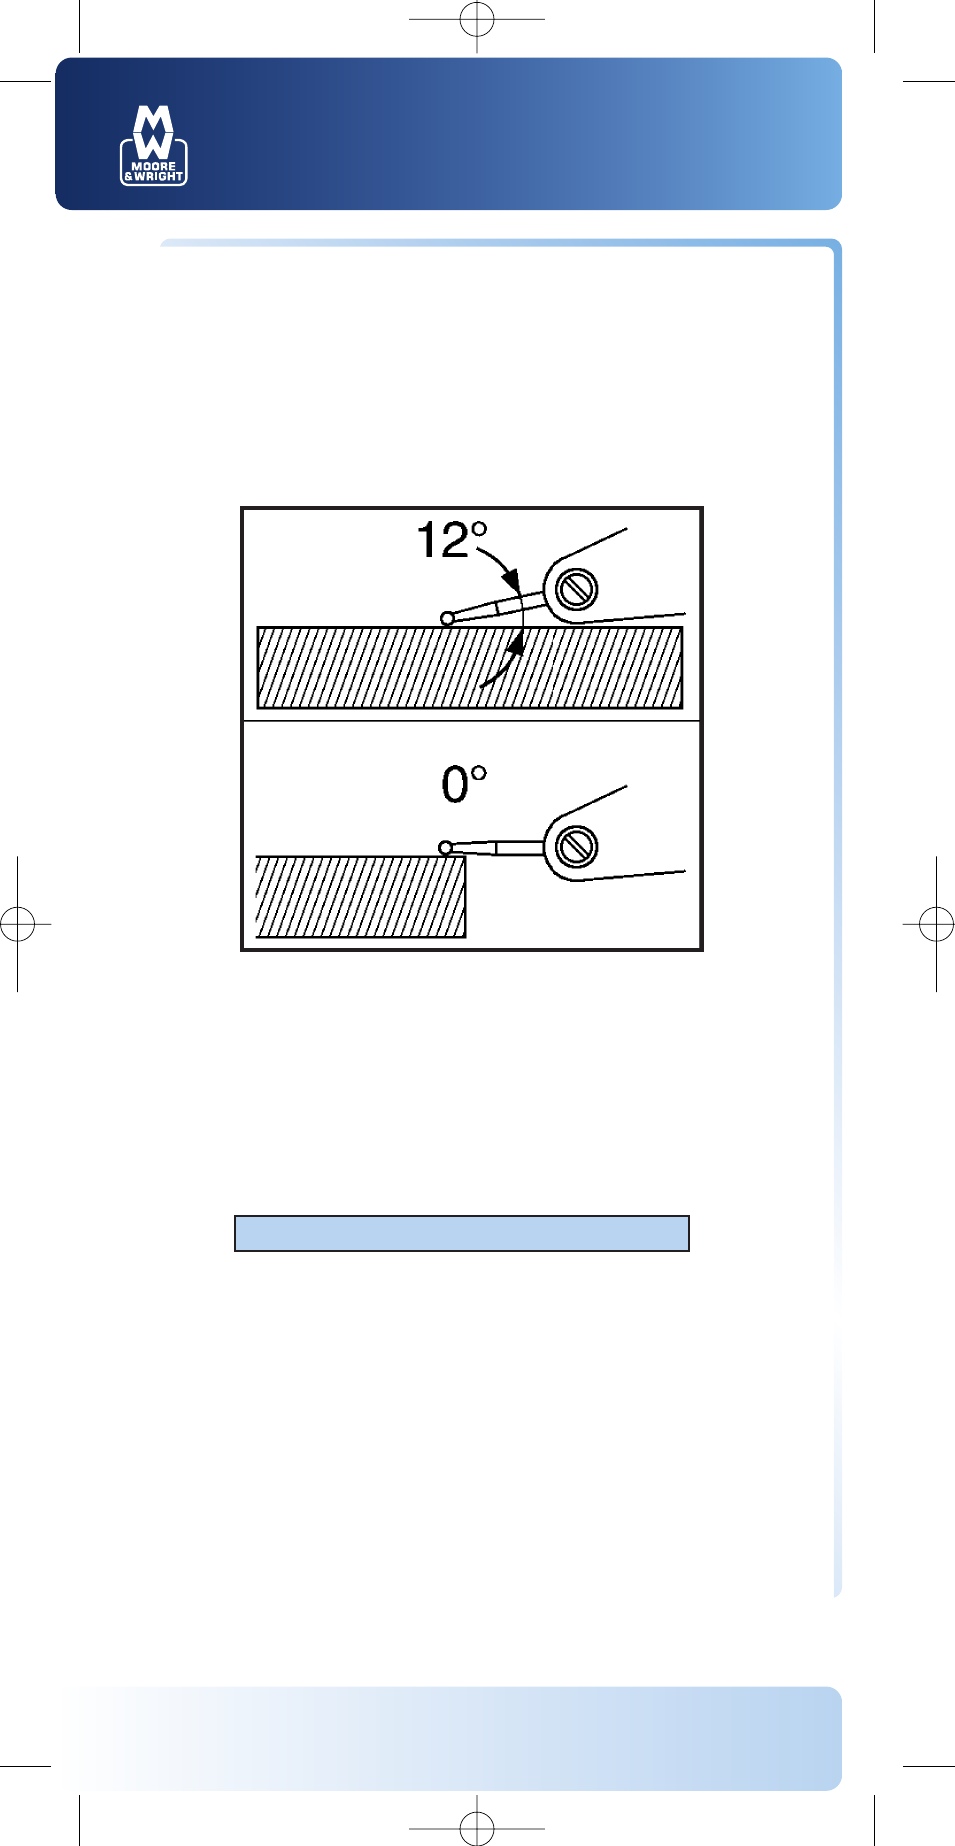
This indicator is designed to provide a true reading when the
angle between the contact point and component is 12°.
Any configuration of an angle other than 12° needs the displayed
value to be corrected. For a position of 0°, the correct value is:
Maintenance
No special maintenance is required. The bearings of the indicator
must not be oiled.
Displayed value x 1.022" or 1.022mm
Contact Point with 12º Position
DL_Instructions_Test_Ind_422 28/7/08 16:00 Page 1
- Advanced Electronic/Air Column PC-2200 (33 pages)
- Baty - Calmaster Digital Caliper (2 pages)
- Baty - Dial Depth Gauge (1 page)
- Baty - Digital Depth Caliper (2 pages)
- Baty - Heavy Duty Digital Height Gauge (1 page)
- Baty - Digital Indicator - DI-1 (1 page)
- Baty - Digital Indicator - DI-2/3 (1 page)
- Baty - Digital Tyre Tread Depth Gauge (1 page)
- Baty - Hardened Stainless Steel Frame Dial Caliper (1 page)
- Baty - Large Digital Workshop Caliper - DC-60 (2 pages)
- Baty - Lever Type Dial Test Indicator BL-9 / BL-10 (1 page)
- Baty - Lever Type Dial Test Indicator BL Series (1 page)
- MicroGauge 2 Point Bore Gauge (13 pages)
- Snapmatic (5 pages)
- UniCal Universal Digital Caliper (72 pages)
- Ultima Bore Gauge (7 pages)
- XT500 Large Diameter Bore Gauge (2 pages)
- XTA Analogue Bore Gauge (9 pages)
- XTD Digital Bore Gauge (12 pages)
- XTH Holematic Bore Gauge (12 pages)
- XTL Lever Bore Gauge (2 pages)
- M&W Digitronic Bore Gauge 316 Series (1 page)
- M&W Value Line Digitronic Micrometer 270 Series (2 pages)
- M&W Digitronic Level 570 Series (2 pages)
- M&W Mechanical Depth Gauge 172 Series (1 page)
- M&W Dial Caliper 142 Series (1 page)
- M&W Digitronic Height Gauge 196 Series (1 page)
- M&W Universal Digital Protractor (2 pages)
- M&W Digital Caliper DFC Series (1 page)
- M&W Large Digitronic Workshop Caliper 150 Series (2 pages)
- M&W Digitronic Depth Gauge 172 Series (1 page)
- M&W Digitronic Height Gauge 191 Series (1 page)
- M&W Digitronic Micrometer 201 Series (2 pages)
- M&W Digitronic Indicator 405 Series (1 page)
- M&W Digitronic Indicator 410 Series (1 page)
- M&W Test Indicator 420 & 421 Series (1 page)
- Countersink Gauge Measurement (2 pages)
- External Ball Screw measurement (1 page)
- Groove measurement (1 page)
- Internal Spline measurement (1 page)
- Internal Thread measurement (1 page)
- Universal Gauge with extra long measuring arms (1 page)
- Sylvac D100S Readouts (74 pages)
- Sylvac Opto Instruments (18 pages)
