Teps to, Nstalling, Before you make any holes – Bose VIRTUALLY INVISIBLE 191 User Manual
Page 9: Drill a pilot hole for testing the wall space, Using the template
9
English
Français
Nederlands
Deutsch
Italiano
S
TEPS TO
I
NSTALLING
Before you make any holes
Be sure you have read and understand the considerations provided in “Preparation” starting
on page 5, so you can proceed with confidence.
CAUTION: If you are unsure of your ability to complete this process, contact a professional
installer.
Small check marks call your attention to the tools you’ll need for the next step.
Tips offer ideas to make the job go easier and help you avoid mistakes.
Drill a pilot hole for testing the wall space
Before you make a large cut into the wallboard, check the space by probing behind the wall
or ceiling through a small pilot hole. Time spent now can help ensure a successful installation.
Note: If you are working in an exterior wall where there is insulation, it may be difficult to probe
behind a pilot hole. You may prefer to eliminate this step and skip ahead to “Prepare the wall for
inserting the speaker” on page 13. Do this only if you can be sure the insulation is malleable and
that nothing else behind the wall will impede the installation.
WARNING: If you believe the insulation behind the wall may be composed of asbestos,
do not drill or cut into that wall. Find a different location for the speakers instead.
Using the template
You will need a sharp pencil for this step.
The template shows where to drill two
1
/
2
in. (13 mm) pilot holes before you make an opening
large enough for the entire speaker. You can then test the space behind the hole to make sure
there is enough room for the speaker and that there are no materials blocking the installation.
Notice the dotted lines extending at an angle from the pilot hole to the bottom corners of
the DO NOT CUT area on the template. Use them as a guideline to be sure there is enough
room below the pilot hole for the length and width of the speaker enclosure.
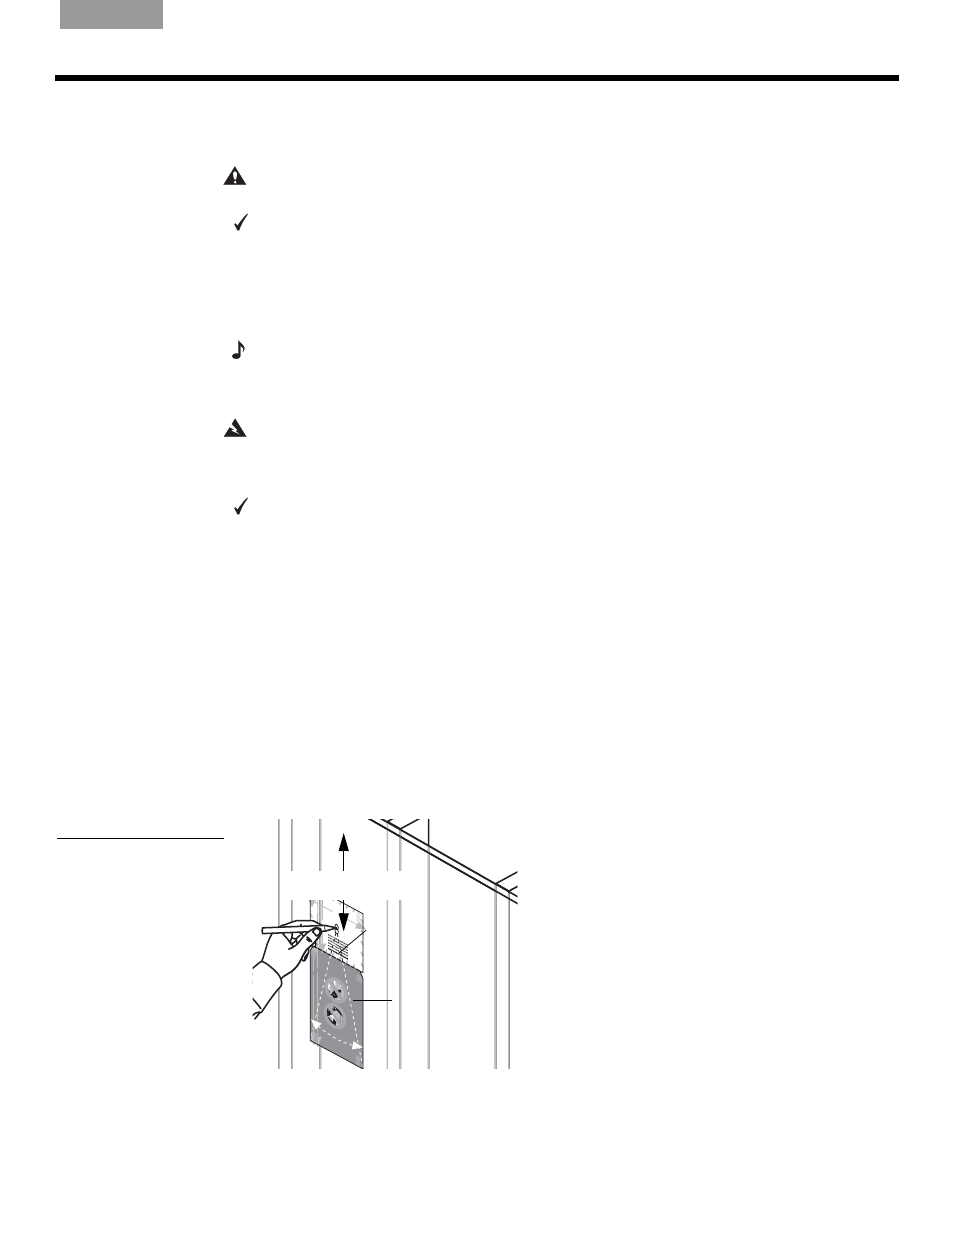
To position the template
1.
Select a spot on the wall or ceiling where you want the center of the speaker grille. Allow
enough space for the speaker enclosure both above and below the pilot hole. You may
need that second option if you find an impediment in the space below the hole.
2.
Center the pilot-hole circles on the selected spot as you press the template to the wall.
3.
Use a pencil to trace around the inside of the circles (Figure 7).
4.
Remove the template.
Figure 7
Preparing to cut a pilot hole
5 1/
2"
(14 cm
)
8 1/
16"
(20
.5 cm
)
141/
2"
(36.9
cm)
TAP
E
HER
E
TAPE
HER
E
TAPE
HER
E
WHITE CUT OUT AREA
WHITE CUT OUT AREA
Pilot
Hole
WA
RNING:
Make
sure th
e spo
t chos
en is sa
fe fo
r cut
ting.
Do no
t cut th
roug
h
surfa
ces
tha
t have
haz
ard
s, su
ch as
electr
ical w
iring,
conduits
or plu
mbing
,
conce
aled
behind
them
. If
you
are
not
sure,
consu
lt a pr
ofe
ssion
al in
stall
er
befo
re you
pro
ceed.
DO N
OT
CUT
ARO
UND
GRAY
AREA
Englis
h &
Trans
lation
s
WAR
NING
: Mak
e sure
the s
pot ch
osen
is safe
for cu
tting.
Do no
t cut th
rough
surfa
ces th
at hav
e haz
ards,
such
as ele
ctrica
l
wiring,
condu
its or
plum
bing,
conce
aled
behin
d them
. If yo
u are n
ot sure
, cons
ult a
profes
siona
l insta
ller be
fore
you p
rocee
d.
WAR
NING
: Make
sure
the sp
ot cho
sen is
safe fo
r
drilling
. Do n
ot cut th
rough
surfac
es th
at ha
ve haz
ards
concea
led be
hind t
hem, s
uch a
s elec
trical
wiring
,
condu
its or
plum
bing.
If you
are no
t sure
, cons
ult a
profe
ssion
al ins
taller
before
you p
rocee
d.
WAR
NING
: Mak
e sure
the sp
ot cho
sen is
safe f
or
drillin
g. Do
not cu
t throu
gh su
rfaces
that h
ave h
azard
s
conce
aled
behin
d them
, such
as ele
ctrica
l wirin
g,
condu
its or
plum
bing.
If you
are n
ot su
re, co
nsult
a
profe
ssion
al ins
taller b
efore
you p
roce
ed.
WAR
NING
: Make
sureth
e
spotc
hosen
is safe
for
drilling
. Don
ot cut t
hroug
h
surface
s that
have
hazard
s
conce
aled b
ehind
them,
such
as ele
ctrical w
iring,
condu
itsor pl
umbin
g. Ifyo
u
are no
t sure,
consu
lt a
profes
sional
instal
lerbefo
re
youpro
ceed.
WAR
NING
: Mak
e
sure
the sp
ot ch
osen
is saf
e for d
rilling.
Do
not cu
t thro
ugh
surfac
es th
at hav
e
hazard
s con
ceale
d
behin
d them
, such
as elec
trical
wiring
,
condu
its or
plum
bing.
If you
are
not su
re, co
nsult
a
profes
sion
al insta
ller
before
you p
rocee
d.
WA
RNING
: Make
sureth
e spot
chose
n issa
fe
fordrill
ing.D
o not c
utthro
ugh
surfac
estha
t have
hazards
concea
led be
hindth
em,su
ch as
electric
al wirin
g, con
duits
or plum
bing.
If you
are no
t sure
, cons
ult ap
rofess
ional
instal
ler
before
you pr
oceed
.
WAR
NING
: Mak
e su
re the
spot
chos
en is s
afe for
drilling
. Do
not cu
t
throug
h surf
aces t
hat ha
ve ha
zards
conce
aled
behin
d them
, such
as
electric
al wirin
g, con
duits
or plu
mbing
.
If you
are no
t sure
, cons
ult a
profe
ssion
al ins
taller
before
you
proce
ed.
9" (22
.9 cm
)
TAPE
HER
E
Translati
ons b
elow
TAPE
HER
E
TAPE
HER
E
DO
NOT
CUT
ARO
UND
GRAY
AREA
DO
NOT
CUT
ARO
UND
GRAY
AREA
DO
NOT
CUT
ARO
UND
GRAY
AREA
DO
NOT
CUT
ARO
UND
GRAY
AREA
DO
NOT
CUT
ARO
UND
GRAY
AREA
DO
NOT
CUT
ARO
UND
GRAY
ARE
A
DO
NOT
CUT
ARO
UND
GRAY
AREA
Template
Pilot hole
At least 9" (22.9 cm)