Mounting sensors with adhesive – Rockwell Automation 9000 Series Sensor User Manual
Page 15
Sensor Mounting
Entek 9000 Series Sensor Installation Guide
7
When connecting cables for sensors with ground-isolated cases, make sure that the cable
shield is not grounded at the sensor end. There are two possible cable configurations:
!
In coaxial cable, the center conductor carries the signal and power, while the outer braid
provides shielding and signal return. Grounding the shield at the monitoring device and
not at the sensor isolates the sensor and prevents ground loops.
!
In cable with two wires and shield, the signal and power are carried on one lead and the
signal return on the other lead. The outer braid provides shielding. To isolate the sensor
and prevent ground loops, ground the shield at the monitoring device.
Note: It is very important to properly ground the cable shield. Failing to do so can result in
interference with the signal and possible damage to the sensor in high electromagnetic
interference/electrostatic discharge environments.
Mounting sensors with adhesive
If a mounting hole cannot be drilled into the machine surface, you can mount the sensor
using adhesive. There are two ways to do this: you can mount the sensor directly to the
machine; or you can mount a flat plate with a threaded stud, and attach the sensor to the
stud. Note that mounting the sensor using adhesive may limit the detection of high
frequencies. Suggested adhesives are listed in the following table.
Note: Entek recommends following the API 670 requirements for surface finish and flatness, even
for non-API installations. If the surface is not properly prepared, it can reduce the detection
of higher frequencies.
1. Spot face the surface on the machine case or bearing housing where you want to install
the sensor. Per the requirements of API 670 Appendix C.2.1, the surface finish should
be within 0.8 micrometers (.032 mil, or 32 µinches) and the flatness should be below 25
micrometers (1 mil).
2. Prepare the surface following standard adhesive bonding practice. Abrade and then
thoroughly clean the spot on the machine with solvent.
3. Mix the adhesive according to its directions.
4. Attach the sensor or plate to the machine.
5. Allow the recommended time for the adhesive to cure.
6. Make sure the sensor is grounded through the cable shield to a good electrical ground.
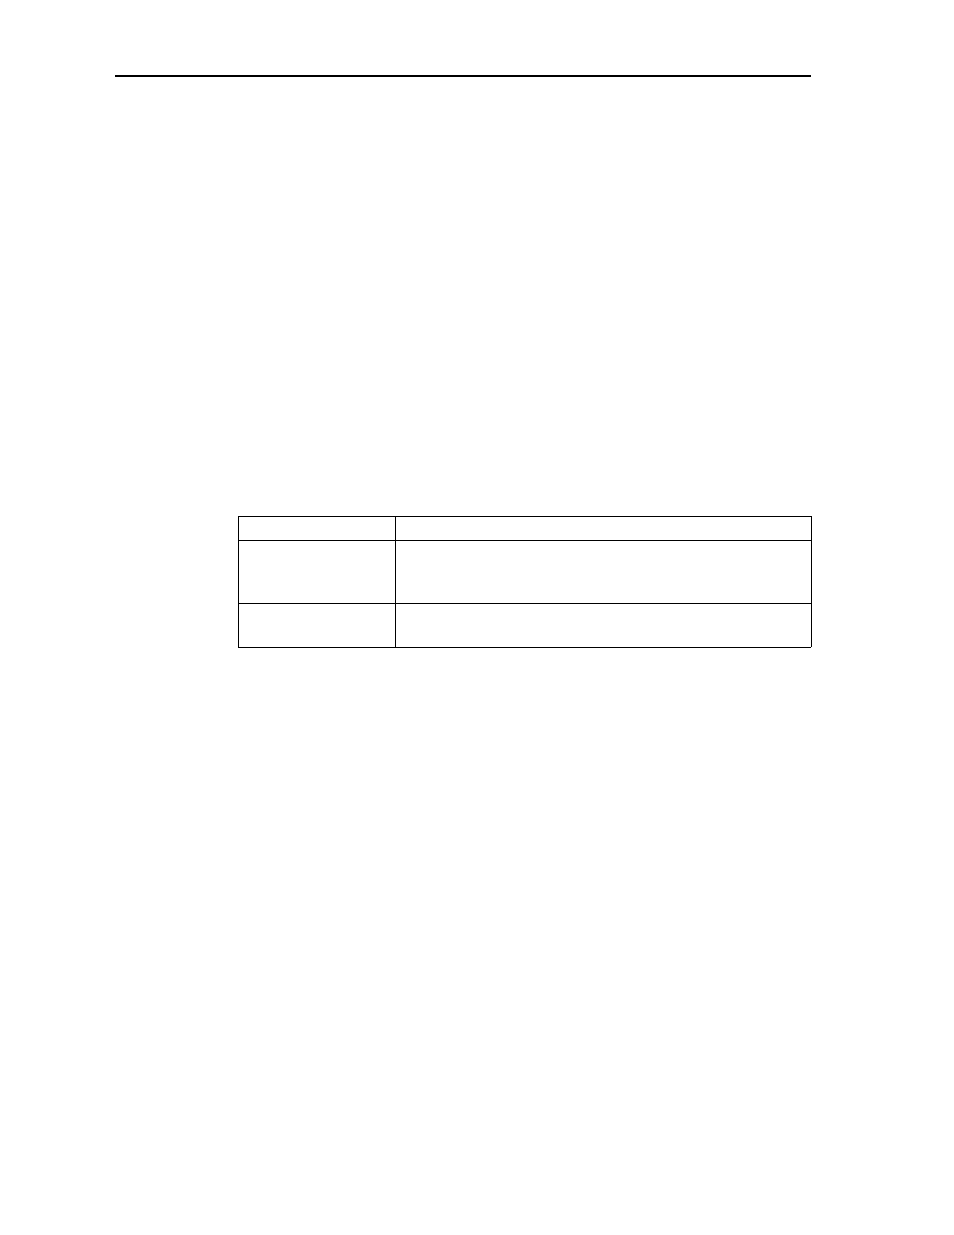
Adhesive
Comments
Loctite 325 with 707
Activator
Cyanoacrylate adhesive. Single component; sets up quickly; use
at temperatures below 200° F; surface must be clean and smooth,
and remove by twisting the sensor.
Versilok 406–Lord
Chemical Products
Structural adhesive. Water resistant; useful to 250° F; cures to
full properties at room temperature in 24 hours.