Rockwell Automation 1756-L72EROMS Armor GuardLogix Controller User Manual
Page 15
Armor GuardLogix Controller 15
Rockwell Automation Publication 1756-IN060B-EN-P - November 2013
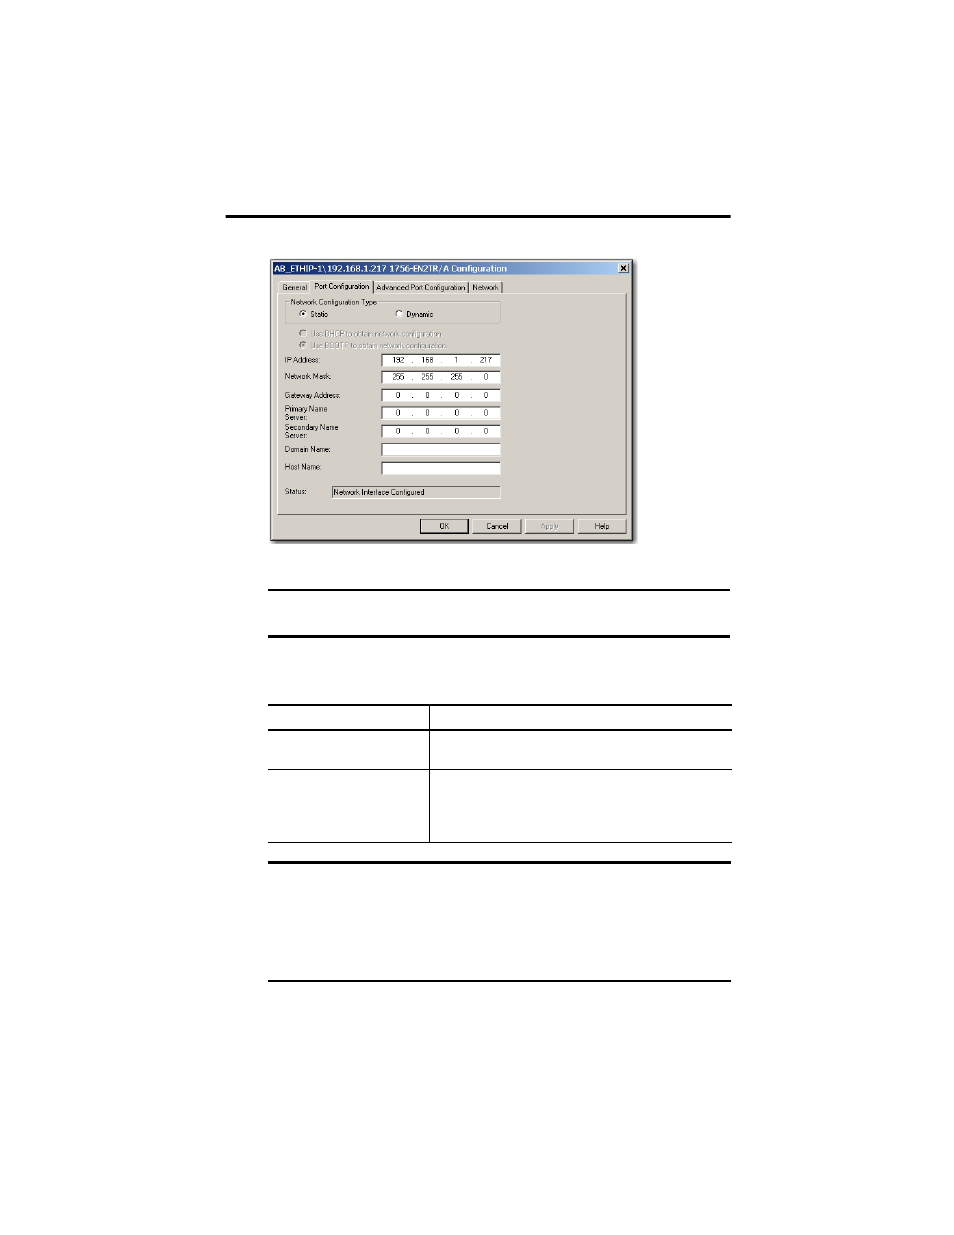
4. On the Module Configuration dialog box, click the Port Configuration tab.
5. For Network Configuration Type, click Static to permanently assign this configuration
to the port
.
6. Type the IP address in the IP Address field and add fill in additional fields, if needed.
7. Configure the port settings.
8. Click OK.
IMPORTANT
If you click Dynamic, on a power cycle, the controller clears the current IP
configuration and resumes sending BOOTP requests.
To
Then
Use the default port speed and duplex
settings
Leave Auto-negotiate port speed and duplex checked.
This setting determines the actual speed and duplex setting.
Manually configure your port’s speed
and duplex settings
Follow these steps.
1. Clear the Auto-negotiate port speed and duplex checkbox.
2. From the Current Port Speed pull-down menu, choose a port speed.
3. From the Current Duplex pull-down menu, choose the appropriate
Duplex value, that is, Half Duplex or Full Duplex.
IMPORTANT
Consider the following when you configure the module’s port settings:
•
If the module is connected to an unmanaged switch, leave Auto-negotiate port
speed and duplex checked or communication can be impaired.
•
If you are forcing the port speed and duplex with a managed switch, the
corresponding port of the managed switch must be forced to the same settings
or the module will fail.