Use a bootp/dhcp server – Rockwell Automation 1756-L72EROMS Armor GuardLogix Controller User Manual
Page 12
12 Armor GuardLogix Controller
Rockwell Automation Publication 1756-IN060B-EN-P - November 2013
Set the Network IP Address of the EtherNet/IP Modules
The EtherNet/IP communication modules reside in slots 2 and 3 of the ControlLogix chassis
within the enclosure. The modules are shipped with Bootstrap Protocol (BOOTP)/Dynamic
Host Configuration Protocol (DHCP) enabled and their rotary switches set to 999. You can use
the following methods to set the IP address of each module.
•
BOOTP/DHCP server
•
RSLinx Classic software
•
Studio 5000 Logix Designer™ application
Refer to the EtherNet/IP publications listed in the
Additional Resources on page 23
for detailed
information on setting an IP address.
Use a BOOTP/DHCP Server
The BOOTP/DHCP server is a standalone server you can use to set an IP address. When used,
the BOOTP/DHCP server sets an IP address and other Transport Control Protocol (TCP)
parameters.
Access the BOOTP/DHCP server from one of these locations:
•
Programs > Rockwell Software > BOOTP-DHCP Server
If you have not installed the server, you can download and install it from
•
Tools directory on the Studio 5000™ environment installation CD
Follow these steps to set the module’s IP address with a BOOTP/DHCP server.
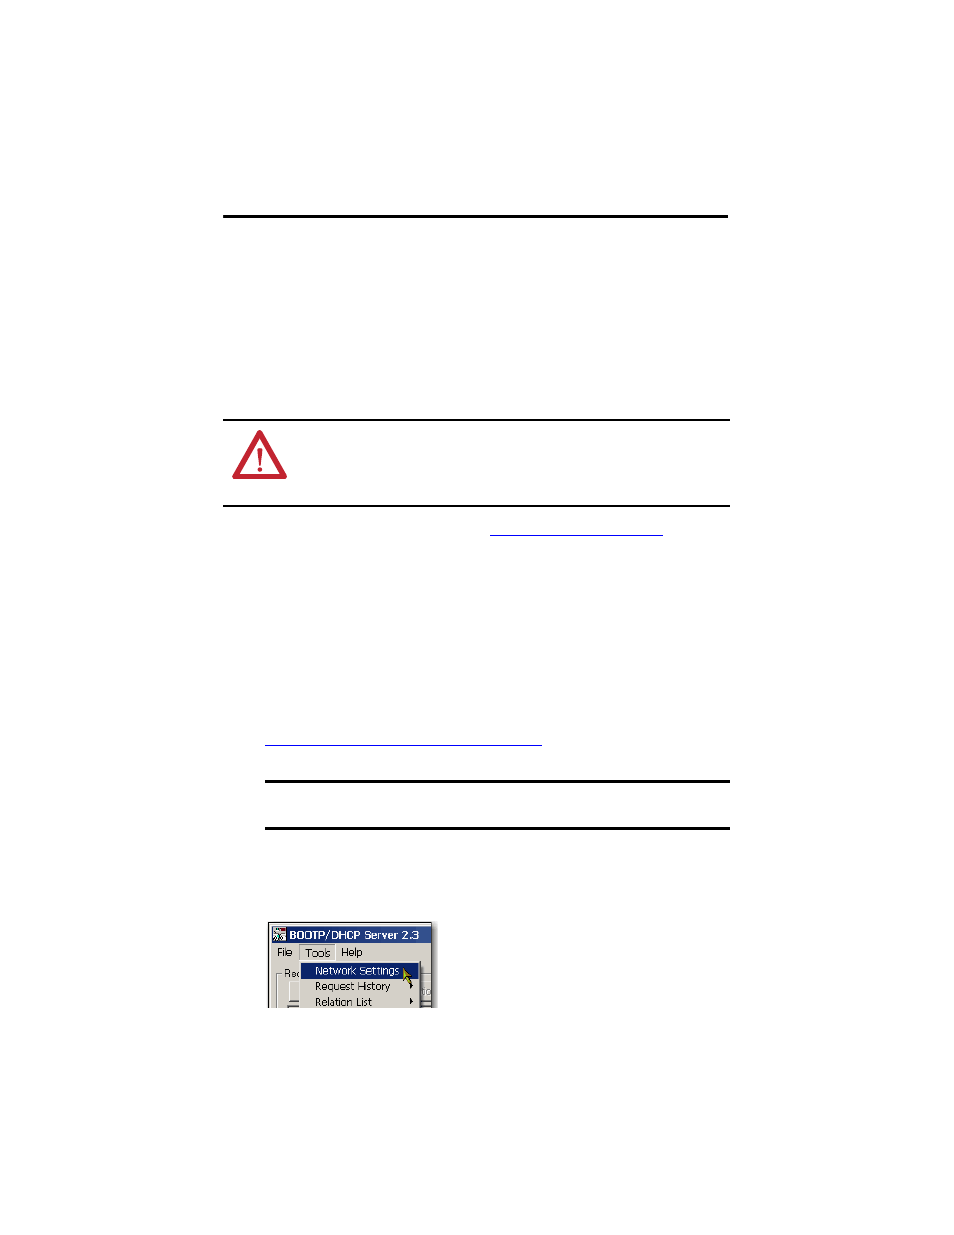
1. Start the BOOTP/DHCP software.
2. From the Tools menu, choose Network Settings.
ATTENTION: The EtherNet/IP communication module must be assigned a fixed network address.
The IP address of this module must not be dynamically provided.
Failure to observe this precaution can result in unintended machine motion or loss of process
control.
IMPORTANT
Before you start the BOOTP/DHCP server, make sure you have the module’s hardware
(MAC) address. The hardware address is on the label on the bottom of the enclosure.