Trim-Tex Flush Corner Guard User Manual
Flush corner guards, Installation instructions for, Installing the bumper bead
Installation Instructions for
Please read entire instruction before proceeding.
Improper installation will void any applicable warranty.
Flush Corner Guards
Installing the Bumper Bead
www.trim-tex.com
• 3700 W. Pratt Ave. Lincolnwood, IL 60712-2508 • Phone: (847) 679-3000 • Fax: (847) 679-3017
Drywall
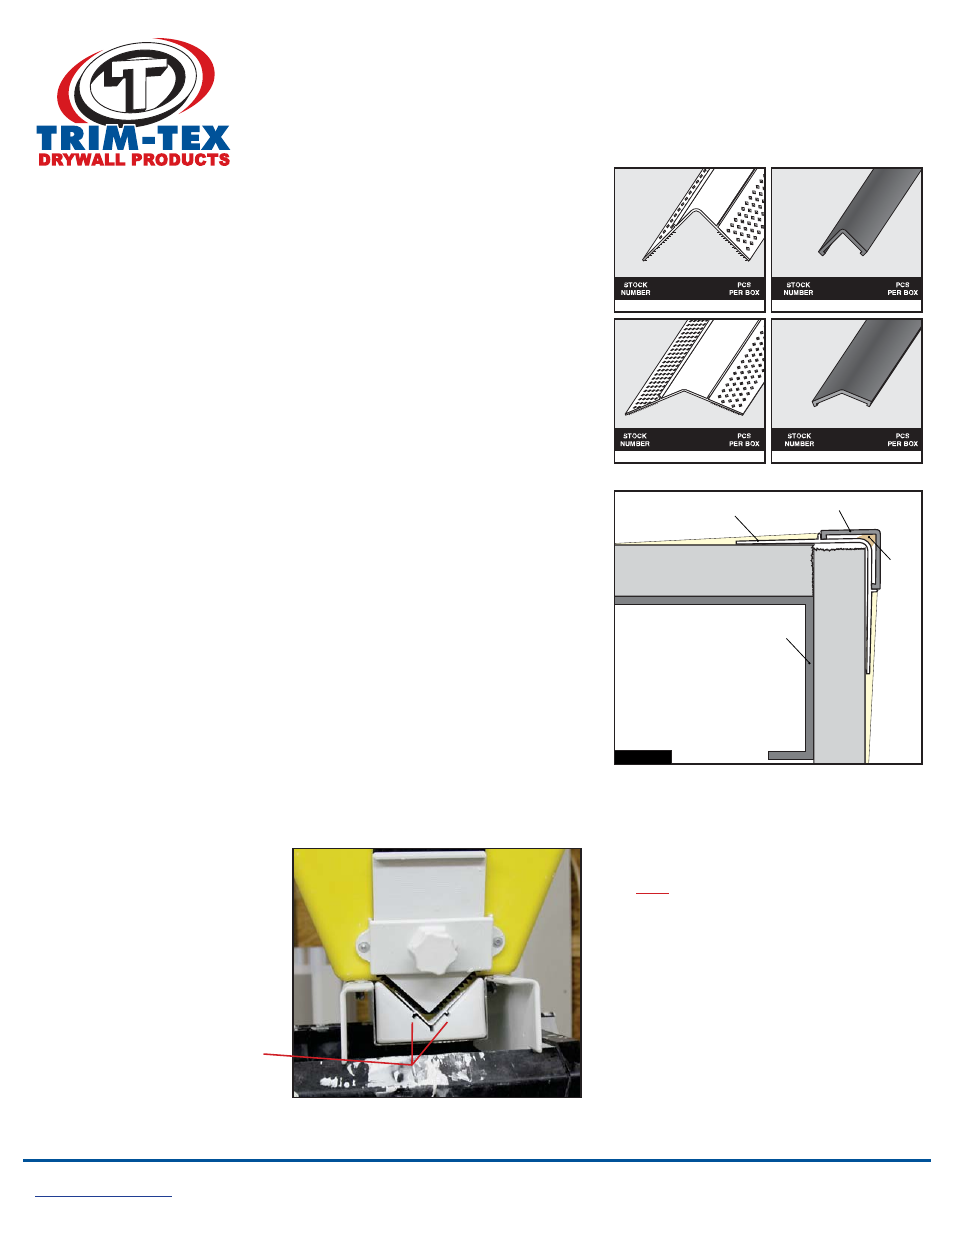
Drywall
Stud
Bumper Bead
Bumper Guard
Bondaflex 700 Caulk
LENGTH
10'
50
Bump90
Bumper Bead
LENGTH
10'
25
Guard90(color)
Bumper Guard
Step 1
Snip the Bumper Bead to length and dry fit the Bead into place to ensure an
accurate installation.
Step 3
Be sure to keep the attachment surface (or nose of the bead) free of drywall
compound. Finish the installation with drywall compound and sanding.
Step 2
You can mud set the Bumper Bead using either a Trim-Tex hopper, drywall
compound tube & 90º compound tube head or by hand blading on your drywall
compound to the corner & setting your bead into place.
Step 1
Wipe down the nose of the Bumper Bead and clean away compound dust
before installing the Bumper Guard.
Step 3
Apply a ⅜" bead of Trim-Tex Bondaflex 700 Caulk along the inside of the
Bumper Guard, as shown in Figure A.
Step 2
Cut the Bumper Guard to length and dry fit to make sure it fits the entire length
of the bead.
Step 4
Place & press Bumper Guard into place ensuring the guard is straight. Paint the
Bumper Guard if desired.
Figure A
Installing the Bumper Guard
LENGTH
10'
40
Bump135
Bumper Bead Splayed
LENGTH
10'
20
Guard135(color)
Bumper Guard
Keep Clean
Keep
Clean
Hopper Modification for Cleaner Installation
Mud Set beads are designed to be installed
with high quality drywall taping compound.
Do
thin out your mud
NOT
like you would
with paper faced beads. Mud Set Bead’s hole
pattern allows thick mud to dissipate evenly.
We recommend the following:
Hopper installation - Add up to 8oz of Mud-
Max or water per 5 gal. of mud.
Compound Tube Application - 16oz to 32oz of
water per 5 gal. of mud.
Install Tips:
Make two simple saw blades cuts
down the sides of the hopper base
where the mud bumps for the
Bumper Bead would be. This
modification allows the hopper to lay
down a thinner, easier to work with,
layer of mud onto the mud legs,
resulting in a cleaner finish. You
can also get a Trim-Tex hopper with
the base groves already cut out for
the Bumper Bead, just make sure
you specify that with your dealer.